Creating or modifying a Membership, Pass, or Loyalty Program
Memberships and Passes grant customers benefits that will give them access to hidden pricing.
Table of Contents
Memberships and Passes are both a collection of benefits that are set to expire either after an amount of time has passed or after a window of time has closed. Memberships typically use the sliding expiration method so they are good for one, six, or twelve months whereas Passes are more likely to use a static expiration and be good only for a weekend.
A membership is made up of your membership program and your membership benefits. The third piece of the membership puzzle is pre-built pricing that has been restricted and will be made available through your program. Follow the directions below for your platform of choice to begin setting up your benefits.
Loyalty programs give a predetermined number of points per dollar to your customer and allow redemption at a separate predefined rate per dollar. This rate can vary between membership levels and this program need not be tied to another membership level so non-members may enjoy it also.
New Membership/Pass/Loyalty in ATS App
Begin by Logging In to ATS App administration and find the Blue Folder under your Organization House where your membership is being built. Best practice is for your membership or loyalty programs to have their own blue folder while a pass will usually share a folder with its events. Use These Instructions if you need to add a new blue folder. Right-click in the Membership area and select New to create a new membership program
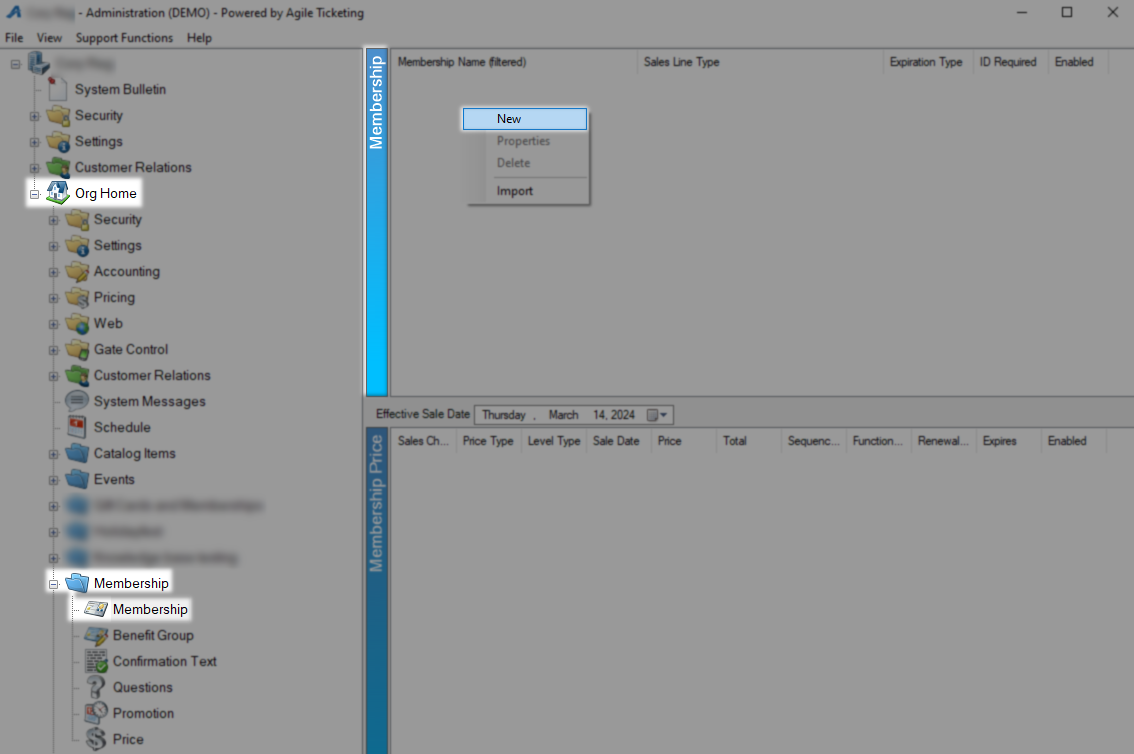
New Membership/Pass/Loyalty Program
On the General Tab start by giving this program an Internal Name which will be used on reports and by the sales system and an External Name which is customer-facing. On the Sales Line Type drop-down choose the type of program this is and use These Instructions if you need to add more options.
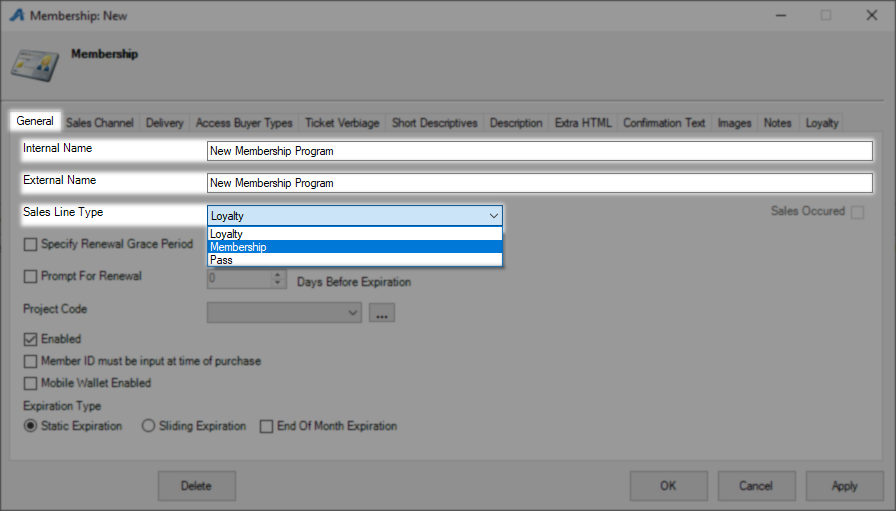
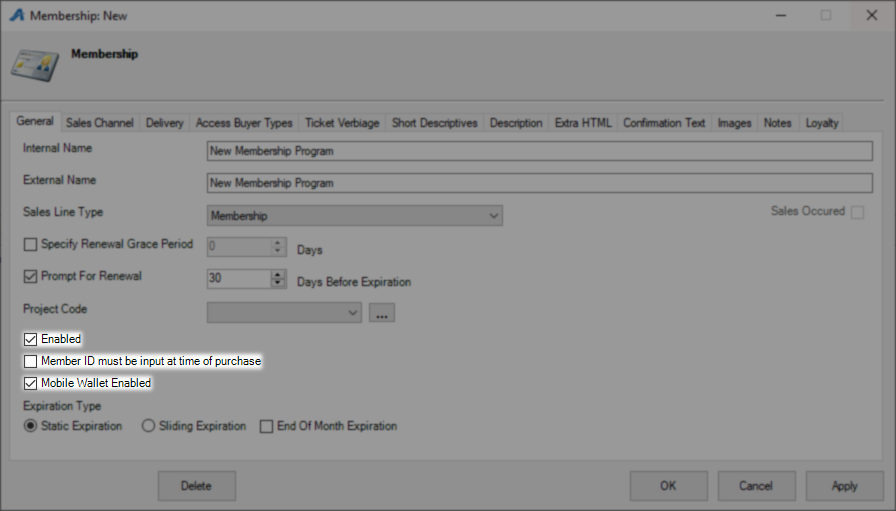
Specify Renewal Grace Period when combined with a sliding expiration will set a window where customers are allowed to renew instead of requiring a new membership. Leave this box unchecked if customers may renew their memberships at any later time. Prompt for Renewal will start giving this customer a pop-up online to notify them of their approaching expiration the set number of days ahead of time.

The Project Code field is used for reporting and can separate this membership from others in case the name is not enough. Enabled should be checked unless you are retiring this membership program. Member ID must be input at time of purchase is a legacy check box that no longer has a function. Check Mobile Wallet Enabled to allow your customers to add their membership to their digital wallet once that format is in place.
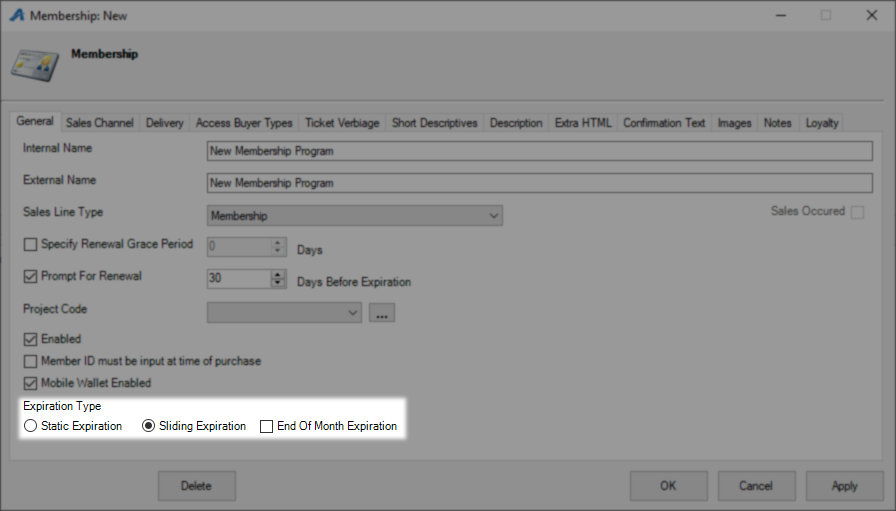
Expiration Type once set and saved will not accept changes. Static Expiration will have you select a specific time frame and the benefits will only be active during that time. Sliding Expiration will have you pick a length of time to be active and will start on the day of purchase. End of Month expiration can be combined with Sliding Expiration to push the end off until the last day of the month.
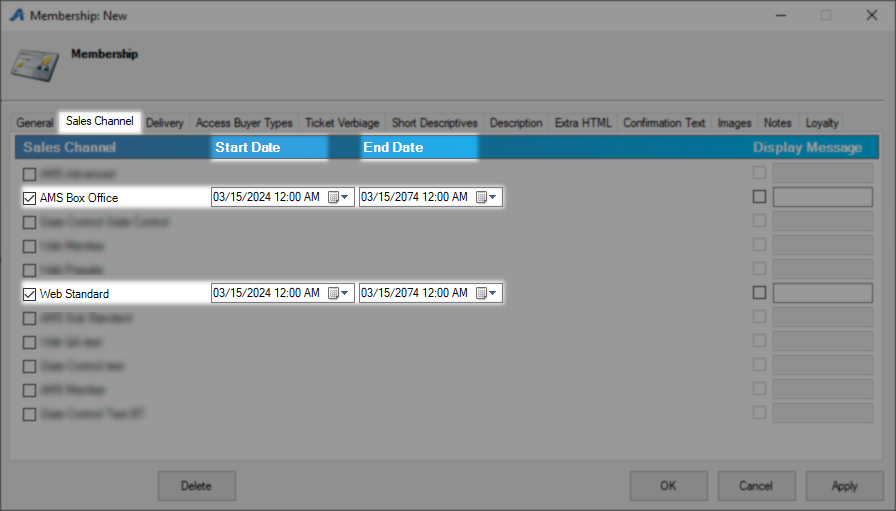
On the Sales Channel tab, you must set where you would like to sell this membership with AMS Boxoffice and Web Online being the most common choices. Start Date will default to today so sales can start immediately and the End Date will default to fifty years from now.
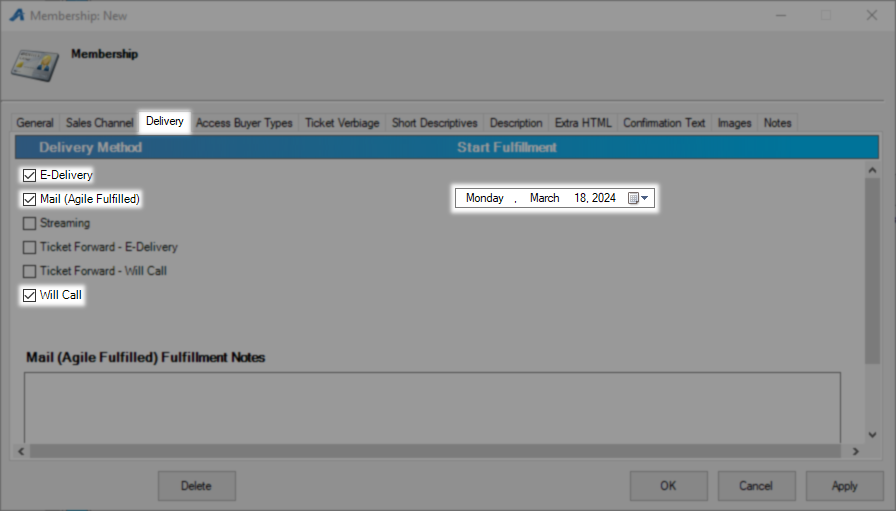
The Delivery tab holds the options you want customers to have for membership card delivery. If you do physical cards Mail and Will Call are common options while E-delivery covers most electronic methods. Start Fulfillment is required if the ATS office will be doing your mailing and is the day the first mailout will happen.
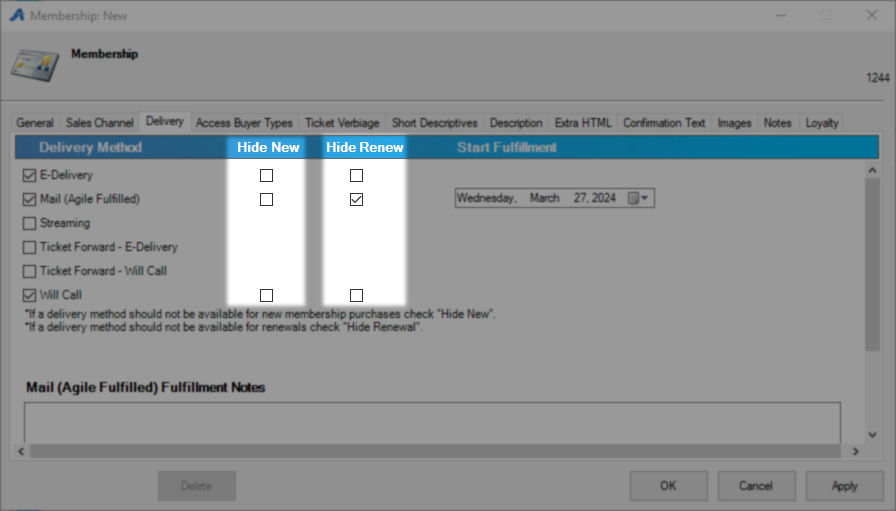
Use Hide New or Hide Renew to exclude a delivery method from that process such as checking Hide Renew on Mail so that only new customers will have that option.
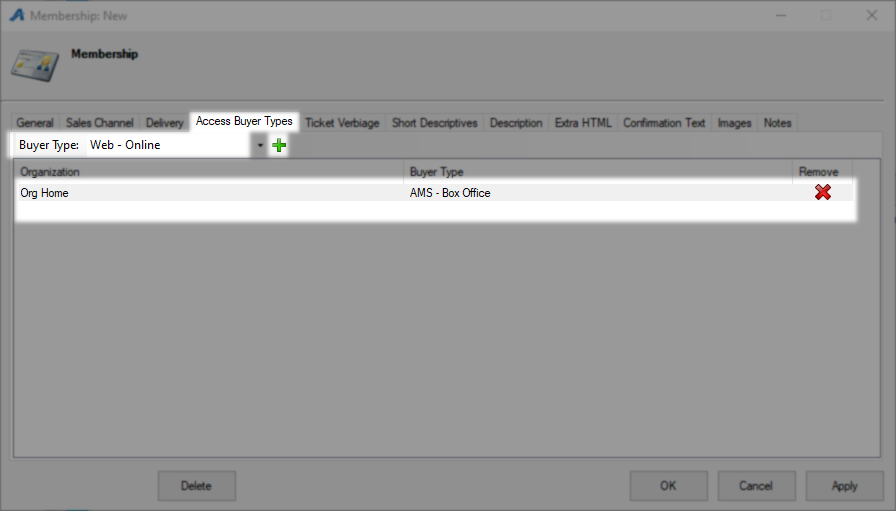
On the Access Buyer Type tab, you must tell the system which types of buyers to expect with AMS - Box Office and Web - Online being the most common. Select the buyer types you want to add using the Buyer Type drop-down and the Green Plus button to add them to the list. This is a required step for your membership to function and it is best practice to turn on any buyer type that applies even slightly.
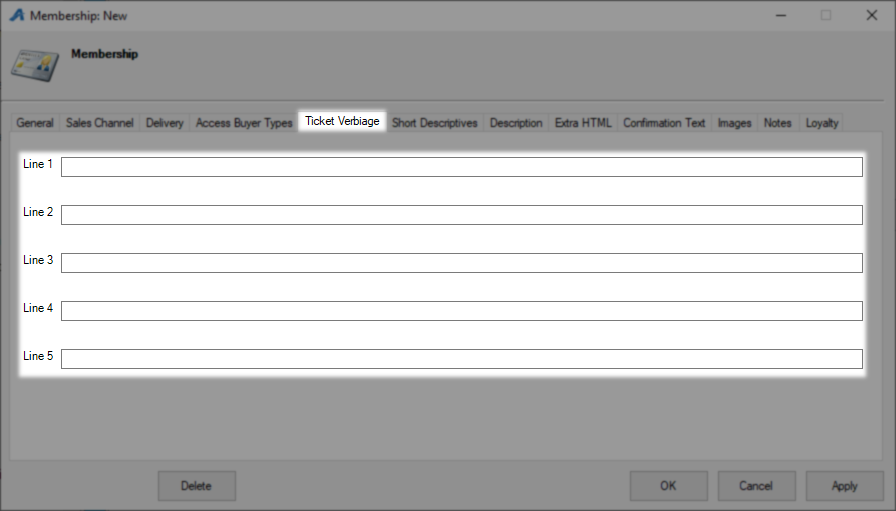
The Ticket Verbiage tab holds Line 1-5 which are all elements that can be added to your membership card and will print whatever you have on that line.
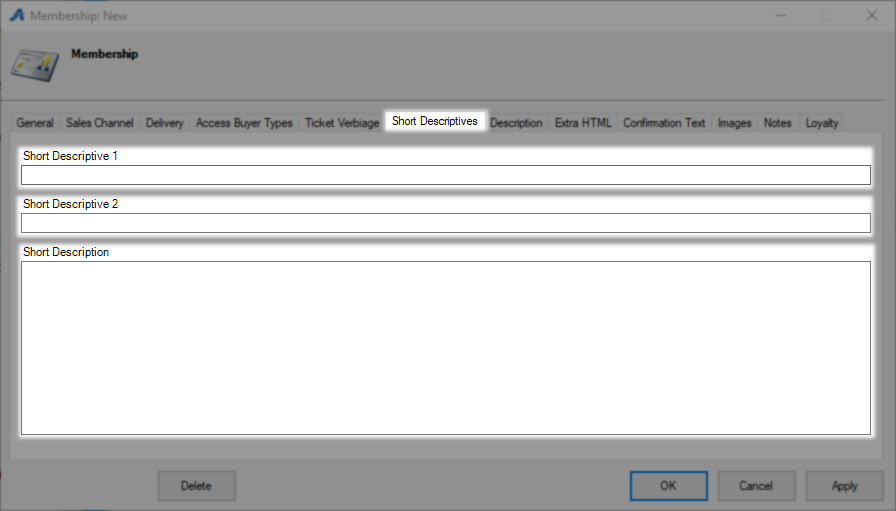
The Short Descriptives tab is where you may put a short synopsis or description of what is available through this membership. This information loads on the initial membership screen where people will see all prices.
Everything put on the Description tab will load on the More Info page of this membership.

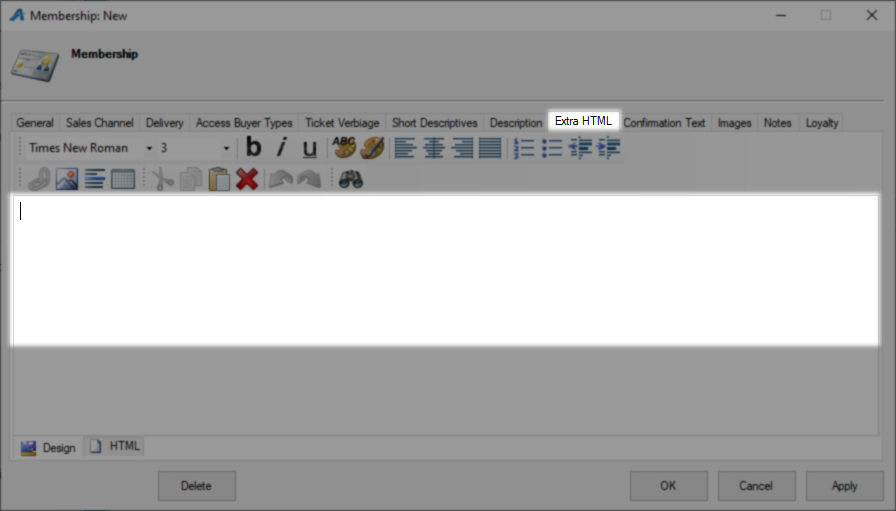
Whatever you put on the Extra HTML tab will load below the short descriptive and description so it can be used with or in place of both.
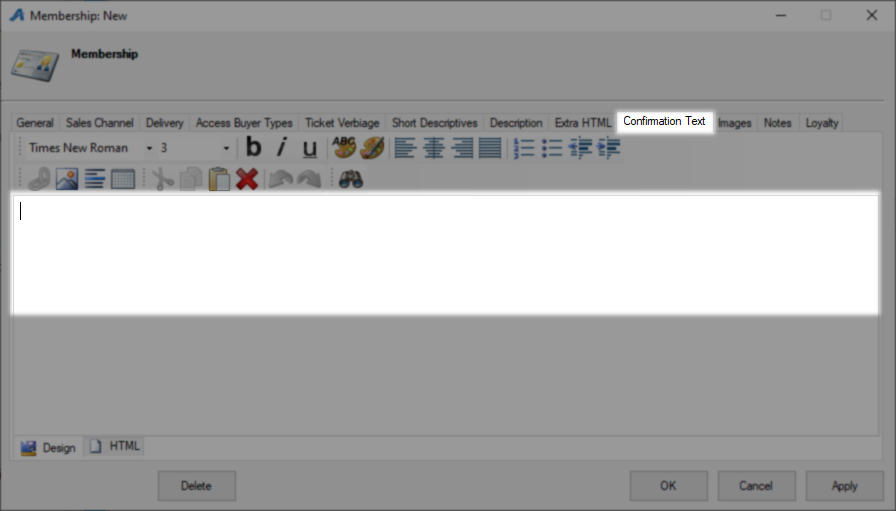
The Confirmation tab is where you put the information your customer should receive after purchasing a membership. This could be links to calendars or just more information on how to use benefits and a thank you message.
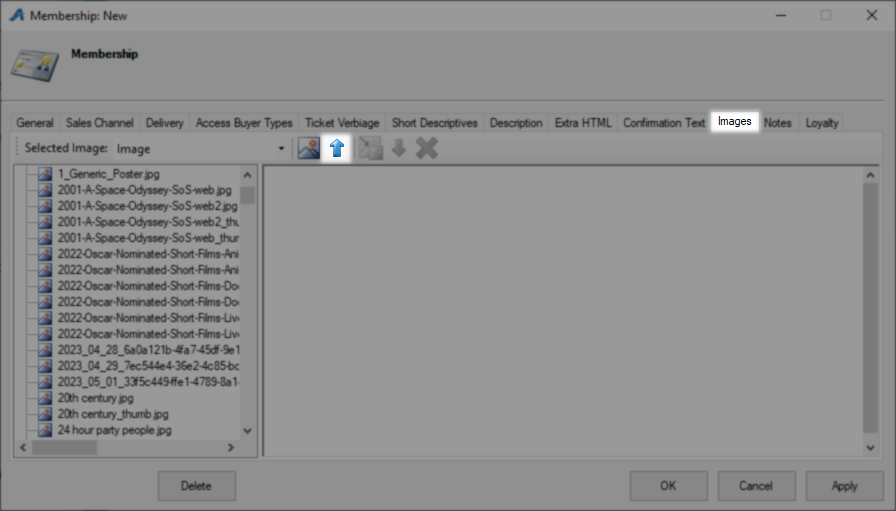
On the Image tab, you can place a marketing image for the membership using the Blue Arrow to upload a new image.
On the Notes tab place any internal information that may be needed in the future for this membership program.
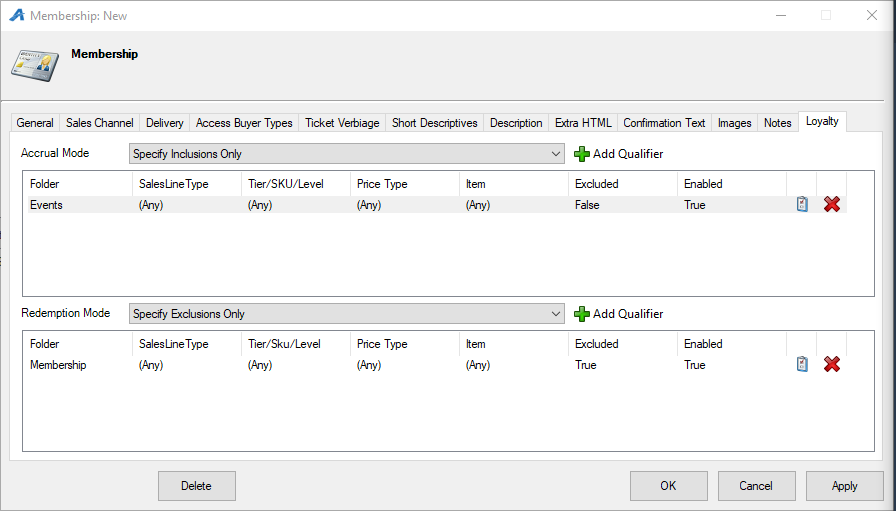
The Loyalty tab contains all of the items that will be included or excluded from your loyalty program. Start in the Accrual section then move on to Redemption using the drop-down to select which method you would like to use.
None - This selection disables the loyalty program from gaining or spending points.
Specify Inclusions Only - With this method selected only items you specifically want to include in your loyalty program will be counted.
Specify Exclusions Only - With this method selected only items you specifically want to exclude in your loyalty program will not be counted.
Specify Both - With this method selected you can specify both as needed. When using both note that if something is included and excluded then it is excluded.
Click Add Qualifier to build your first Inclusion or Exclusion.

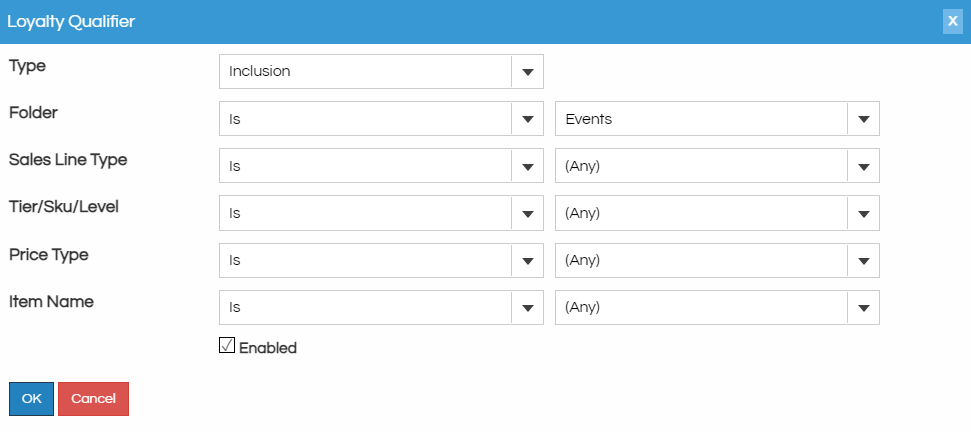
On the Loyalty Qualifier window, you may define the item, items, or folders you want taken into consideration for your loyalty program.
Start by selecting if this rule will Include items in your program or exclude them from it with the Type drop-down menu. For each of the five categories you may select Is for a specific item or Contains for keywords. The drop-down menus marked (Any) can be used to select specific items in each category to be as refined as you want. Leave Enabled checked to use this qualifier and hit OK to save.
Set as many of these as you need, and in any order, to refine your loyalty program. In the example below everything in the Events folder will accrue points and those can be redeemed on anything except memberships. Use the edit checklist or delete X for changes to loyalty parameters.
Click OK to save this membership program.

Next, you should build your membership benefits so they are ready to use during the price creation process. The purpose of a benefit is to point at a price or group of prices and then make hidden selections available to anyone with the proper benefit.
New Membership/Pass/Account Benefits
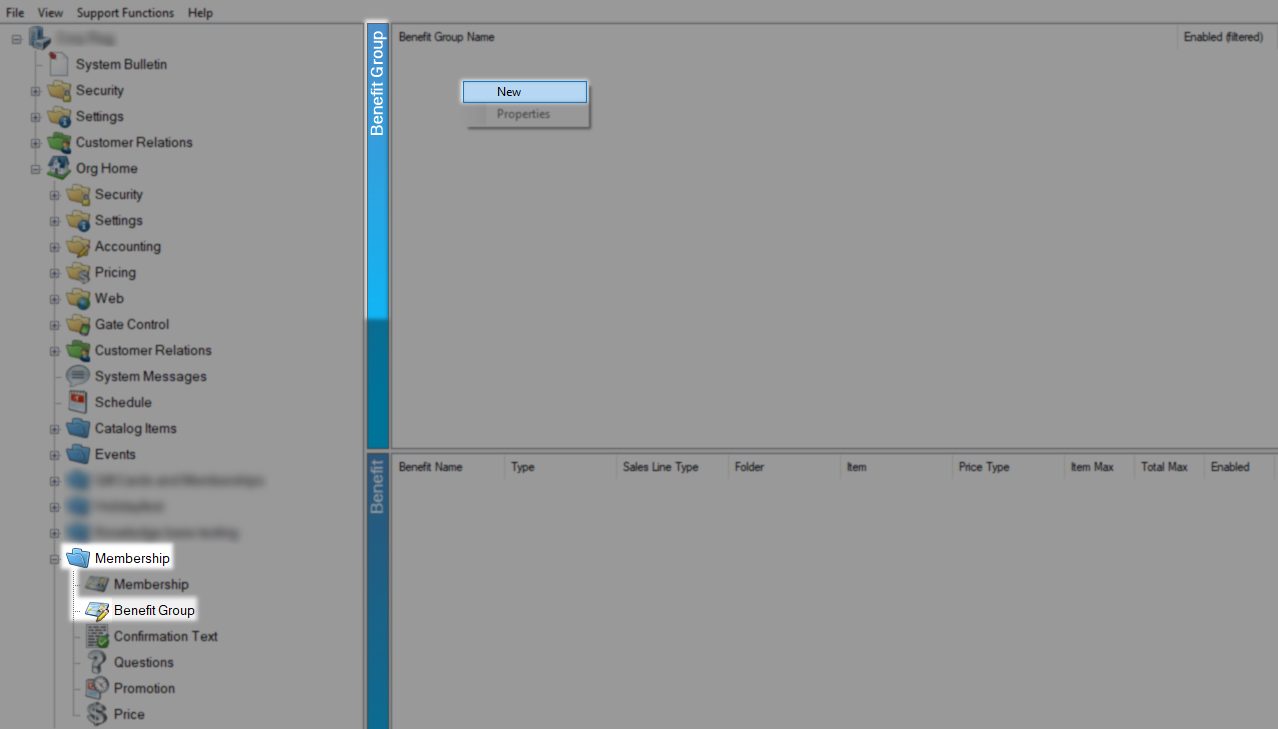
Benefits are built in the Benefit Group section of your Membership folder. Right-click in the Benefit Group area and select New to create a new set of member or account benefits.
The only required field on the General tab of the Benefit Group: New window is a Name for this group. Best practice is for the benefit group names to match the levels of membership they will be tied to. The Description area is mostly an internal reference for what this benefit group gets but can also be included on membership welcome letters using the BenefitDescription insert.
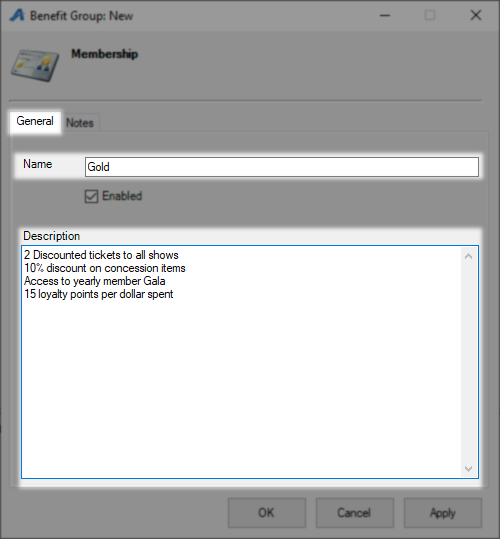
Use the Notes tab for anything you need to remember about this benefit group and OK to save and close.

With a benefit group selected in the Benefit Group section right-click in the Benefits area and select New followed by what type of benefits you want to add.
Event/Showing Benefit - This benefit can be pointed at a specific date and time of a showing or event. This is the most commonly used type of benefit, as it can be used to create event ticket discounts for members.
Catalog Benefit - This benefit can be pointed at a merchandise or concession item. This is commonly used to create concessions or merchandise discounts.
Membership Benefit - This benefit can be pointed at memberships. This is used if members get special access to another kind of membership price. For example, if members at your year-round theatre get a discount on passes to a festival, then you would build a Membership Benefit for that pass's price type.
Package Benefit - This benefit can be pointed at a package. This is often used for a member discounted price on a series or season package.
Show Benefit - This benefit can be pointed at a run of shows instead of one specifically. This is not commonly used as it would restrict a member from seeing a film more than once.

Now on the Benefit window and General tab, you must first give it a Benefit Name which ideally should describe what this benefit gives the customer. This is not a customer-facing field.

Sales Line Type is the first field you get to narrow down the items this benefit will apply to and is a required field. If you only have one option to select from the system will default to that option. Sales Folder is next and you can either select a specific folder or all sales folders to further restrict this benefit.

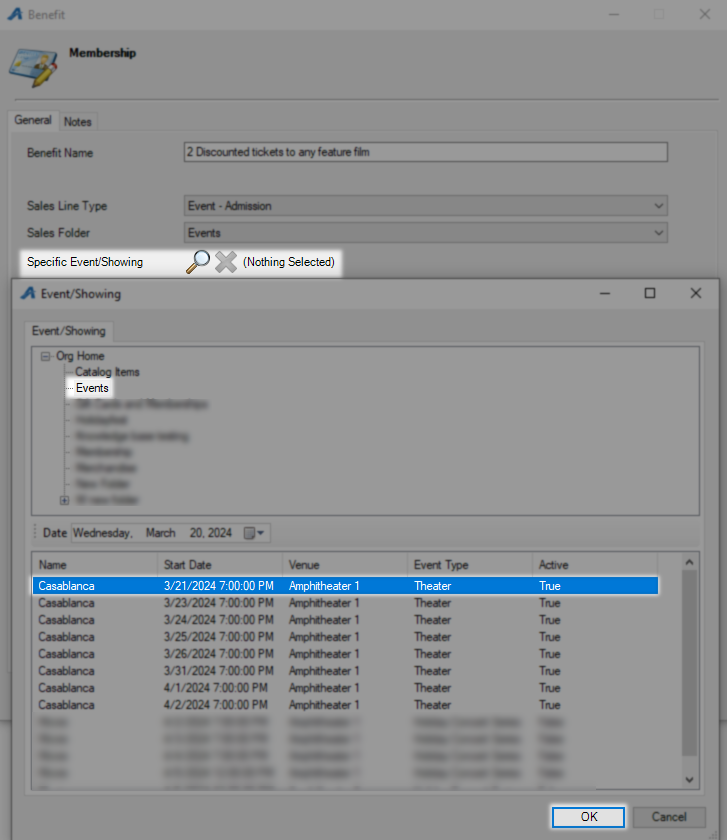
The Specific Event/Showing search glass will open a search window for your system and allow you to select one specific date and time for this benefit to apply to.
Specify Tier allows you to choose a specific tier this benefit applies to allowing you to exclude others, this is useful if this benefit is for Admission tickets but not VIP. Specific Ticket Type is where you will pick which hidden ticket type this benefit is granting access to, Member is a very common ticket type to use here.

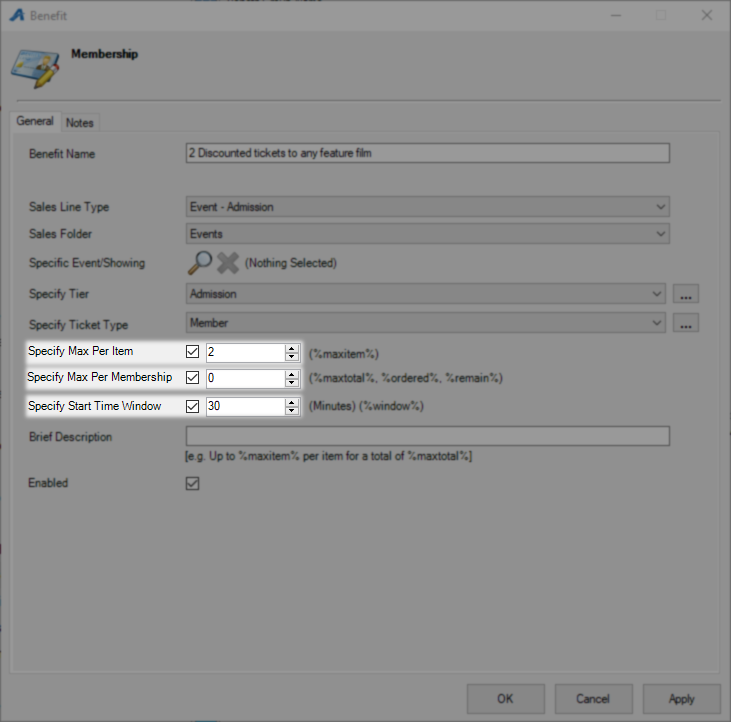
Specify Max Per Item specifies how many times the member may use this benefit per item. For example, if a member may buy two tickets per event/show at the membership price, then you would specify the Max Per Item as 2.
Specify Max Per Membership specifies how many times the member may use this benefit per membership. For example, if members receive three complimentary guest passes to use at any time before their membership expires, then you would specify the Max Per Membership as 3.
Specify Start Time Window lets you enter in the amount of time that must occur between showings in order for a member to use the benefit on both showings. (For example, if a customer uses this benefit to buy a ticket to The Good Movie at 11:30 AM, and the Start Time Window is specified as 30 minutes, then they will not be able to use the benefit on The Best Movie at 11:45 AM on the same day.)
Brief Description describes the uses and redemptions of this benefit in the textbox. This description will appear on the customer's My Benefits page in their online account. You can use the following elements:
%maxitem% - will show the maximum number of redemptions per item that is allowed through this benefit.
%maxtotal% - will show the maximum number of redemptions per membership that is allowed through the benefit.
%ordered% - will show the number of redemptions that have already been used.
%remain% - will show the number of benefits that the member has left to use before their membership expires.
%window% - will show the number of minutes specified in the Start Time Window number box.
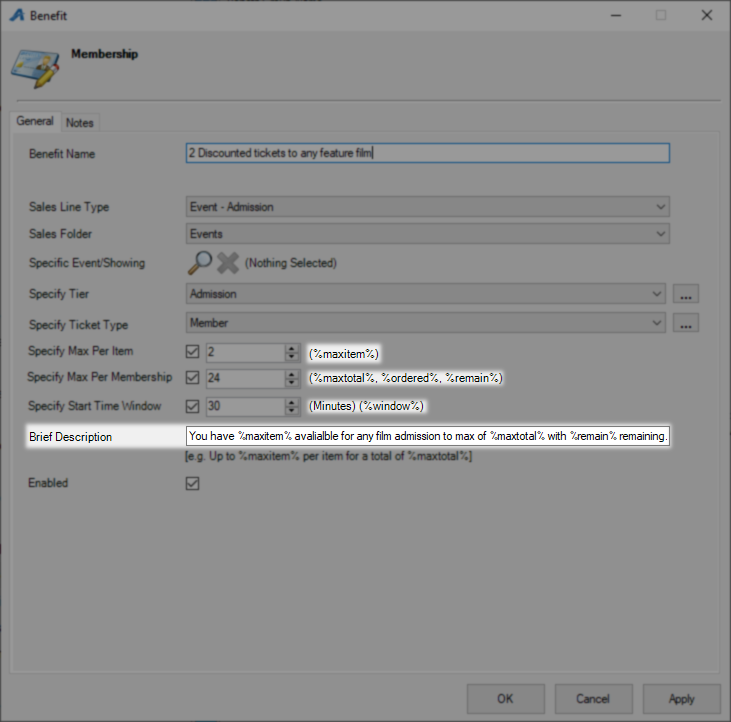
Leave Enabled checked and press OK to save these benefits. Repeat as many times as needed to build all of the benefits for this membership level before moving on to price.

Now that you have benefits ready to attach to prices it's time to build those prices.
New Membership/Pass/Loyalty Price
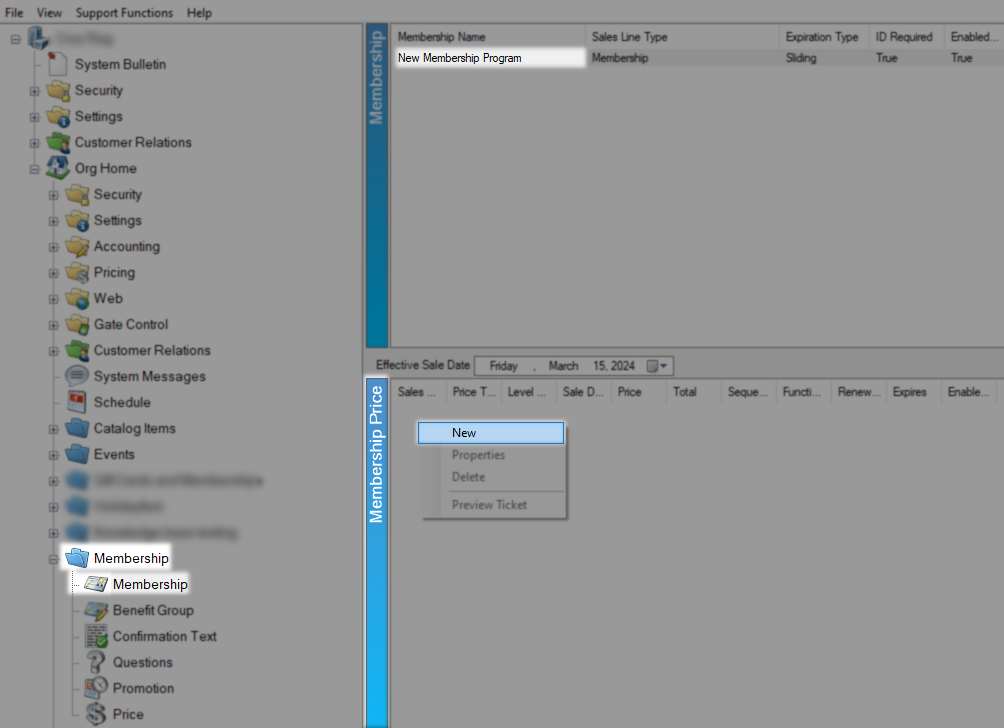
Back in the Membership area of your Blue Folder select the Membership Program you want to build a new price for. Next, right-click in the Membership Price area and select New.
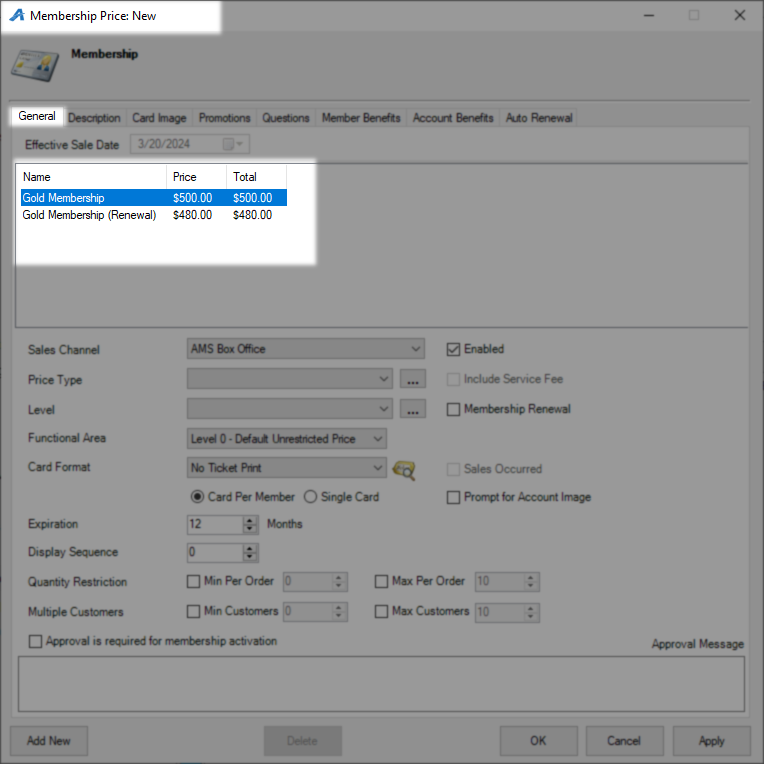
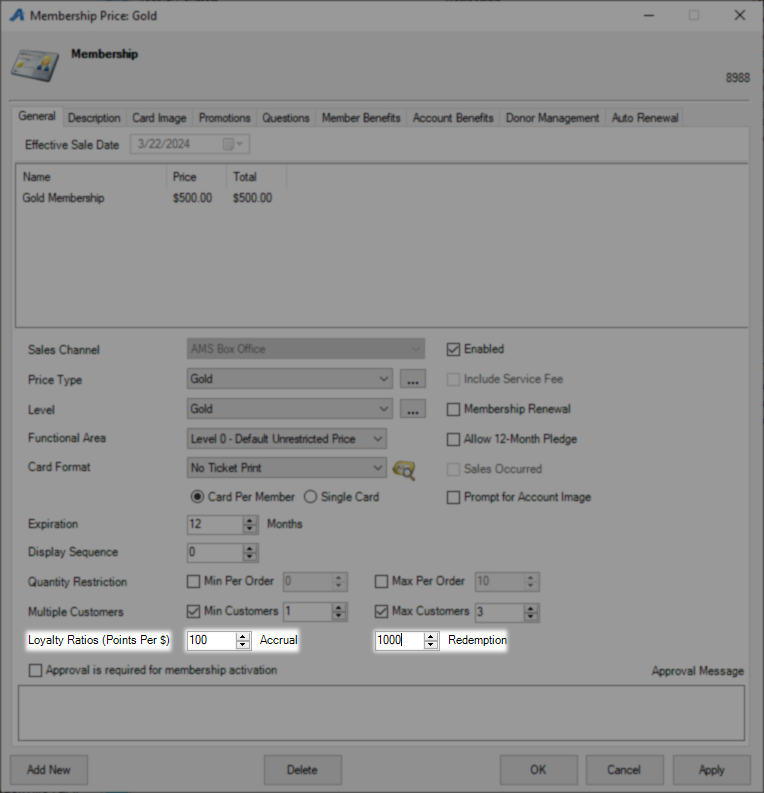
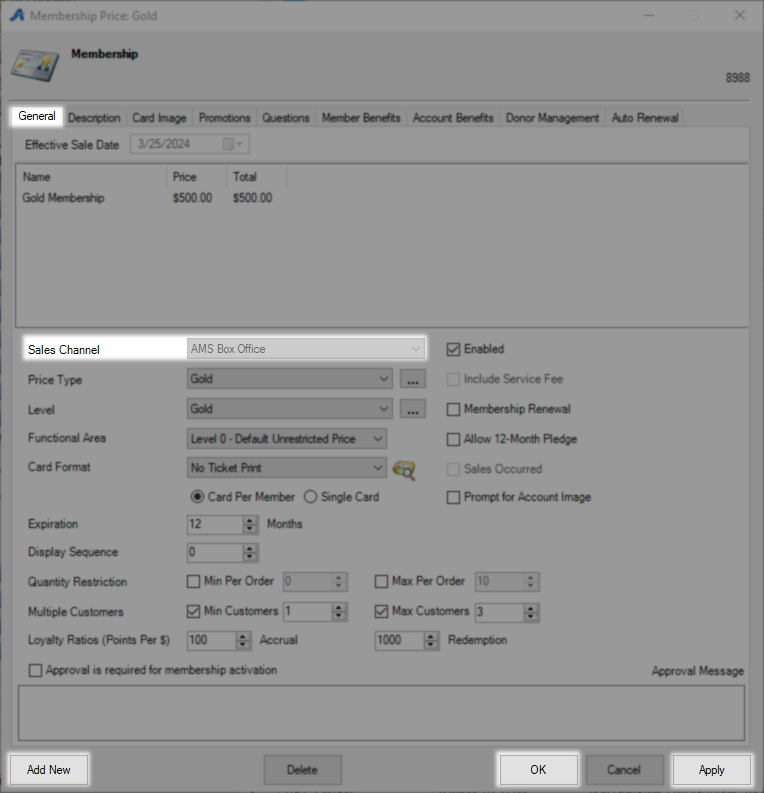
On the General tab of the Membership Price: New window you must first either select or build the prices for this membership level. If you need to create a new price you can use These Instructions. For each level of membership you are building (such as silver and gold) you will want to build two prices, one for new memberships and the other for renewals. These items will need to be built separately so doing it this way makes pricing differences and changes easier in the future.
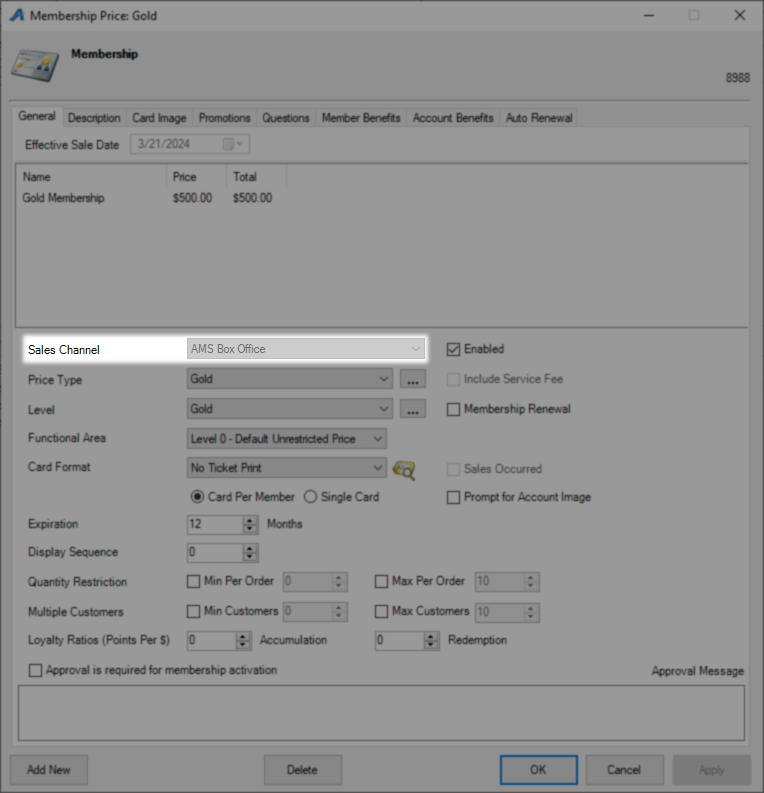
Sales Channel is next, AMS Box Office and Web Online are the most common choices here. A method to speed up building the second price will be covered at the end of this section so simply pick one to start with.
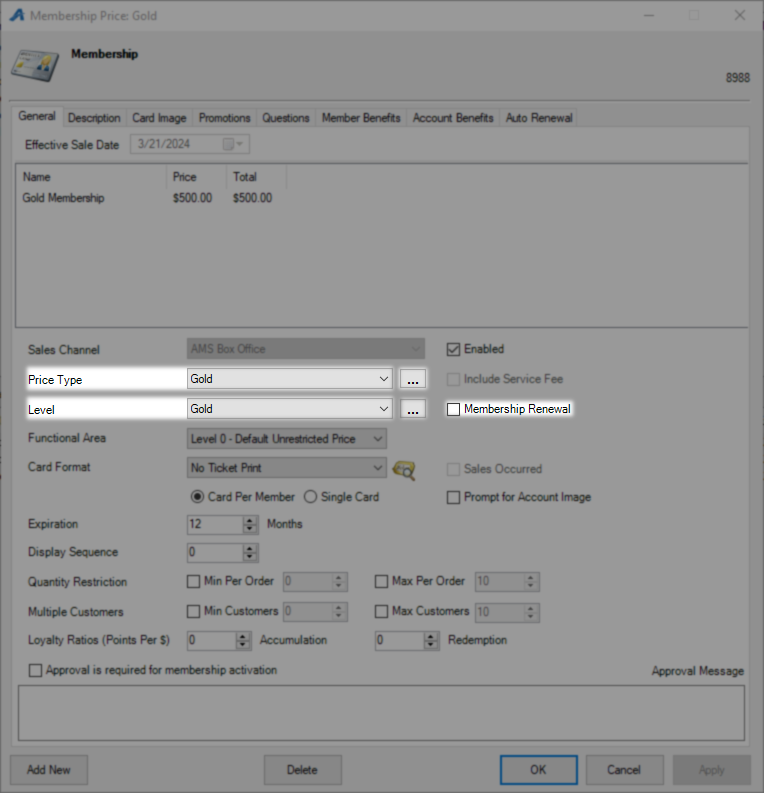
Price Type is a customer-facing field and should be specific so for renewal prices it is best practice to put the word renewal in the Price Type and for this to match the next setting. Level is the next field and should reflect the type of benefits this price will receive. For this example, a gold renewal price and a gold complimentary price would both just be gold level. For Renewals you will need to designate this as a renewal price by checking the Membership Renewal check box.
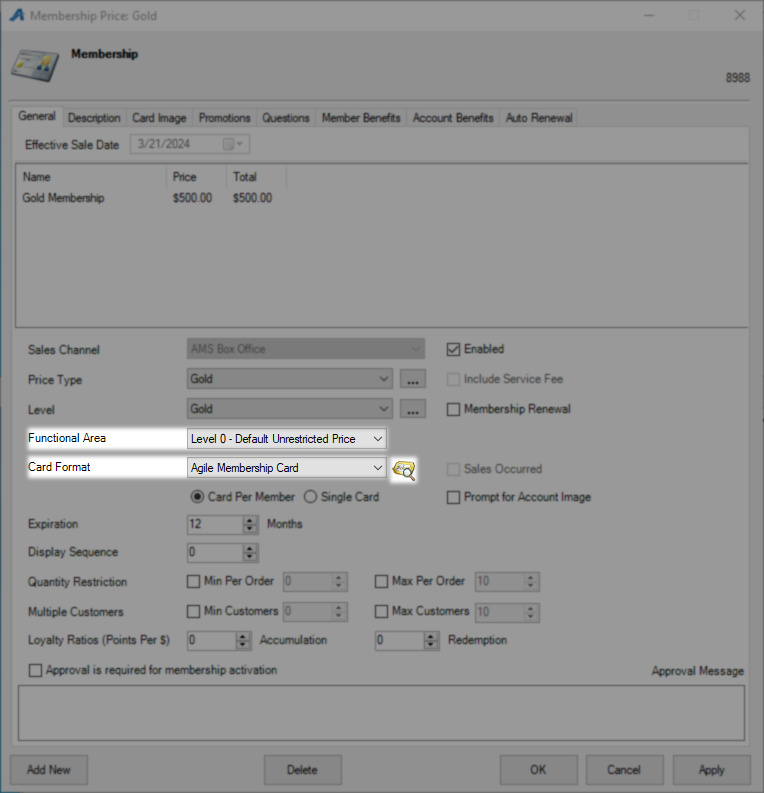
Function Area should be left at 0 for any new membership prices you want the general public to have access to. Renewal prices will be built with a function level 1 and the system will unhide these prices when your customer comes to renew. Card Format is where you pick the template for this membership card, you can use the Ticket Preview button to see what this membership card will look like.
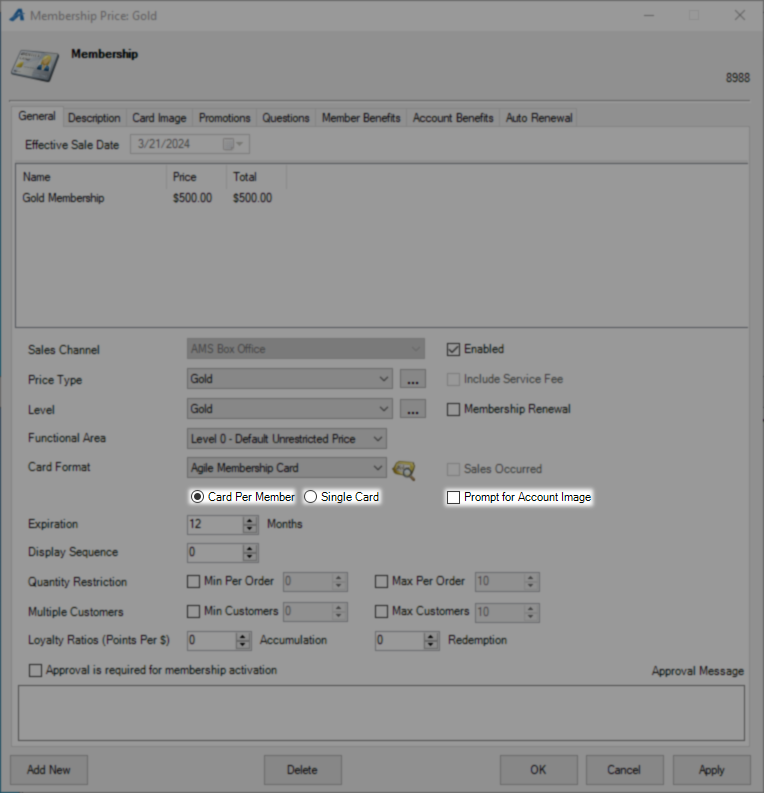
Card Per Member will issue a card for each member on this membership, Single Card will issue only one card to the primary membership holder. Prompt for Account Image will require the customer to add an account image which will display when their customer record is viewed.
Expiration is how many months or on exactly which date this membership will expire depending on if this is a static or sliding membership. Display Sequence allows you to order these prices however you would like the customer to see them with higher numbers being further down the list.

Quantity Restriction is the number of this membership you are requiring customers to purchase with the default being 0-10. Multiple Customers is asking how many members you will allow or require to share this membership.
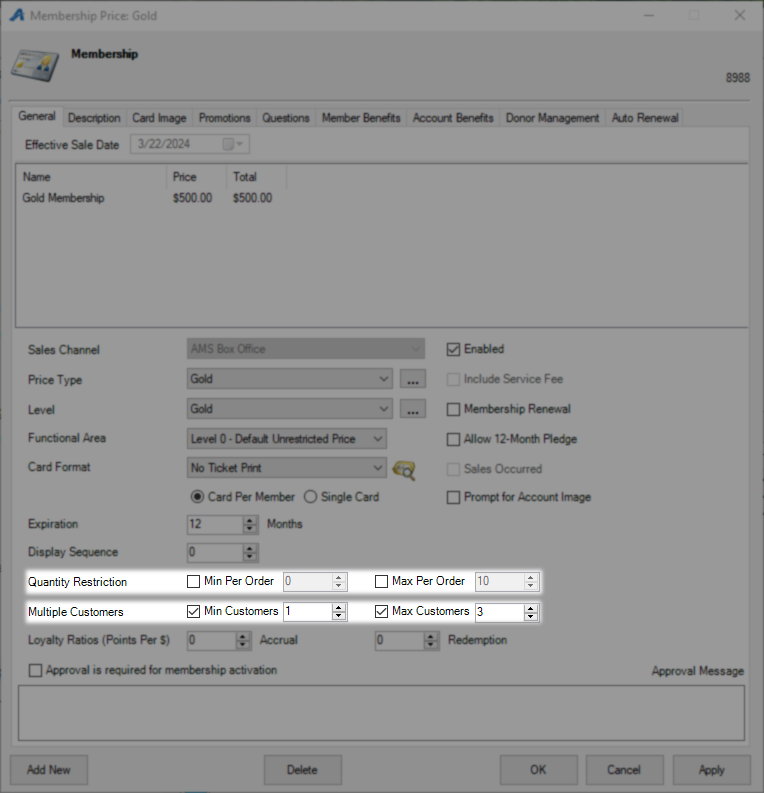
Loyalty Ratios is the field where you assign a value to the items you included during the new program creation process. In the Accrual field put the number of points your customer will receive per dollar spent on your included items. In Redemption put the number of points it takes to equal a dollar when spending them on redeemable items. In this example buying tickets or popcorn would earn 100 points per dollar and those could be spent to save one dollar per 1000 points. Best practice is to Accrue 100 points per dollar so the conversion of cents to points requires no approximation. On orders containing future showings the customer will receive all points after the date of the last showing, this includes packages.
Loyalty Program example of Customer experience
Once a customer has accrued enough points to cover the full value of an item they will see a loyalty toggle on any page with loyalty facing items.

Once toggled the points needed to purchase that item will be displayed along with the price and quantity.

On payment, these items will appear free and loyalty points will be subtracted from this account upon completion.

For some of the final settings on this tab checking Approval is required for membership activation will put this in a queue that must be fulfilled before the customer will have any benefits. Approval Message is what customers will see to know they must wait for activation. Allow 12-Moth Pledge will allow customers to pay for this membership in 12 installment payments, this setting requires DonorPerfect and a SafeSave Merchant account to function.

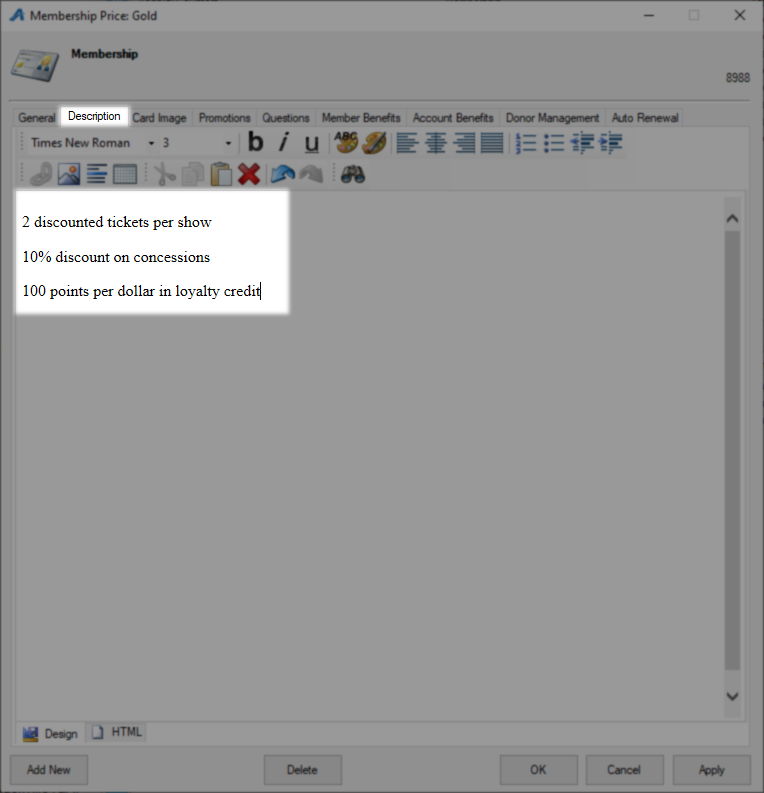
Anything put on the Description tab will load directly below the price for this membership level. If you have a small number of options this can be used to list all benefits or could say all previous plus this depending on how you want to advertise.
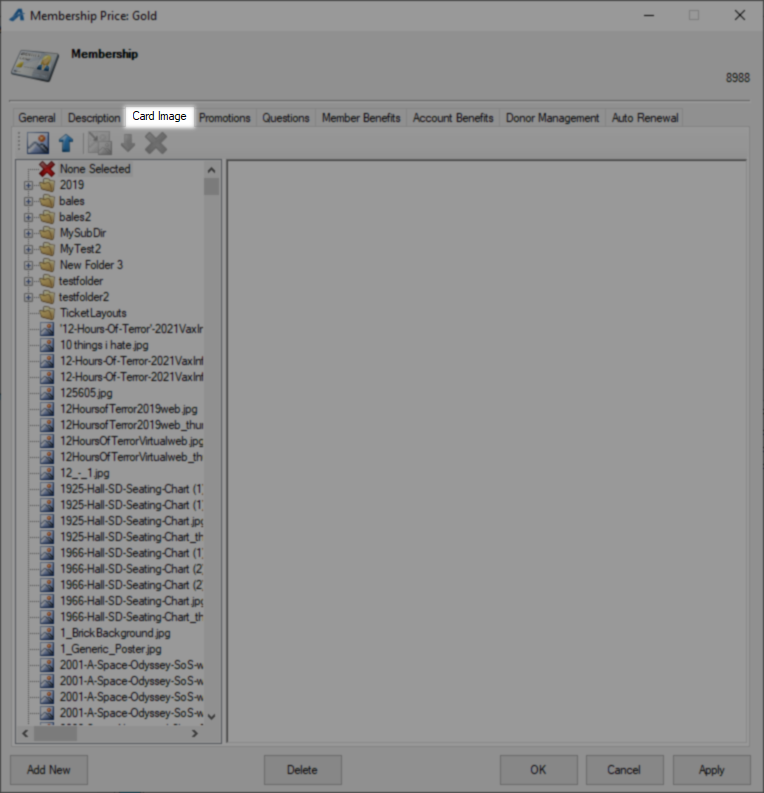
Card Image is where you would upload an image specific to this membership level. You only need to do this if you are printing double-sided cards.
Promotions is the next tab and is where you would tie in promo codes for running a discounted price. You can follow These Instructions for help setting up a promo code.

Questions allow you to create and attach questions to your prices that customers will have to answer. You can use These Instructions to add new order questions.

The Member Benefits Tab is where you attach the benefits for this membership level that you previously created. Right-click in the area and select New to assign.
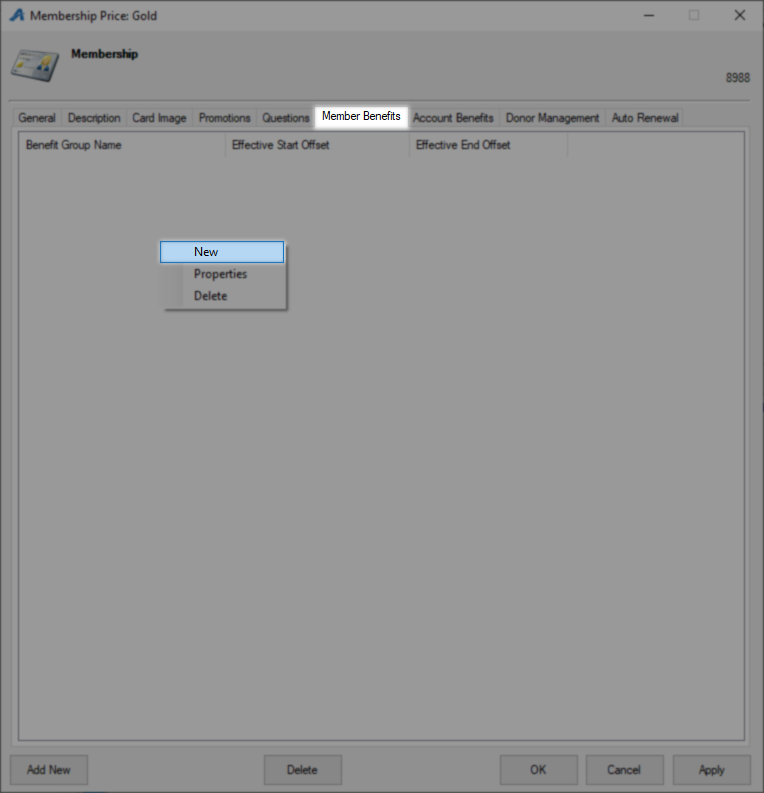
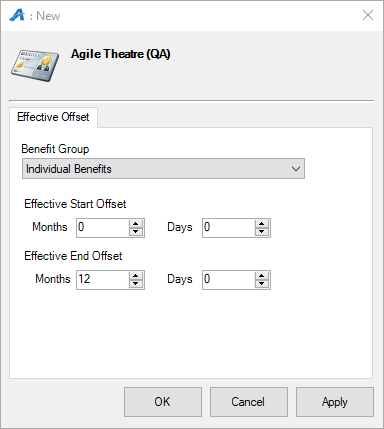
On the New membership benefits window use the Benefit Group drop down to select the level of benefit this membership gets. For sliding memberships, in the Effective Start Date area, you are selecting how many days and months to wait before this membership will begin, leave these both at 0 to start right away. Effective End Date should be how long this membership will last so a 1 or 12 in the month field are the most common settings. For a static membership, you will pick the exact date range these benefits are for.
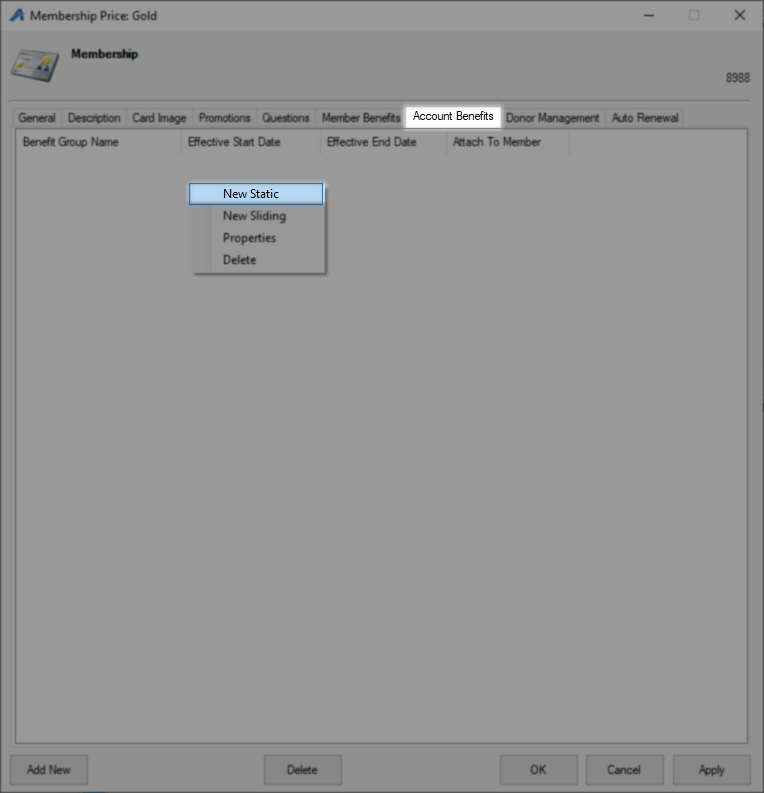
It is not very likely that you will need to add account benefits to a membership price. Account Benefits will be attached to the customer record of the purchaser, rather than to the membership created by a membership purchase. This can make account benefits harder to deal with globally than membership benefits, as their properties will have to be managed on individual member records instead of in the Benefit Group area.
Given that information, you can create new Account benefits by right-clicking and selecting either New Static or New Sliding.
Regardless of this being Static or Sliding on the New Benefit window you must first select the Benefits you want to assign using the Benefit Group drop-down menu. Next for static pick the exact window of time where this benefit can be used. For sliding benefits, you will pick how long they last from the date of purchase.

Check Attach to Membership if this benefit should be available to every member on this membership otherwise it will only attach to the primary membership holder. Checking Require Active Membership will require this membership to be active for the benefit to work and requires this benefit to be attached to a membership.

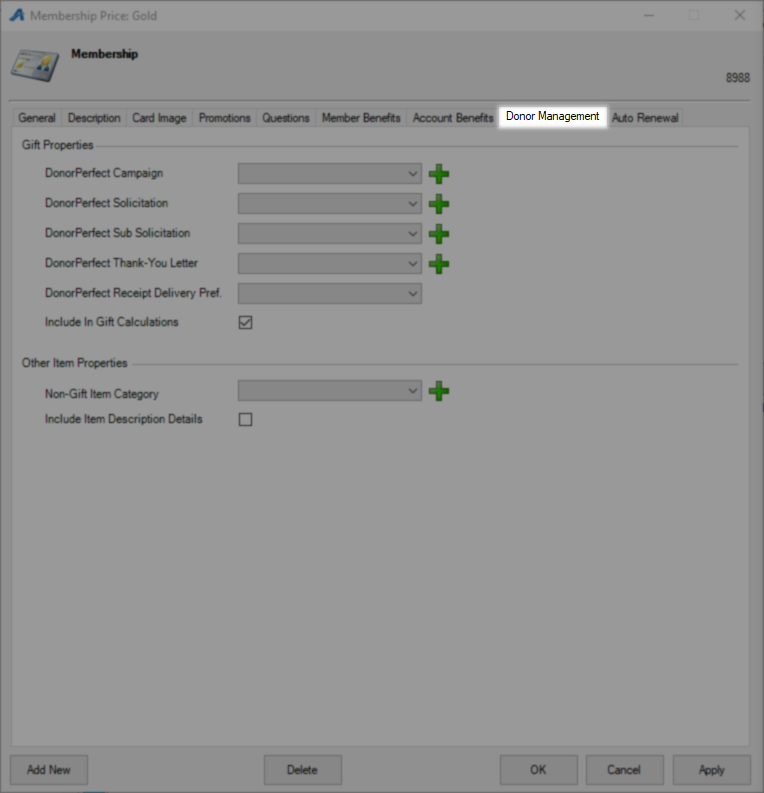
The Donor Management tab is used by Donor Perfect clients who need this membership information to flow over to that platform. Once sync is set up your DP campaigns will appear on these drop-down menus.
The Auto Renewal tab holds the information for automatic renewals of this membership level. Automatic renewals require credit card vaulting to store card information and has added costs, consult your representative to set up this service.
Check Allow Auto Renewal to designate this as an auto-renewable membership level and unlock the rest of the settings. The Renewal Membership Price drop-down is where you will pick the renewal price for this specific membership level, either set that now or return here once that has been created. Renewal Delivery Method is asking how and if a new card will be sent.
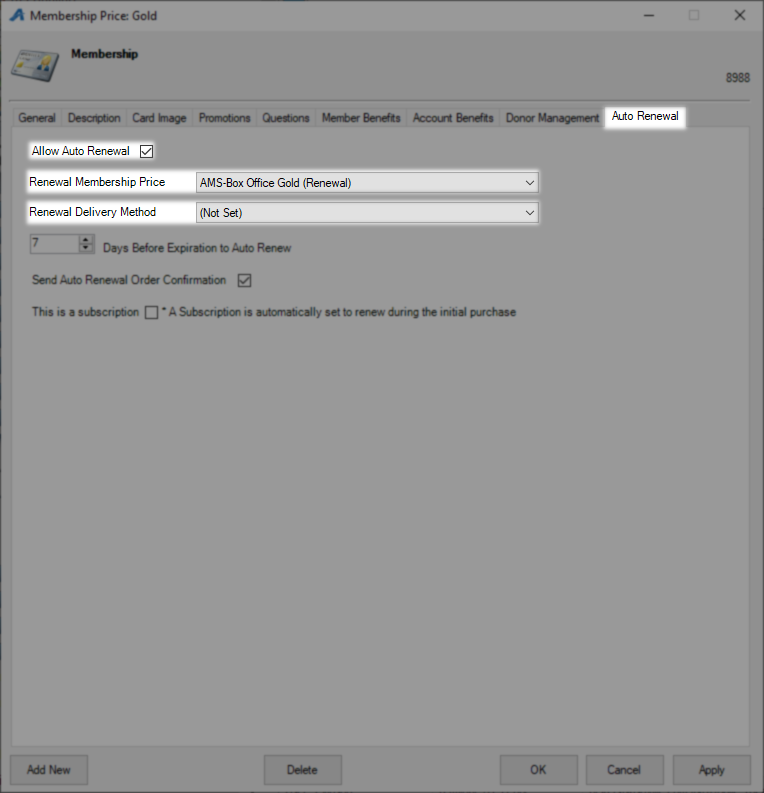
Days Before Expiration to Auto Renew is asking how many days before the membership would lapse this will run. You could combine this with an expiration reminder email to remind customers this will happen soon. Send Auto Renewal Order Confirmation should be checked so this customer gets the details of this renewal via email. Check the This is a Subscription box to default this renewal into auto renewal instead of it being a choice.

With all settings in place click Apply to save this membership price for this sales channel. For additional sales channels where this price will be available return to the General tab, click Add New, change the Sales Channel, and once again click apply until all sales channels are complete. Use OK to save and close this price.
New Membership/Pass/Loyalty in Web Portal
Begin by Logging In to Web Portal and selecting Membership on the left menu. Click the red Add Membership to begin.

On the New Membership window in the Select Folder field use the drop-down to find the folder for this membership program and click Continue. You can use the View all Folders button to select a folder membership is not already in and the system will add it for you.

New Membership/Pass/Loyalty Program
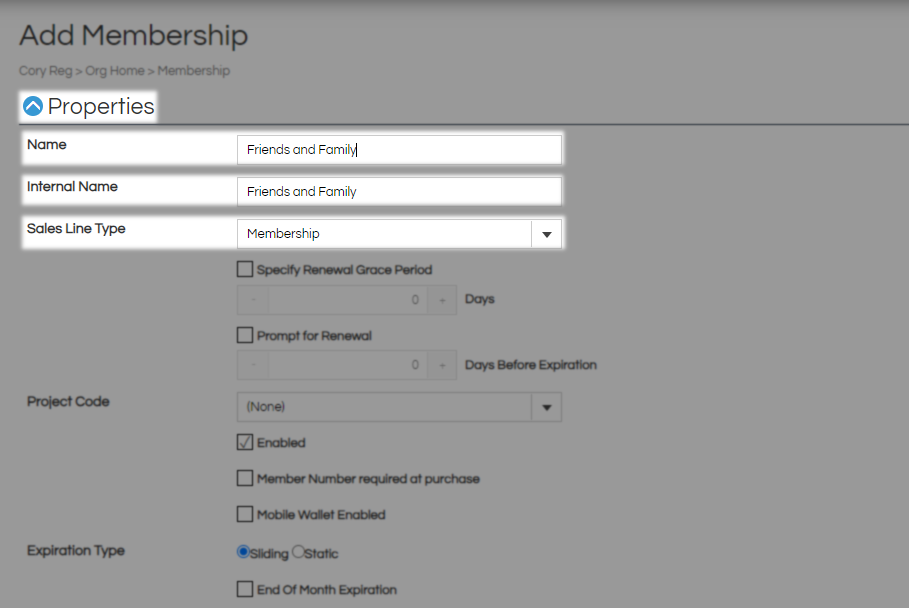
Start in the Properties section by giving this program an Internal Name which will be used on reports and by the sales system and a Name which is customer-facing. On the Sales Line Type drop-down choose the type of program this is and use These Instructions if you need to add more options.
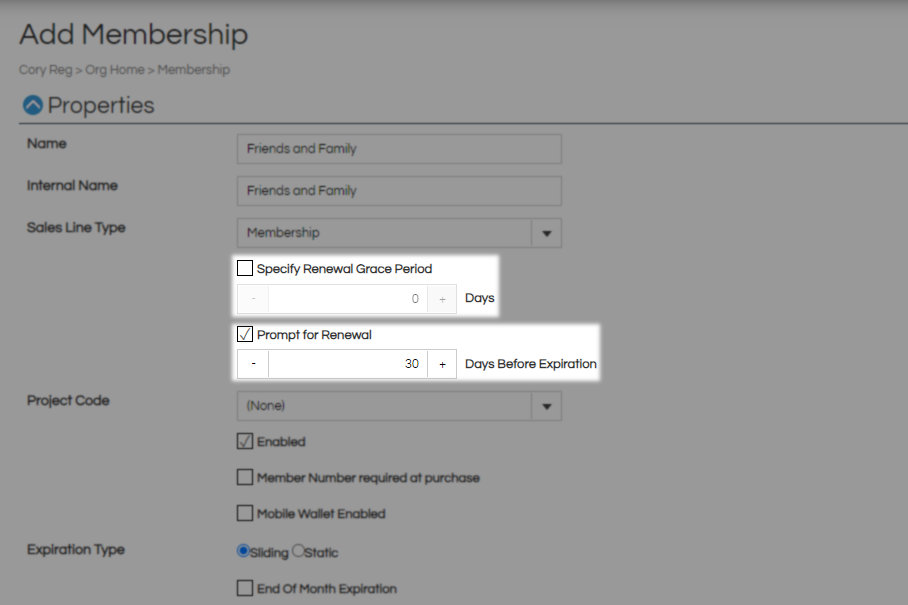
Specify Renewal Grace Period when combined with a sliding expiration will set a window where customers are allowed to renew instead of requiring a new membership. Leave this box unchecked if customers may renew their memberships at any later time. Prompt for Renewal will start giving this customer a pop-up online to notify them of their approaching expiration the set number of days ahead of time.
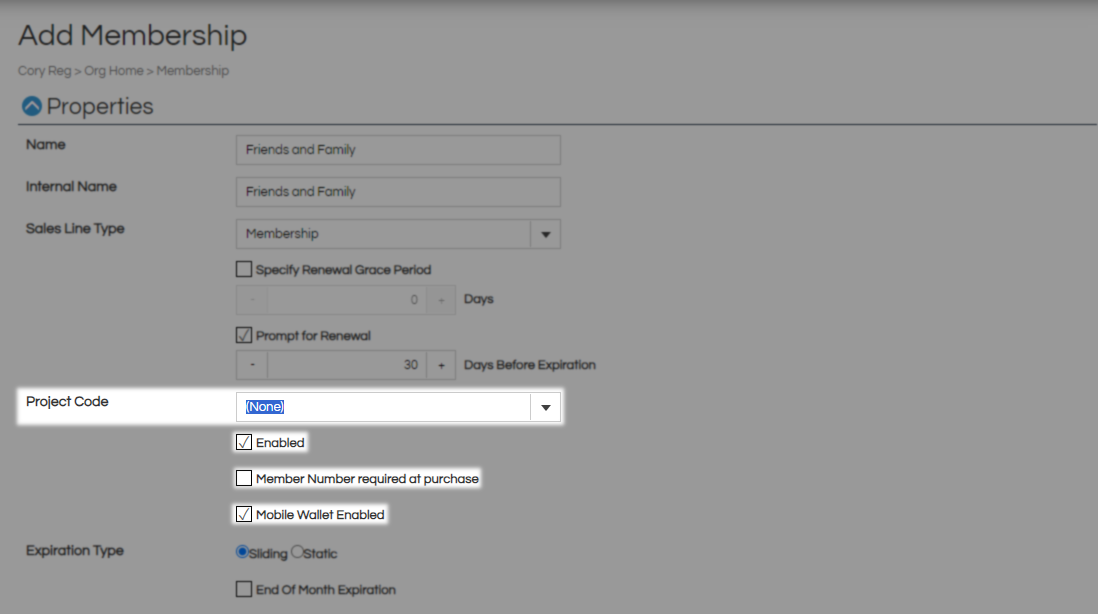
The Project Code field is used for reporting and can separate this membership from others in case the name is not enough. Enabled should be checked unless you are retiring this membership program. Member Number required at purchase is a legacy check box that no longer has a function. Check Mobile Wallet Enabled to allow your customers to add their membership to their digital wallet once that format is in place.
Expiration Type once set and saved will not accept changes. Static Expiration will have you select a specific time frame and the benefits will only be active during that time. Sliding Expiration will have you pick a length of time to be active and will start on the day of purchase. End of Month expiration can be combined with Sliding Expiration to push the end off until the last day of the month.
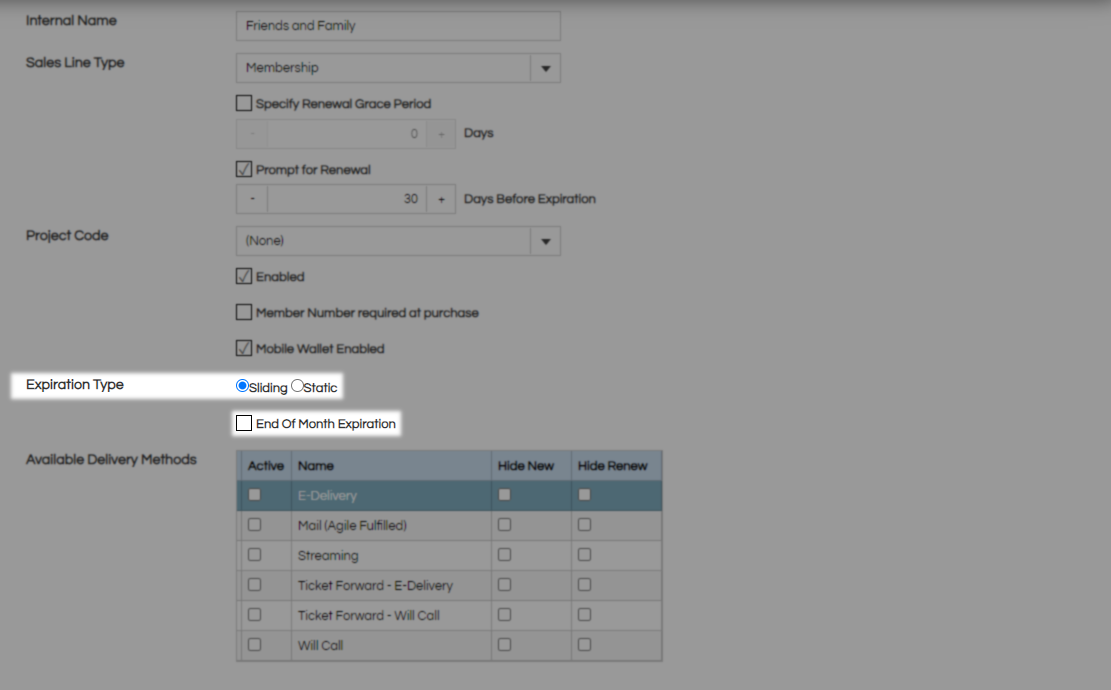
Available Delivery Methods holds the options you want customers to have for membership card delivery. If you do physical cards Mail and Will Call are common options while E-delivery covers most electronic methods. Start Fulfillment is required if the ATS office will be doing your mailing and is the day the first mailout will happen.
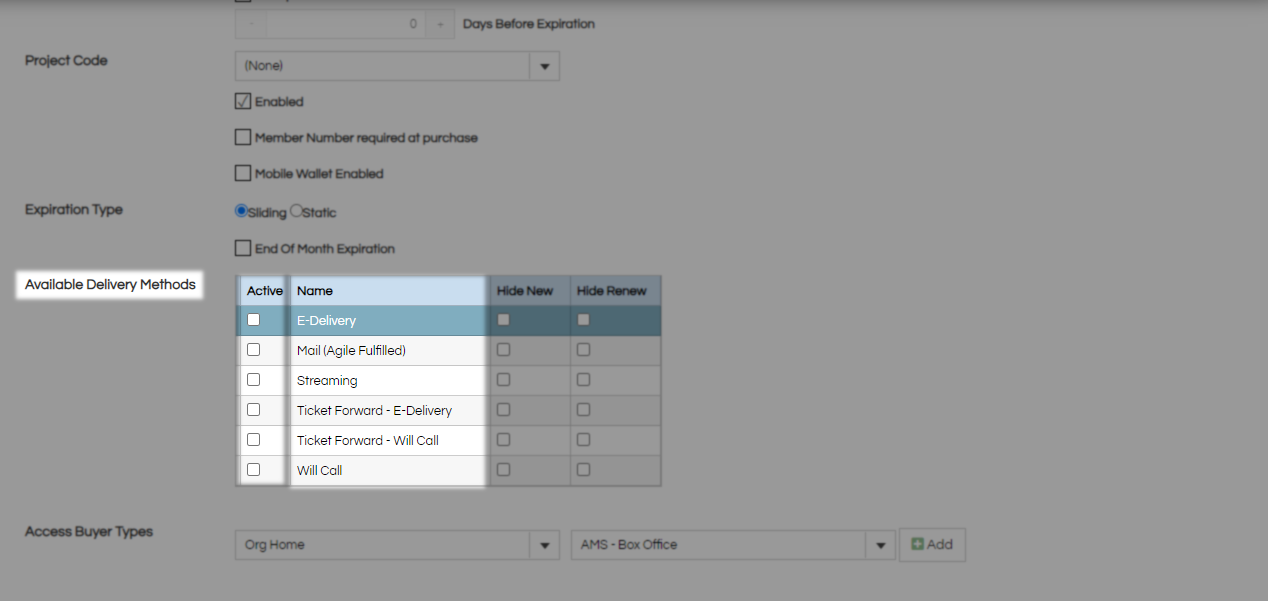
Use Hide New or Hide Renew to exclude a delivery method from that process such as checking Hide Renew on Mail so that only new customers will have that option.
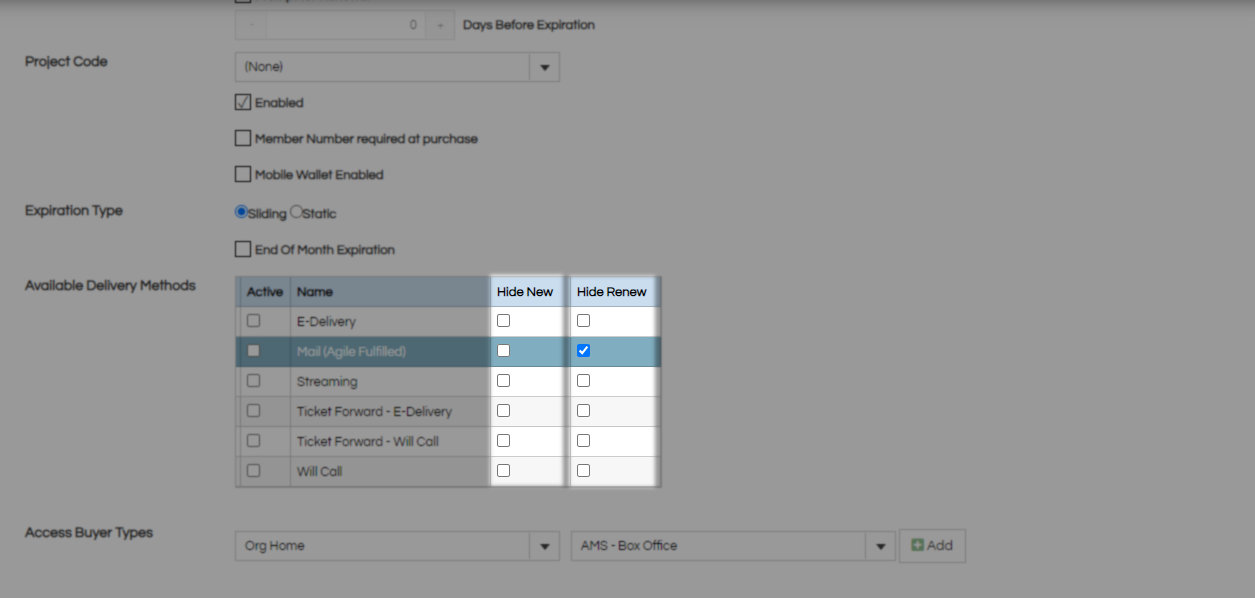
Access Buyer Types lets you tell the system which types of buyers to expect with AMS - Box Office and Web - Online being the most common. Select the buyer types you want to add using the Buyer Type drop-down and the Add button to add them to the list. This is a required step for your membership to function and it is best practice to turn on any buyer type that applies even slightly.

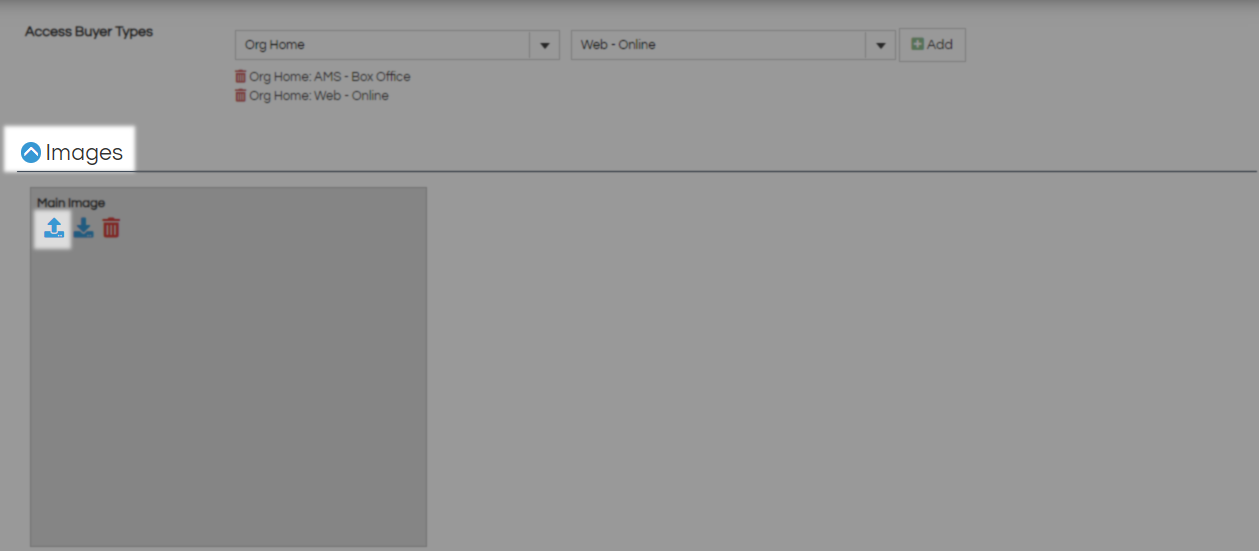
In the Images section use the Blue Up Arrows to upload new photos you want to use in advertising this membership program online.
In the Additional Information section, you will find all the fields used to tell your customers about this membership program. Everything put in Description will load on the More Info page of this membership.

Whatever you put in Extra HTML will load below the short descriptive and description so it can be used with or in place of both.
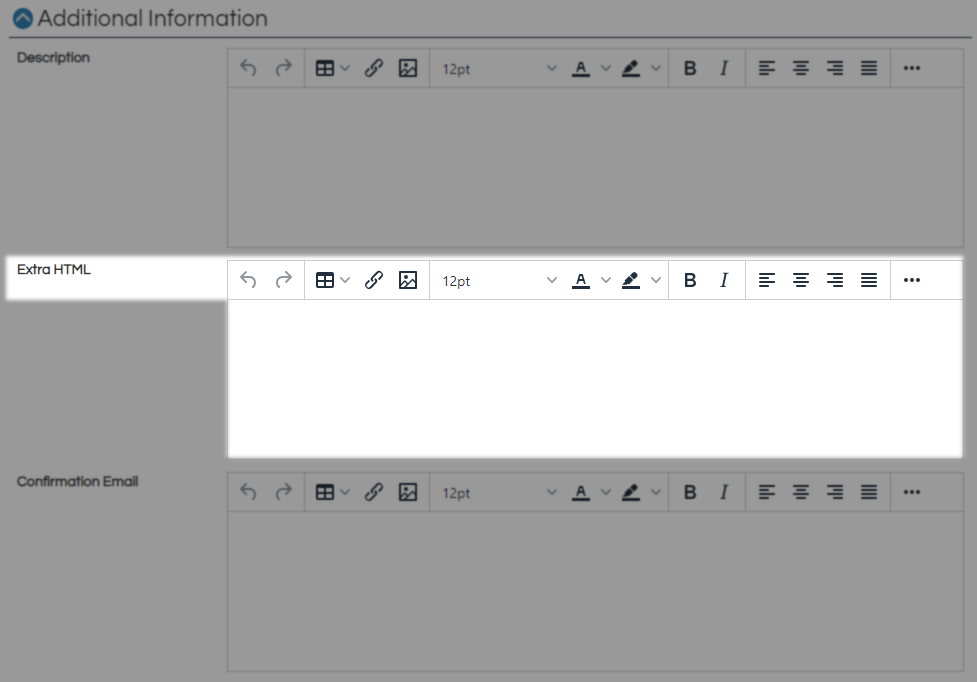
Confirmation Email is where you put the information your customer should receive after purchasing a membership. This could be links to calendars or just more information on how to use benefits and a thank you message.
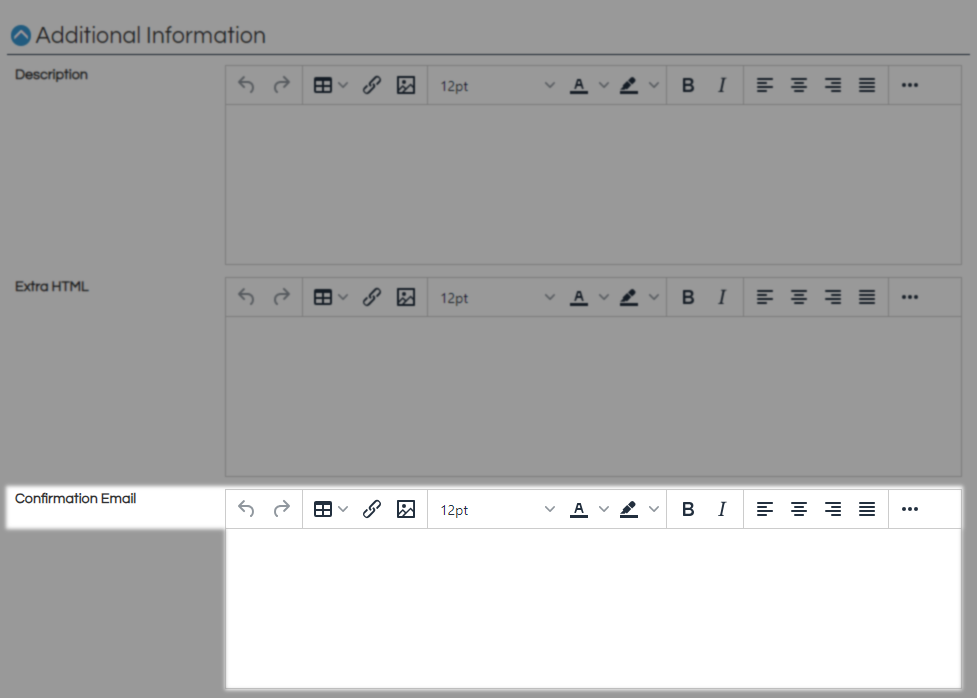
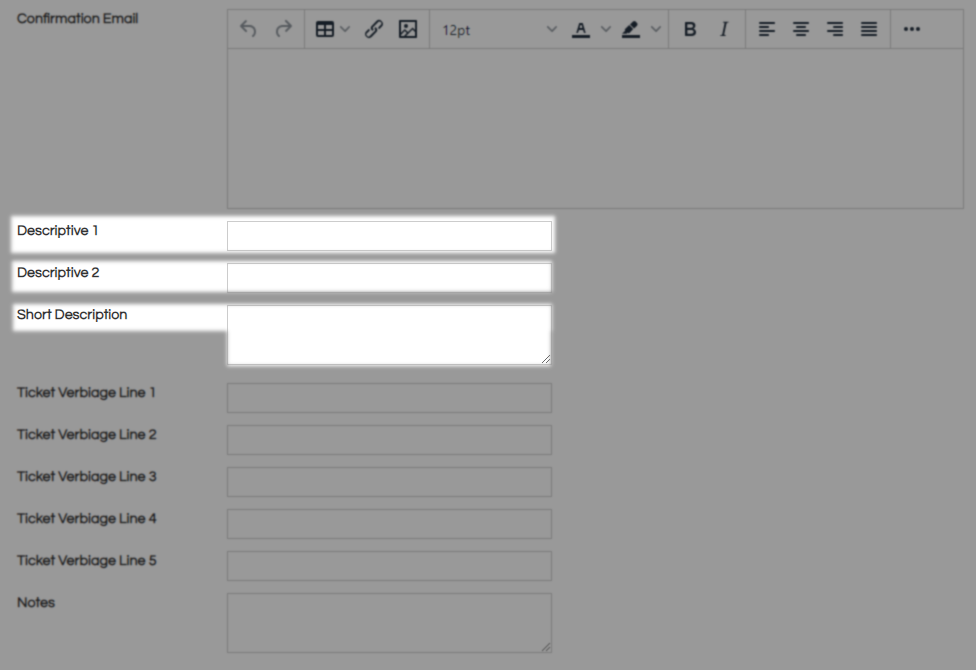
Descriptive 1, Descriptive 2, and Short Description are where you may put a short synopsis or description of what is available through this membership. This information loads on the initial membership screen where people will see all prices.
Ticket Verbiage holds Line 1-5 which are all elements that can be added to your membership card and will print whatever you have on that line.
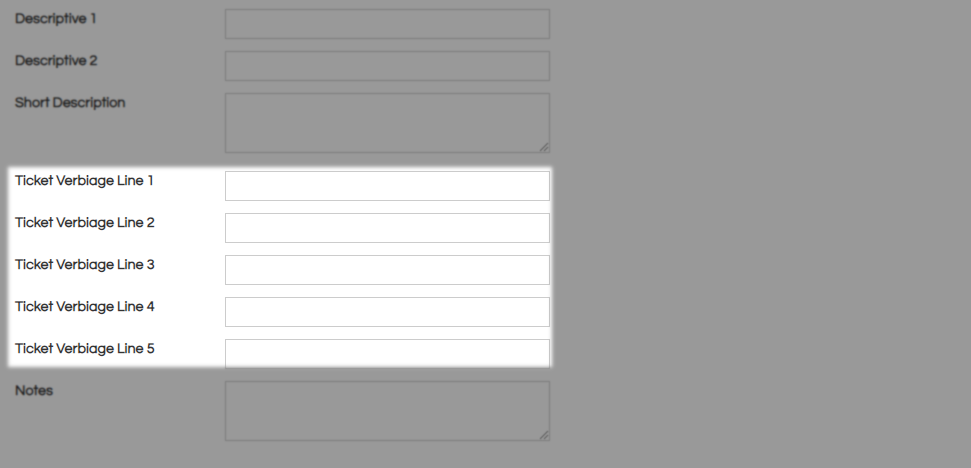
Notes is where you can place any internal information that may be needed in the future for this membership program.

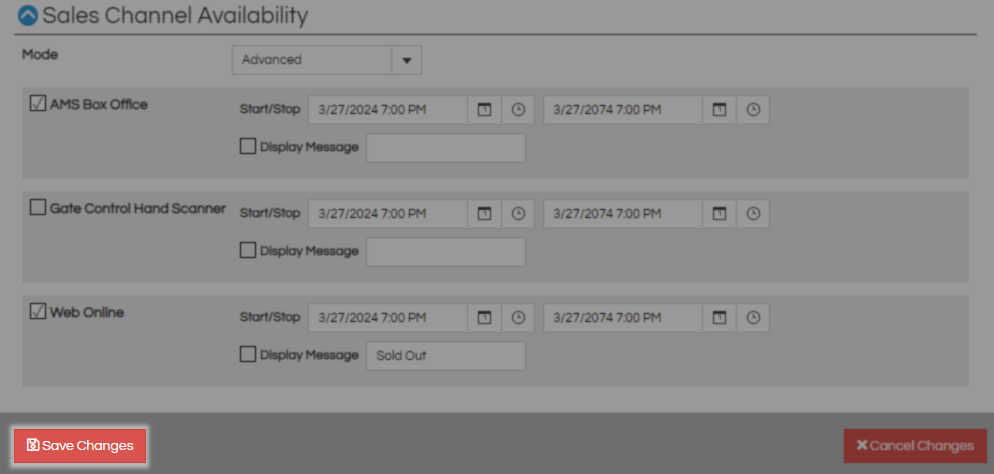
Sales Channel Availability lets you set where you would like to sell this membership with AMS Box Office and Web Online being the most common choices. Start/Stop will default to today so sales can start immediately and the end will default to fifty years from now.

Click Save Changes which will save this membership program and return you to the top of this page.
You may now set up or add a loyalty program to this membership, scroll down to the Loyalty Settings section to begin.

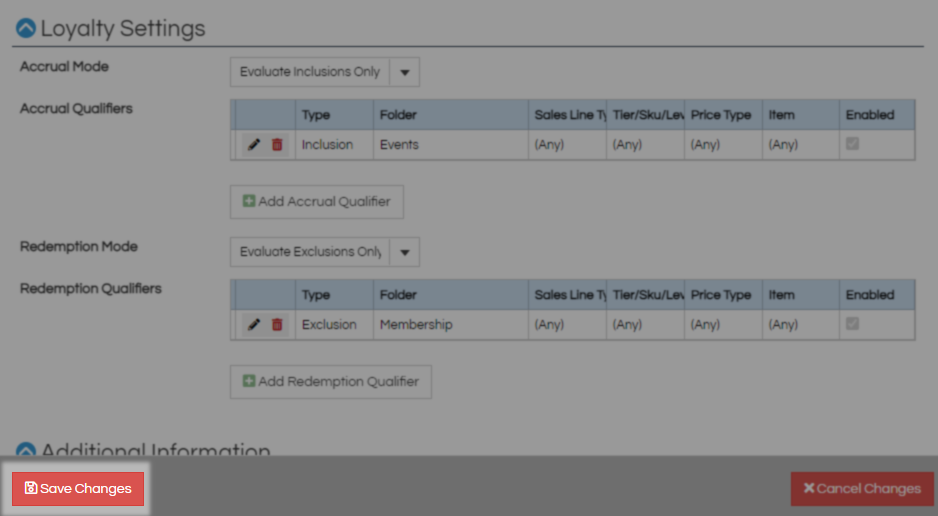
Loyalty Settings contains all of the items that will be included or excluded from your loyalty program. Start in the Accrual Mode section then move on to Redemption Mode using the drop-down to select which method you would like to use.
None - This selection disables the loyalty program from gaining or spending points.
Specify Inclusions Only - With this method selected only items you specifically want to include in your loyalty program will be counted.
Specify Exclusions Only - With this method selected only items you specifically want to exclude in your loyalty program will not be counted.
Specify Both - With this method selected you can specify both as needed. When using both note that if something is included and excluded then it is excluded.
Click Add Accrual Qualifier or Add Redemption Qualifier to build your first Inclusion or Exclusion.

On the Loyalty Qualifier window, you may define the item, items, or folders you want taken into consideration for your loyalty program.
Start by selecting if this rule will Include items in your program or exclude them from it with the Type drop-down menu. For each of the five categories you may select Is for a specific item or Contains for keywords. The drop-down menus marked (Any) can be used to select specific items in each category to be as refined as you want. Leave Enabled checked to use this qualifier and hit OK to save.

Set as many of these as you need, and in any order, to refine your loyalty program. In the example below everything in the Events folder will accrue points and those can be redeemed on anything except memberships. Use the Edit Pencil or Red Trashcan for changes to loyalty parameters.

Click Save Changes to commit your loyalty settings to this membership program.
Next, you should build your membership benefits so they are ready to use during the price creation process. The purpose of a benefit is to point at a price or group of prices and then make hidden selections available to anyone with the proper benefit.
New Membership/Pass/Account Benefits
Benefits are built under General Settings in the Benefit Groups section of the Settings menu.
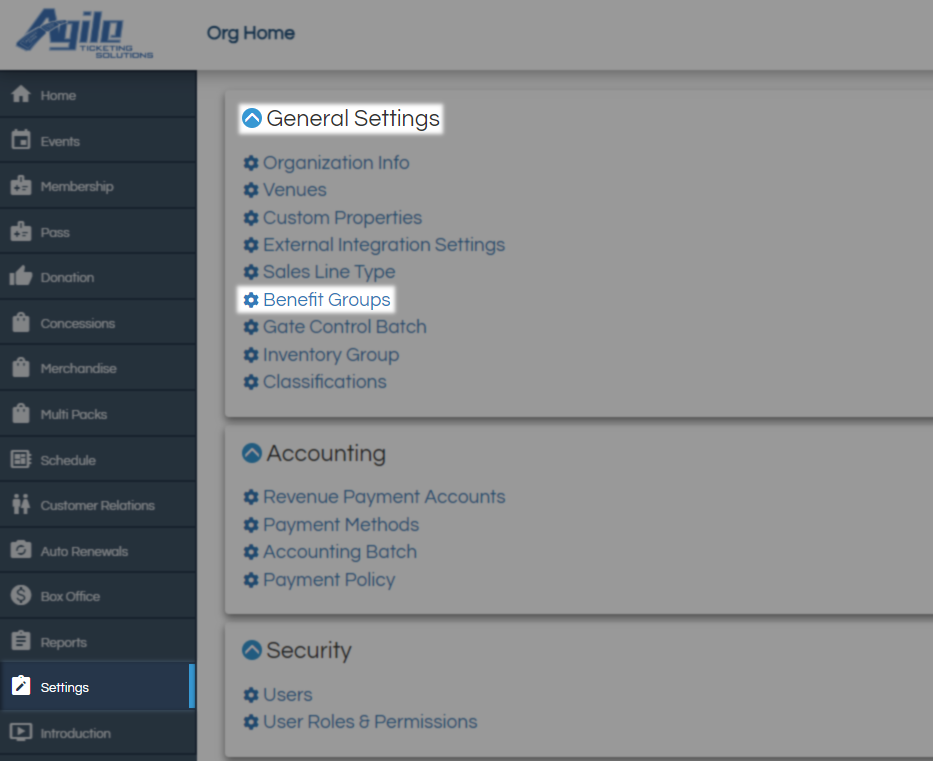
Click the red Add Benefit Group button to create a new set of benefits to use with membership or account benefits.

In the Folder drop-down, you should pick the same location as your membership program these will be attached to. Best practice is for the Name to match the levels of membership they will be tied to. The Description area is mostly an internal reference for what this benefit group gets but can also be included on membership welcome letters using the BenefitDescription insert. Use the Notes section for anything you need to remember about this benefit group. Click Save to create this benefit group.
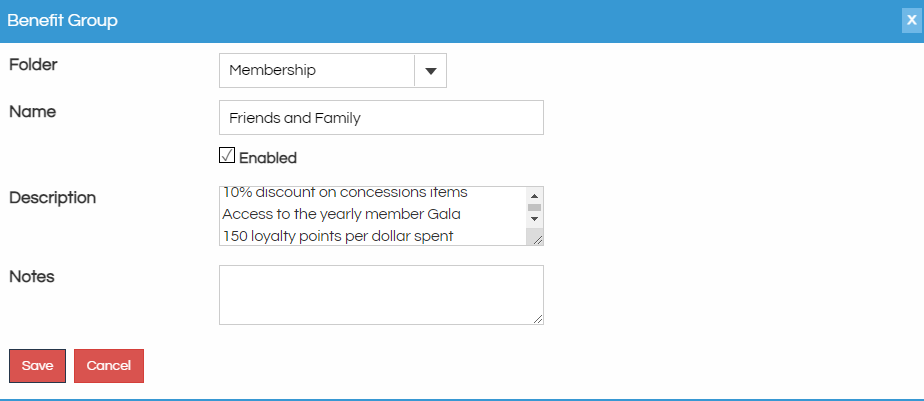
With the benefit group now created you have to assign benefits to it. Click the Edit Benefits button to get started.
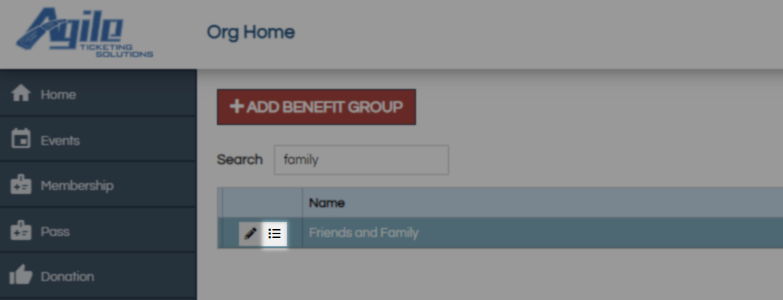
Click Add New Benefit button on the next screen.

On the Benefit Edit window choose the type of benefit you need to create.
Event/Showing Benefit - This benefit can be pointed at a specific date and time of a showing or event. This is the most commonly used type of benefit, as it can be used to create event ticket discounts for members.
Catalog Benefit - This benefit can be pointed at a merchandise or concession item. This is commonly used to create concessions or merchandise discounts.
Membership Benefit - This benefit can be pointed at memberships. This is used if members get special access to another kind of membership price. For example, if members at your year-round theatre get a discount on passes to a festival, then you would build a Membership Benefit for that pass's price type.
Package Benefit - This benefit can be pointed at a package. This is often used for a member discounted price on a series or season package.
Show Benefit - This benefit can be pointed at a run of shows instead of one specifically. This is not commonly used as it would restrict a member from seeing a film more than once.

Now on the Benefit Edit window and General tab, you must first give it a Benefit Name which ideally should describe what this benefit gives the customer. This is not a customer-facing field.
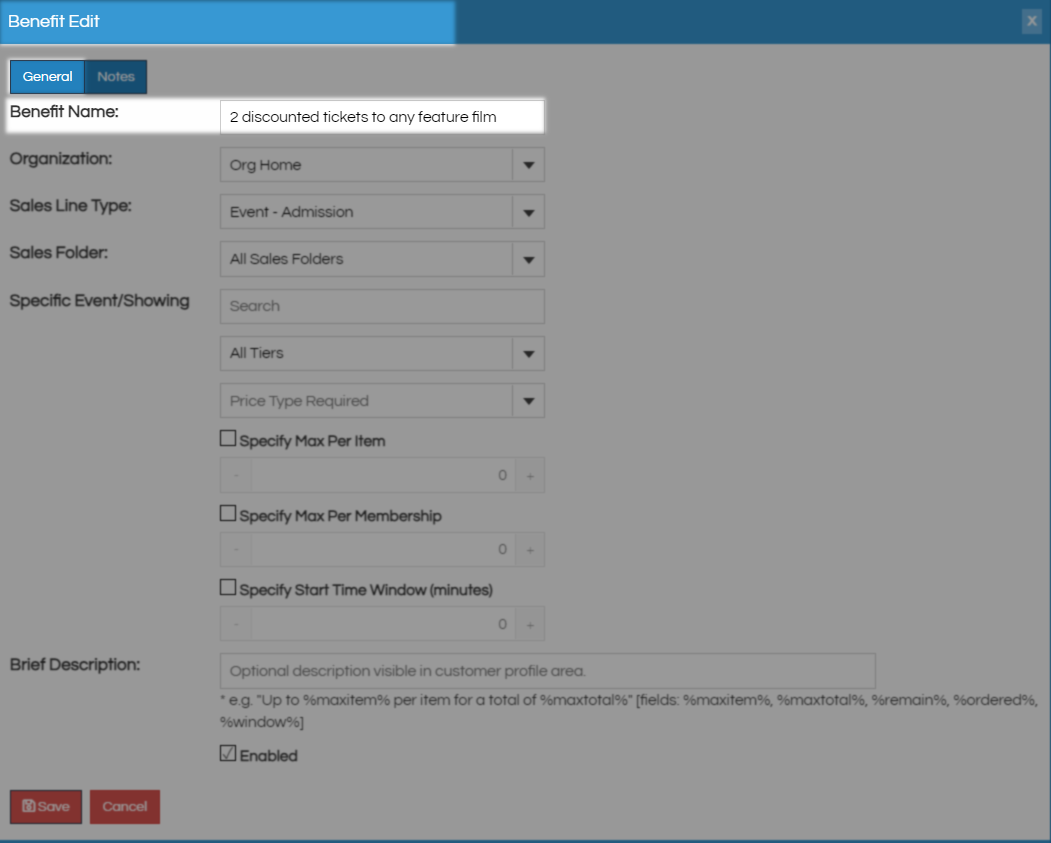
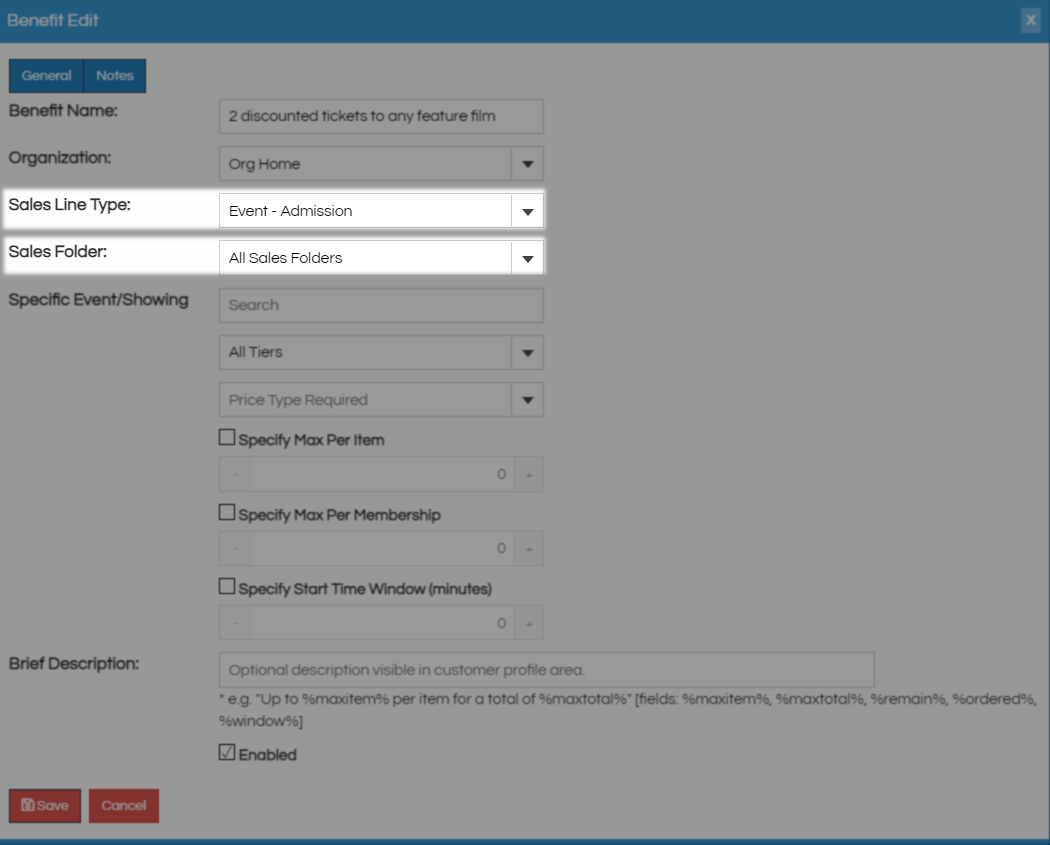
Sales Line Type is the first field you get to narrow down the items this benefit will apply to and is a required field. If you only have one option to select from the system will default to that option. Sales Folder is next and you can either select a specific folder or all sales folders to further restrict this benefit.
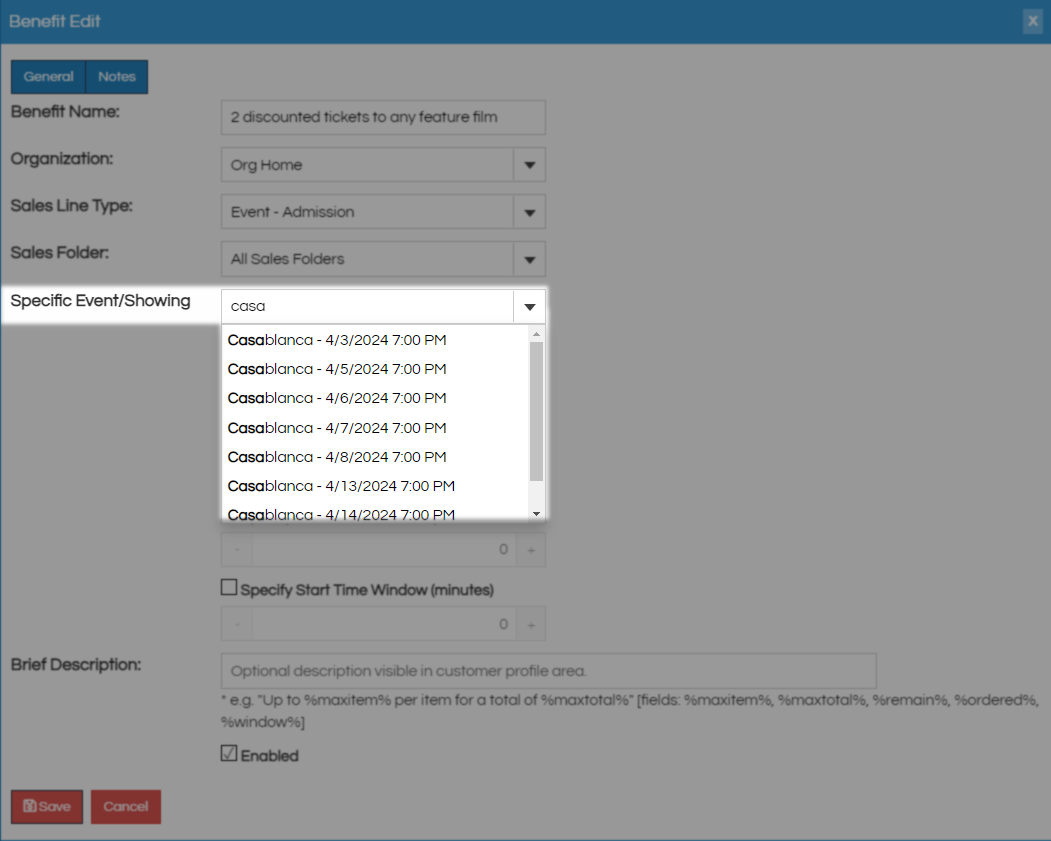
The Specific Event/Showing search field will search for show or events in your system and allow you to select one specific date and time for this benefit to apply.
Specify Tier allows you to choose a specific tier this benefit applies to allowing you to exclude others, this is useful if this benefit is for Admission tickets but not VIP. Price Type Required is where you will pick which hidden ticket type this benefit is granting access to, Member is a very common ticket type to use here.

Specify Max Per Item specifies how many times the member may use this benefit per item. For example, if a member may buy two tickets per event/show at the membership price, then you would specify the Max Per Item as 2.
Specify Max Per Membership specifies how many times the member may use this benefit per membership. For example, if members receive three complimentary guest passes to use at any time before their membership expires, then you would specify the Max Per Membership as 3.
Specify Start Time Window lets you enter in the amount of time that must occur between showings in order for a member to use the benefit on both showings. (For example, if a customer uses this benefit to buy a ticket to The Good Movie at 11:30 AM, and the Start Time Window is specified as 30 minutes, then they will not be able to use the benefit on The Best Movie at 11:45 AM on the same day.)

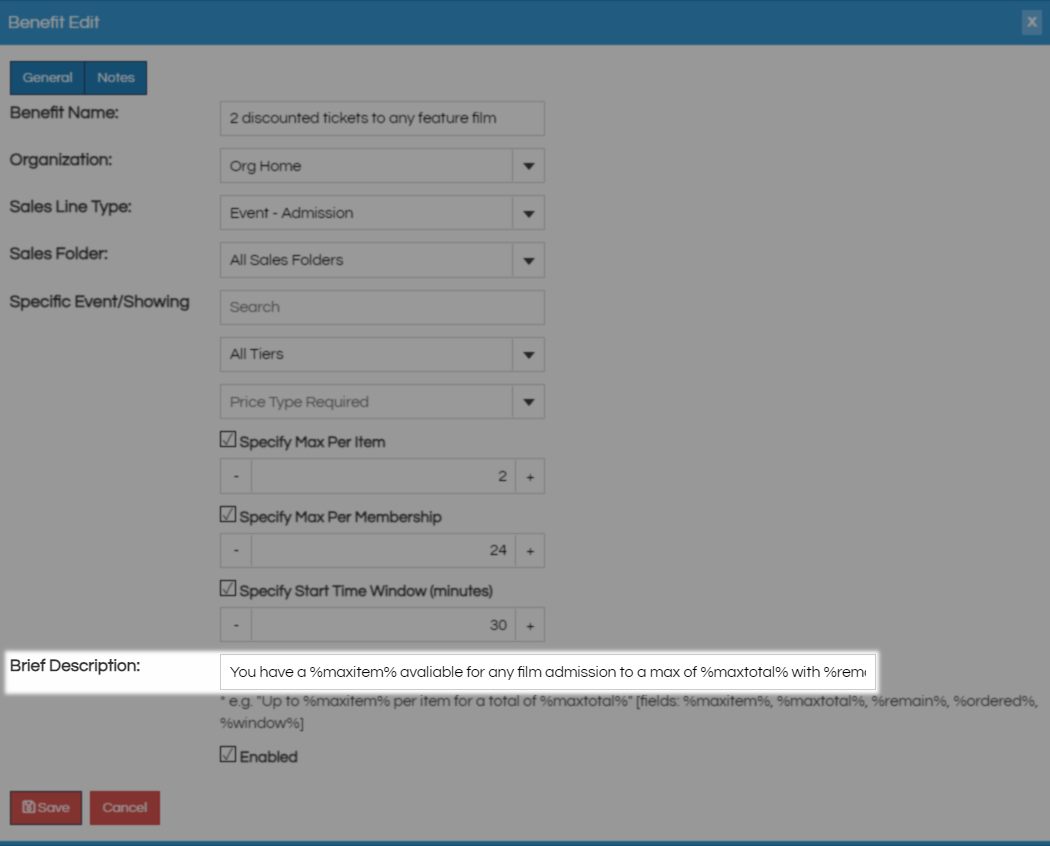
Brief Description describes the uses and redemptions of this benefit in the textbox. This description will appear on the customer's My Benefits page in their online account. You can use the following elements:
%maxitem% - will show the maximum number of redemptions per item that is allowed through this benefit.
%maxtotal% - will show the maximum number of redemptions per membership that is allowed through the benefit.
%ordered% - will show the number of redemptions that have already been used.
%remain% - will show the number of benefits that the member has left to use before their membership expires.
%window% - will show the number of minutes specified in the Start Time Window number box.
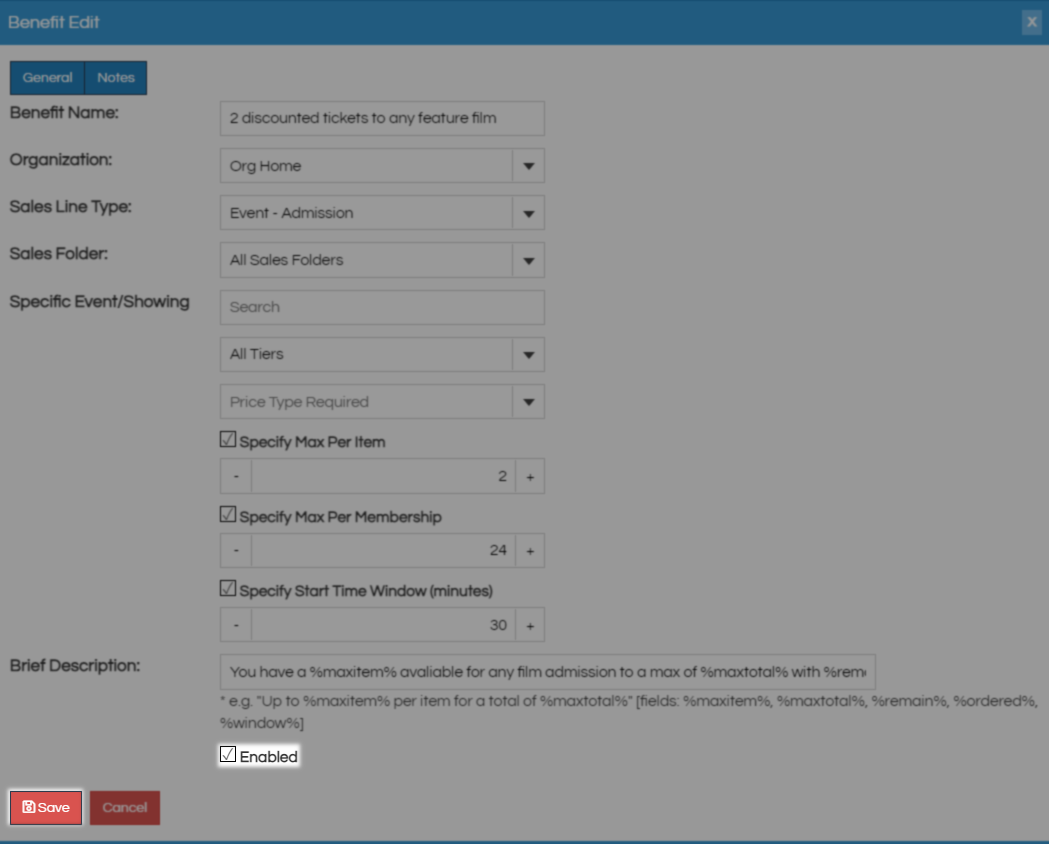
Leave Enabled checked and press Save to save these benefits. Repeat as many times as needed to build all of the benefits for this membership level before moving on to price.
Now that you have benefits ready to attach to prices it's time to build those prices.
New Membership/Pass/Loyalty Price
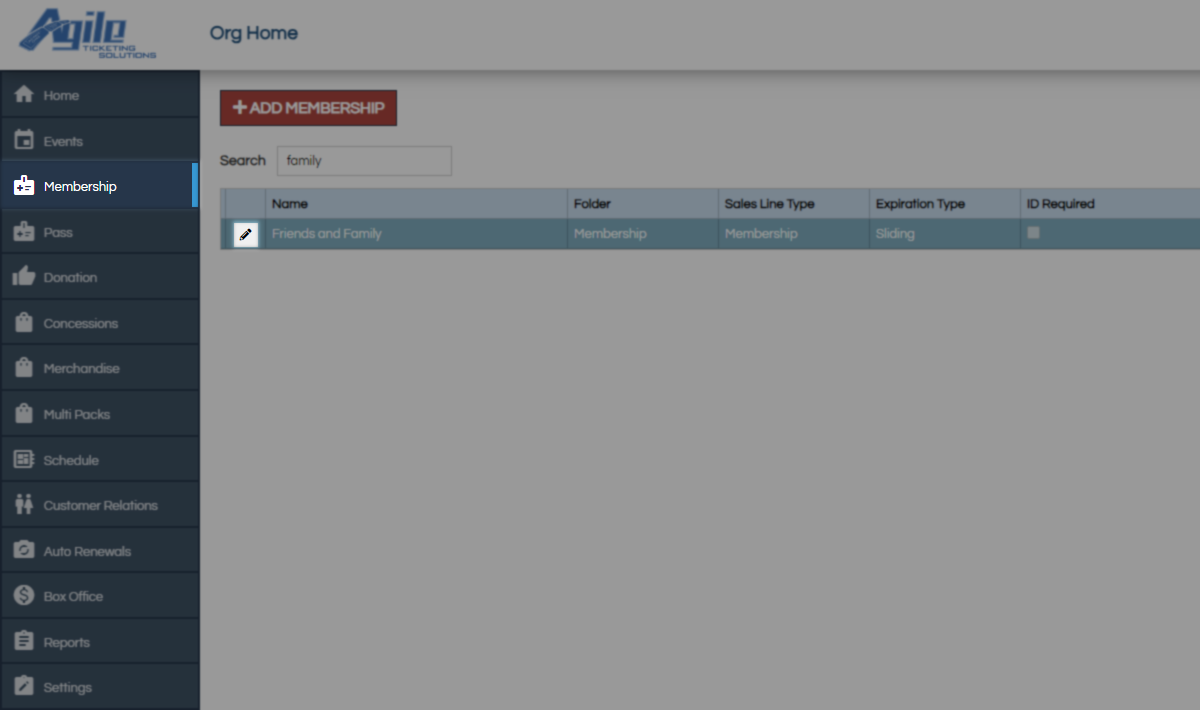
Back in the Membership area select the Membership Program you want to build a new price for by clicking the Edit Pencil.
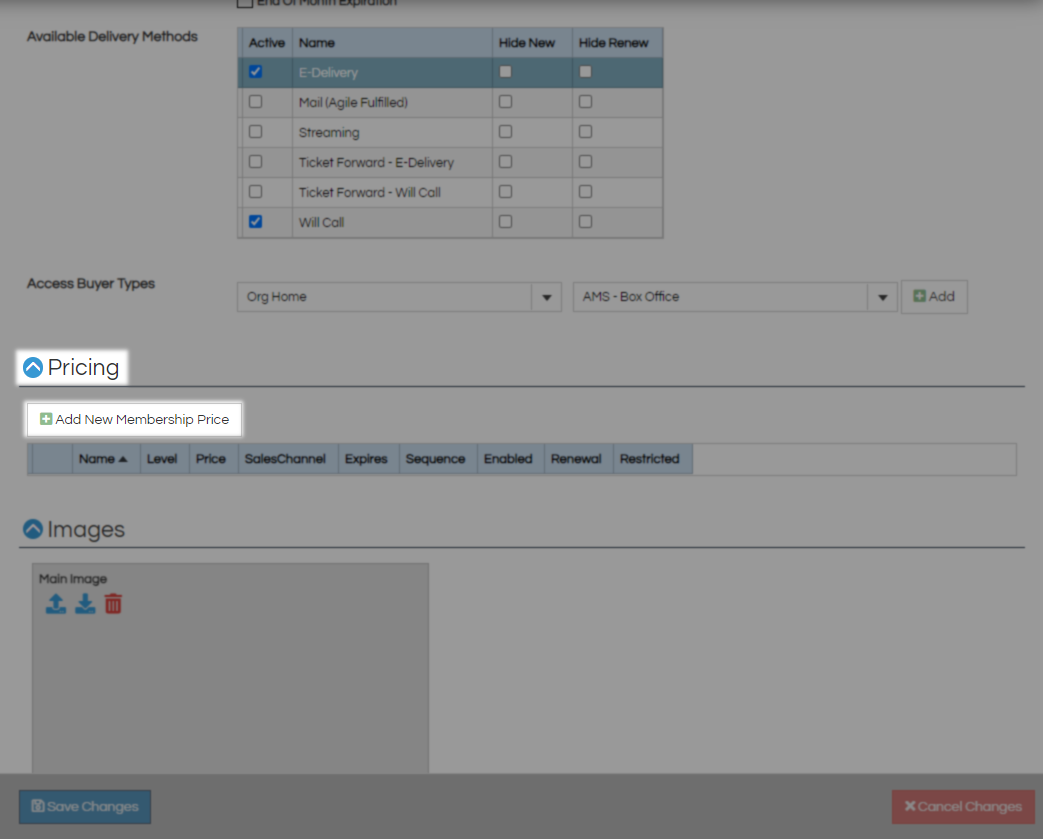
Scroll down to the Pricing section and click Add New Membership Price to create a new price for this program.
On the General tab Buyer Type is the first field, AMS Box Office and Web Online are the most common choices here.

Name (Select or Enter) is a customer-facing field and should be specific so for renewal prices it is best practice to put the word renewal in the Price Type and for this to match the next setting. Level (Select or Enter) is the next field and should reflect the type of benefits this price will receive, for this or the previous field you can type to create new options. For this example, a gold renewal price and a gold complimentary price would both just be gold level. For Renewals you will need to designate this as a renewal price by checking the Membership Renewal check box at the bottom of this page.

For Select Price you must either select or build the prices for this membership level. If you need to create a new price you can use These Instructions. For each level of membership you are building (such as silver and gold) you will want to build two prices, one for new memberships and the other for renewals. These items will need to be built separately so doing it this way makes pricing differences and changes easier in the future.

Sequence allows you to order these prices however you would like the customer to see them with higher numbers being further down the list. Expiration (Months) is how many months or on exactly which date this membership will expire depending on if this is a static or sliding membership.
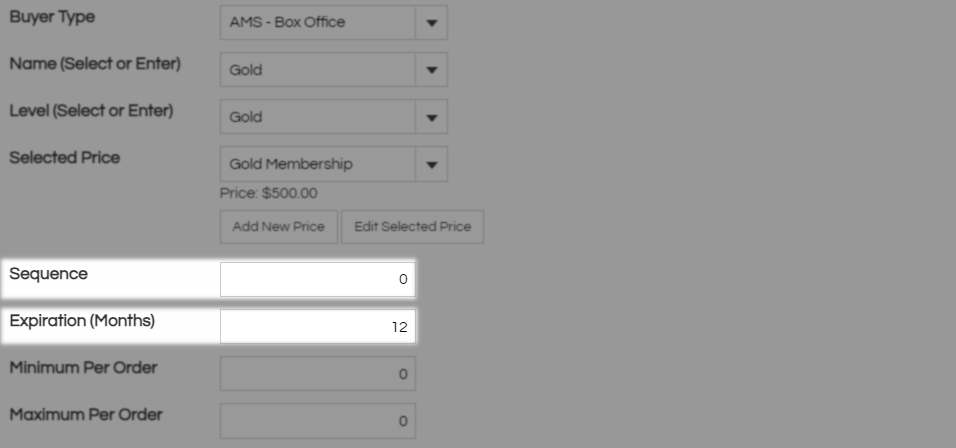
Minimum Per Order and Maximum Per Order Restriction is the number of this membership you are requiring customers to purchase with the default being 0-10. Min Cust Per and Max Cust Per are asking how many members you will allow or require to share this membership.

The next two fields are where you assign a value to the items you included during the new program creation process. In the Loyalty Accrual field put the number of points your customer will receive per dollar spent on your included items. In Loyalty Redemption put the number of points it takes to equal a dollar when spending them on redeemable items. In this example buying tickets or popcorn would earn 100 points per dollar and those could be spent to save one dollar per 1000 points. Best practice is to Accrue 100 points per dollar so the conversion of cents to points requires no approximation. On orders containing future showings the customer will receive all points after the date of the last showing, this includes packages.

Loyalty Program example of Customer experience
Once a customer has accrued enough points to cover the full value of an item they will see a loyalty toggle on any page with loyalty facing items.

Once toggled the points needed to purchase that item will be displayed along with the price and quantity.

On payment, these items will appear free and loyalty points will be subtracted from this account upon completion.

Print Format is where you pick the template for this membership card, you can use the Ticket Preview button to see what this membership card will look like. Card Per Member will issue a card for each member on this membership, Single Card will issue only one card to the primary membership holder.
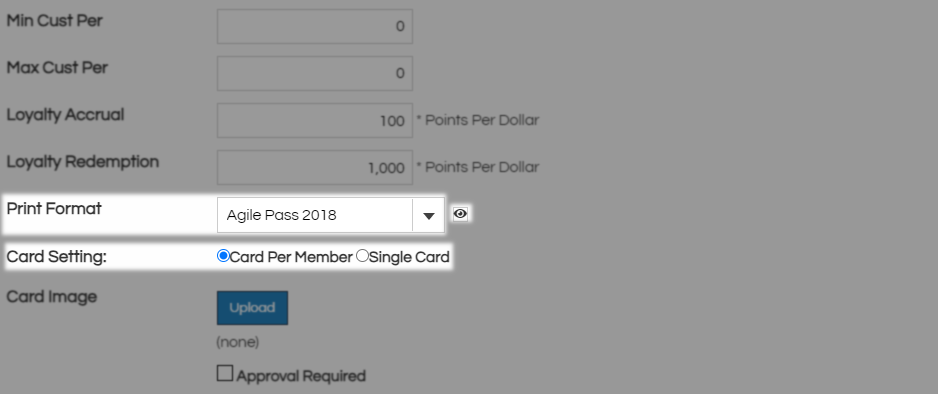
Card Image is where you would upload an image specific to this membership level. You only need to do this if you are printing double-sided cards. Approval is required for membership activation will put this in a queue that must be fulfilled before the customer will have any benefits. Approval Message is what customers will see to know they must wait for activation.

For renewals, you will need to designate this as a renewal price by checking the Renewal check box here as stated above. Prompt for Account Image will require the customer to add an account image which will display when their customer record is viewed.
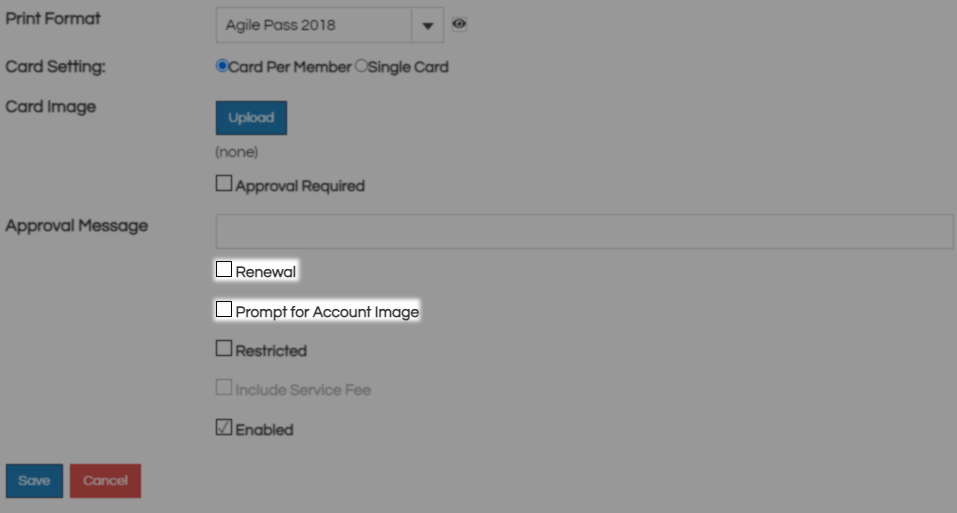
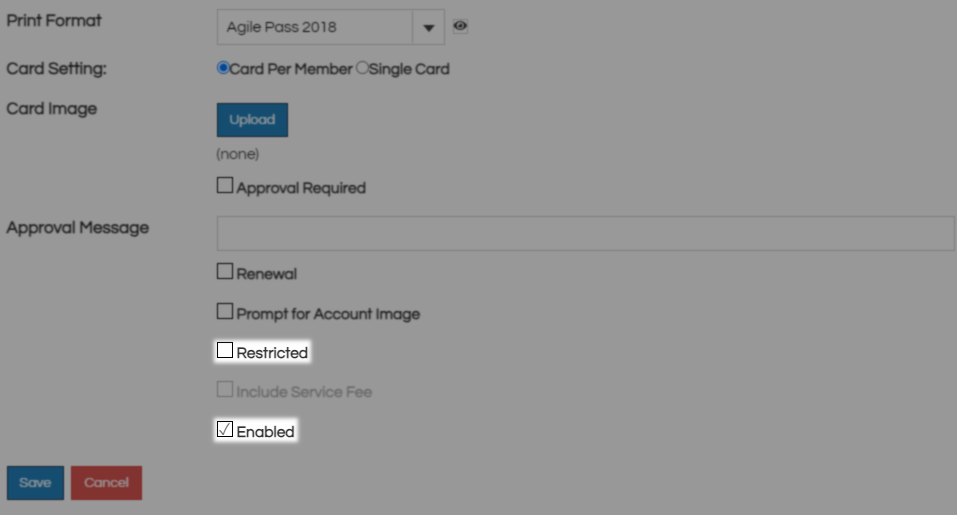
Restricted should be left unchecked for any new membership prices you want the general public to have access to. Renewal prices will be built with a check here and the system will unhide these prices when your customer comes to renew. Leave Enabled checked for this price to be active and scroll back to the top to get to the other tabs.
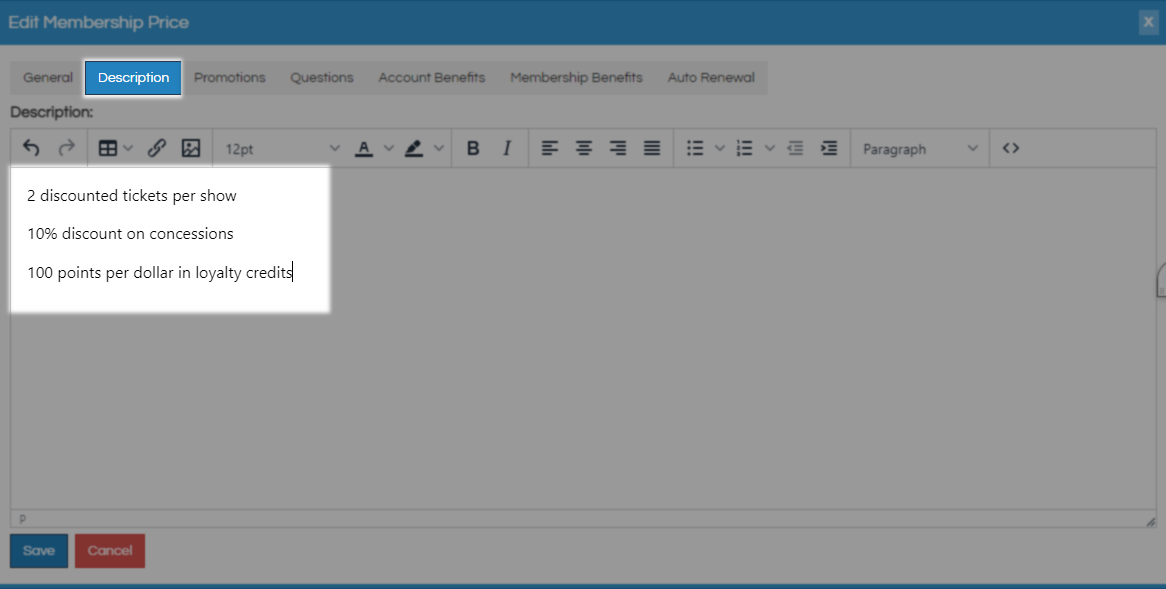
Anything put on the Description tab will load directly below the price for this membership level. If you have a small number of options this can be used to list all benefits or could say all previous plus this depending on how you want to advertise.
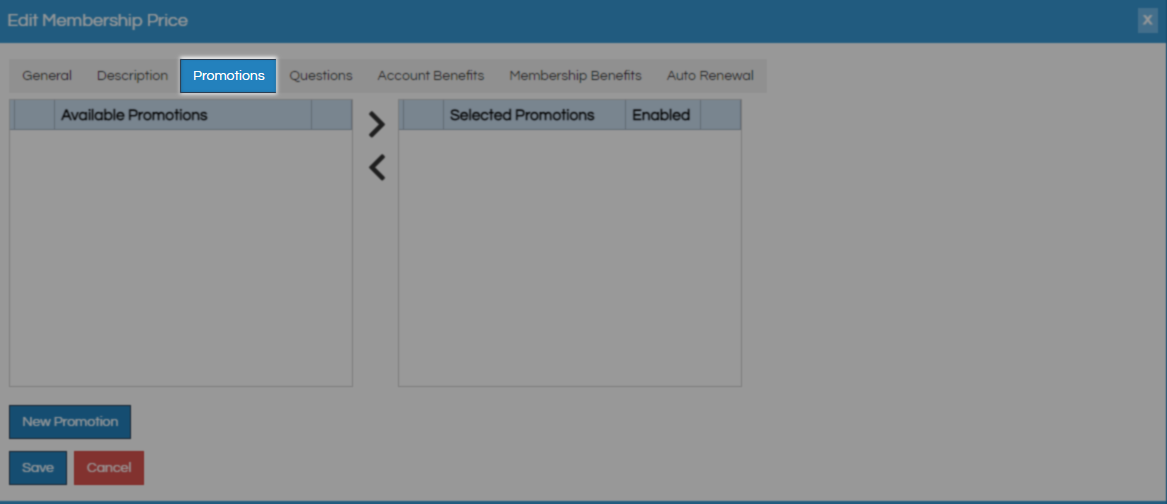
Promotions is the next tab and is where you would tie in promo codes for running a discounted price. You can follow These Instructions for help setting up a promo code.
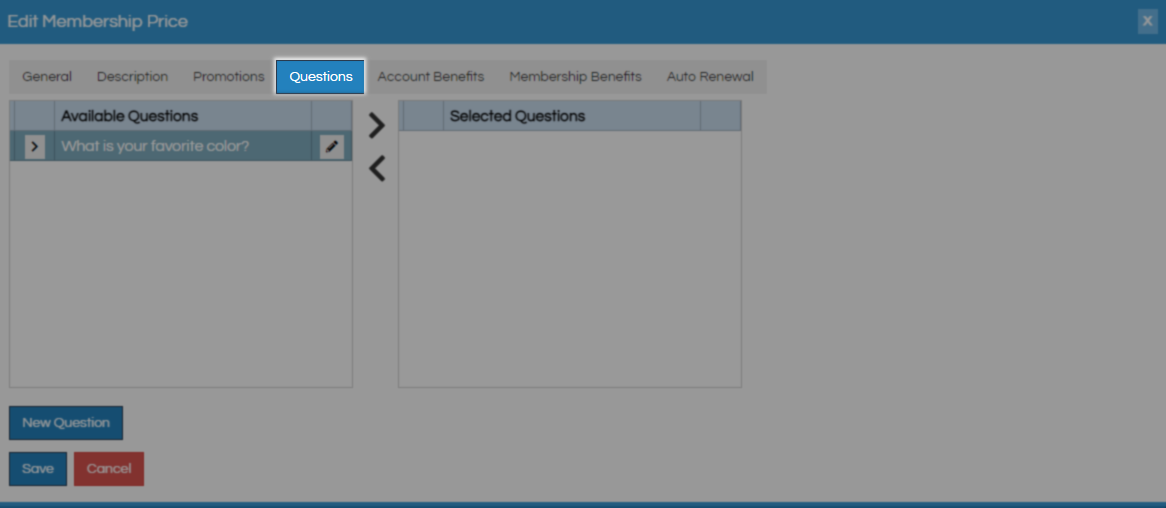
Questions allow you to create and attach questions to your prices that customers will have to answer. You can use These Instructions to add new order questions.
Account Benefits will be attached to the customer record of the purchaser, rather than to the membership created by a membership purchase. This can make account benefits harder to deal with globally than membership benefits, as their properties will have to be managed on individual member records instead of in the Benefit Group area.
Given that information, you can create new Account benefits by clicking the New Benefit button.

Regardless of this being Static or Sliding on the New Benefit window you must first select the Benefits you want to assign using the Benefit Group drop-down menu. Next for static pick the exact window of time where this benefit can be used. For sliding benefits, you will pick how long they last from the date of purchase.

Check Attach to Membership if this benefit should be available to every member on this membership otherwise, it will only attach to the primary membership holder. Checking Require Active Membership will require this membership to be active for the benefit to work and requires this benefit to be attached to a membership.

The Member Benefits Tab is where you attach the benefits for this membership level that you previously created. Click the New Benefit button to begin assignment.

On the New membership benefits window use the Benefit Group drop-down to select the level of benefit this membership gets. For sliding memberships, in the Effective Start Date area, you are selecting how many days and months to wait before this membership will begin, leave these both at 0 to start right away. Effective End Date should be how long this membership will last so a 1 or 12 in the month field are the most common settings. For a static membership, you will pick the exact date range these benefits are for.

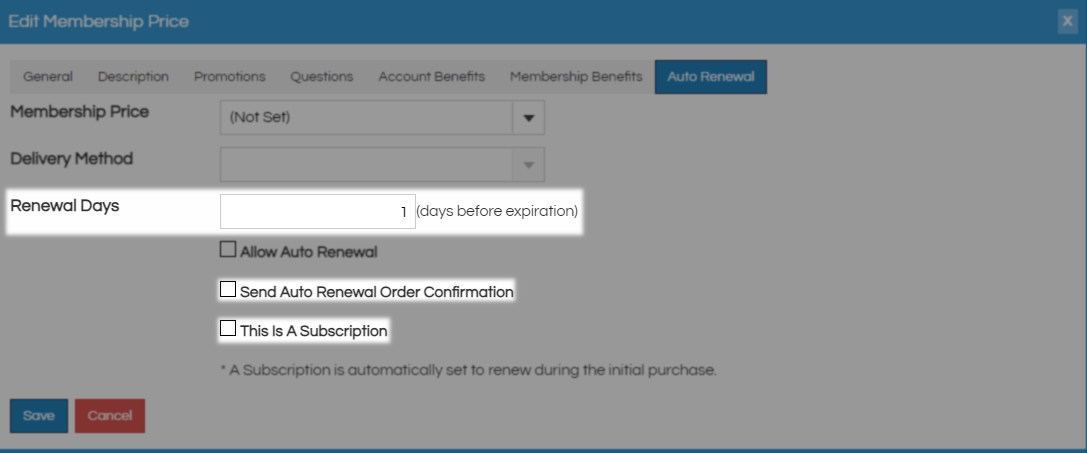
The Auto Renewal tab holds the information for automatic renewals of this membership level. Automatic renewals require credit card vaulting to store card information and has added costs, consult your representative to set up this service.
Check Allow Auto Renewal to designate this as an auto-renewable membership level and unlock the rest of the settings. The Membership Price drop-down is where you will pick the renewal price for this specific membership level, either set that now or return here once that has been created. Delivery Method is asking how and if a new card will be sent.
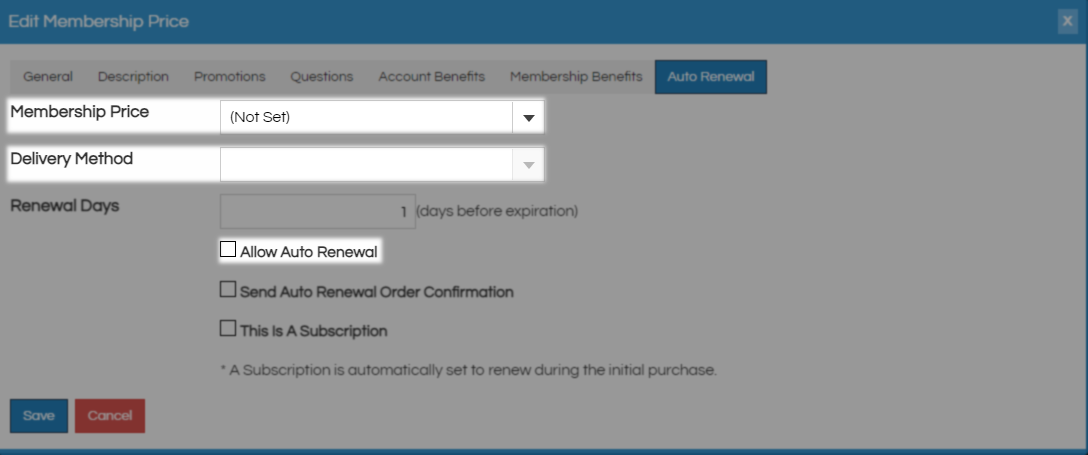
Renewal Days is asking how many days before the membership would lapse this will run. You could combine this with an expiration reminder email to remind customers this will happen soon. Send Auto Renewal Order Confirmation should be checked so this customer gets the details of this renewal via email. Check the This is a Subscription box to default this renewal into auto-renewal instead of it being a choice.
Click Save and repeat this process as many times as you have to for all sales channels and membership levels.
