Creating a New Price
Using simple or enterprise price mode to create new pricing.

Table of Contents
Prices in the AgileTix software are both the amount of money you want to collect for an item and a vehicle to interact with or delivery items to your customers. Prices can be built and edited either one at a time or in groups using the Windows app or web portal.
Simple Price Mode vs Enterprise Price Mode
At the folder level you decide how pricing for items in that folder are formatted. This can be changed later but best practice is to lock it in early and leave it alone. you can read more about folders by following this link.
Right-click any blue folder in the Windows App to swap between modes on the Tree Management tab. Not selecting simple price mode will leave you in enterprise mode.

Simple price mode will have you building amounts and payment accounts right on the price screen for every item individually. This is standard for concessions and merchandise due speed and lack of complexity.
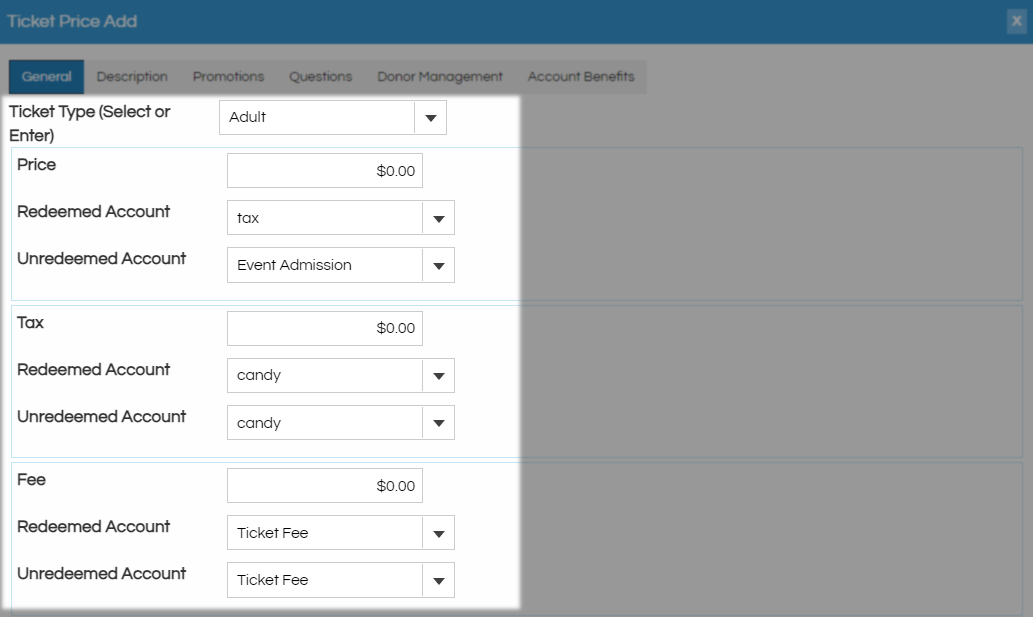
Enterprise price mode will have you building amounts and payment accounts then naming them for use across the entire folder. This is standard for Shows and Events as it allows for blanket price changes and reusing common ticket prices.
Web Portal New Price
Begin by Logging In to the Web Portal selecting Events, Memberships, Pass, Gifts, Concessions, Merchandise, or Multi Packs from the left menu bar. Click the edit pencil and scroll down until you find the Pricing and Inventory section for that item
Select your pricing method to continue.
Under either Pricing and Inventory Tiers or Pricing and SKUs you will find the Add Price/Add Ticket Price button used to create new prices.

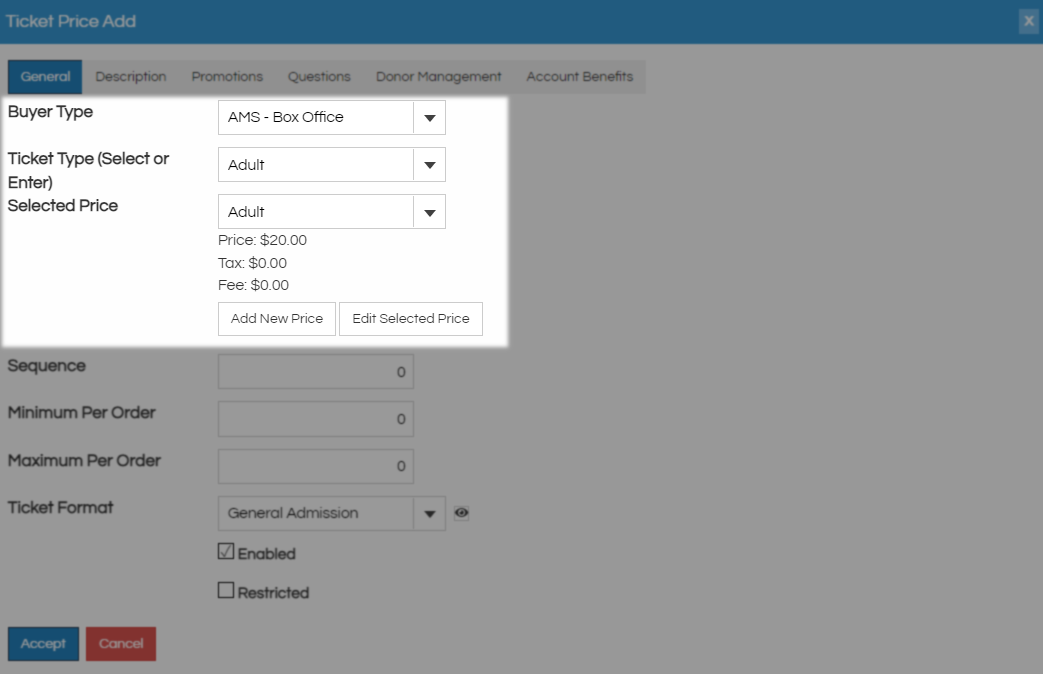
Buyer Type is the first field on the General tab and controls where this price will be available to purchase. In order to have this price show up in the box office and online you will need to build it for AMS - Box Office and Web - Online. Gate Control - Hand scanner will make this price available on any hand scanners being used to validate tickets.

Name is a customer-facing field, you can either pick from items on the drop-down or click and type directly into the box to add new ones to the list. For events and shows this name becomes your ticket type.
Selected Price is where your previously created prices live, select them using the drop-down and confirm below the drop-down this is the pricing breakdown you wise to apply. Click Add New Price to create new prices or Edit Selected Price if you want to raise or lower this price point.

After clicking either Add New Price or Edit Selected Price you will get the New Price window where you can build or make changes. Name is the top field and needs to be unique to the folder this price will be used in, if you are editing a price this field will already be filled out and locked in. If you are using these instructions to edit a price pay extra attention to the warning in red at the bottom of the page.

The Next sections will be some combination of Price, Tax, and Fee each with their own Redeemed Account. Starting with the Price field put the dollar amount you are collecting for this item and then select a Redeemed account for reporting purposes. If you need an account that is not on these drop-down account menus you can follow These Instructions to add more.

The Tax and Fee fields are optional so you only need to fill them out if you have them and are manually adding these items instead of letting the system handle them. Allow Variable Price when checking will swap this price from being static to being a range customers get to pick from. Fair Market Value will default copy the price field but when lowered will treat the difference between this and the price as a donation. Click Save to commit these settings and go back to the previous screen.

Back on the Ticket Price Add window the next item is Sequence which can be used to arrange your ticket prices. By default prices will list alphabetically, using sequence is how you manually control that order with lower numbers loading higher on the list. Minimum Per Order and Maximum Per Order are used to set how many of this item can or must be purchased at this price, 0 - 10 is the default but you can go as far as 0 - 200.

Start Date and End Date allow down to the minute control over when your prices are avaliable. This setting is perfect for early bird and day of price changes allowing them to be built in advance and automated to swap when you need them to.

Print Format tells the system which of your existing formats to apply to this price. Use the eye shaped Ticket Preview button to see an example of this format in use for this show. Checking the Restricted box will hide this price, hidden prices are made available by attaching a promo code or pointing a membership benefit at them.

Include Service Fee can be checked to include a pre-built fee onto this item and will be greyed out if you don't have that can apply. Enabled should remain checked for any active prices, unchecking it will leave this price here for later use but make it unavailable for now. Sales Occurred is not a selectable field and will self check after this price has been used for a sale. Click Save to commit any changes or create this price.

Under either Pricing and Inventory Tiers or Pricing and SKUs you will find the Add Price/Add Ticket Price button used to create new prices.

Their are no buyer types for simple price mode as part of their simplicity is being created for all buyer types automatically. Name is a customer-facing field, you can either pick from items on the drop-down or click and type directly into the box to add new ones to the list. For events and shows this name becomes your ticket type.

The Next sections will be some combination of Price, Tax, and Fee each with their own Redeemed Account. Starting with the Price field put the dollar amount you are collecting for this item and then select a Redeemed account for reporting purposes. If you need an account that is not on these drop-down account menus you can follow These Instructions to add more.

The Tax and Fee fields are optional so you only need to fill them out if you have them and are manually adding these items instead of letting the system handle them. The next item is Sequence which can be used to arrange your ticket prices. By default prices will list alphabetically, using sequence is how you manually control that order with lower numbers loading higher on the list. Minimum Per Order and Maximum Per Order are used to set how many of this item can or must be purchased at this price, 0 - 10 is the default but you can go as far as 0 - 200.

Start Date and End Date allow down to the minute control over when your prices are avaliable. This setting is perfect for early bird and day of price changes allowing them to be built in advance and automated to swap when you need them to.

Allow Variable Price when checking will swap this price from being static to being a range customers get to pick from. Fair Market Value will default copy the price field but when lowered will treat the difference between this and the price as a donation.

Print Format tells the system which of your existing formats to apply to this price. Use the eye shaped Ticket Preview button to see an example of this format in use for this show. Checking the Restricted box will hide this price, hidden prices are made available by attaching a promo code or pointing a membership benefit at them.

Include Service Fee can be checked to include a pre-built fee onto this item and will be greyed out if you don't have that can apply. Enabled should remain checked for any active prices, unchecking it will leave this price here for later use but make it unavailable for now. Sales Occurred is not a selectable field and will self check after this price has been used for a sale. Click Save to commit any changes or create this price.

Editing Prices as a Group
You can make many of the changes outlined in the section above using the Multi Edit button found in the Pricing and Inventory section of a showing or event. Select two or more prices you want to edit by holding SHIFT or CTRL on your keyboard and left clicking your prices then click the multi edit button.

Once the Edit Multi Price window opens you will have to unlock a field before you can make changes to it. Use the check box found on the left and top of these sections to unlock them.


Once the edits are complete click Save to commit your changes.

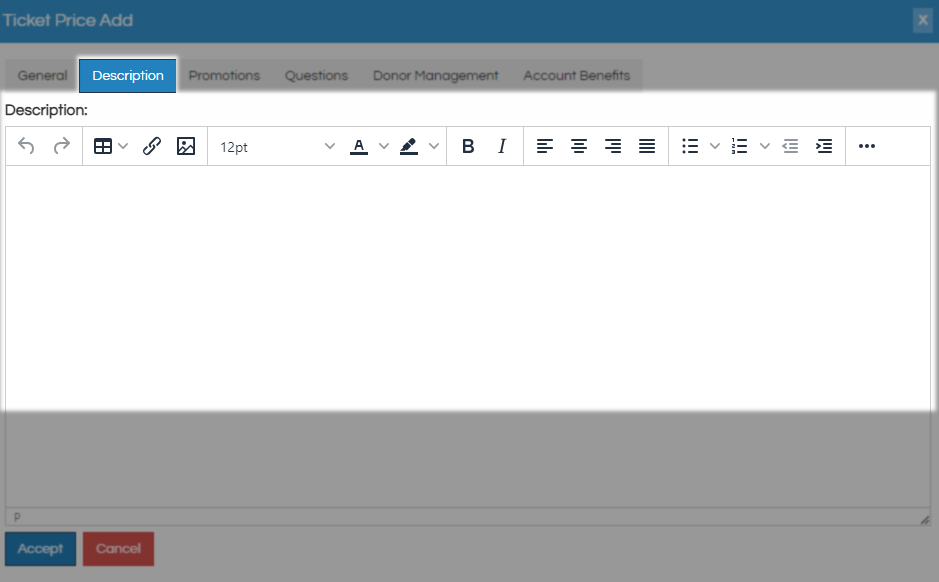
The Description tab is used for holding information that is relevant to this price specifically. Anything you put here will load directly under the price on the buy tickets page.
The Promotions Tab is where you can select any active promotions you have on this price. When a customer has this promo code it will make this price available for them to purchase online. To add a promo to this price move the desired promotion from Available Promotions to Selected Promotions using the arrow buttons between those fields or to the left of it's name. If you need a new promotion set up you can follow These Instructions to create one.

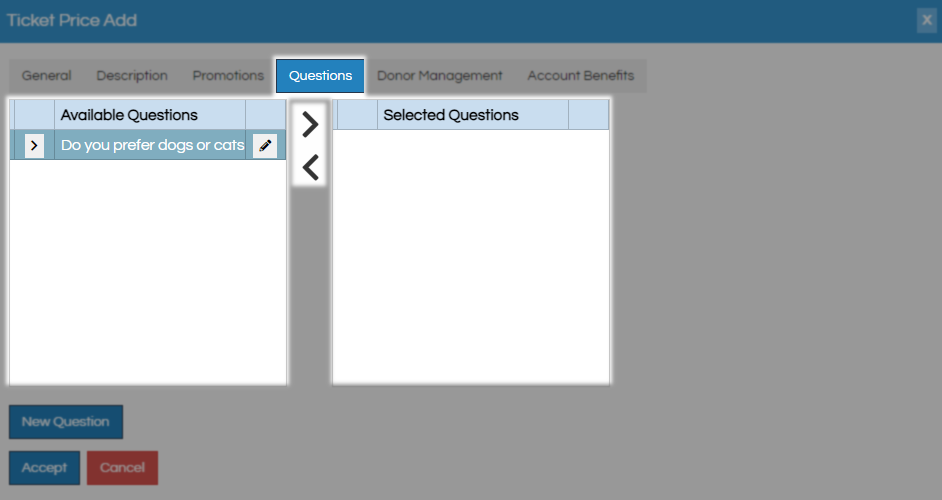
The Questions tab allow you to ask your customers for information at the time of purchase. This can be a simple yes or no, drop down with a list of choices, or open entry text field depending on what you need to collect. Follow These Instructions if you need to build a new question and use the arrows buttons to move a questions you have from Available Questions to Selected Questions so it becomes active.
The Account Benefits tab gives you a place to set benefits the customer will receive when making this purchase. These are built as membership benefits but when applied here are connected to the customer account not a membership program. Click Add Benefits to get started on building an account benefit.
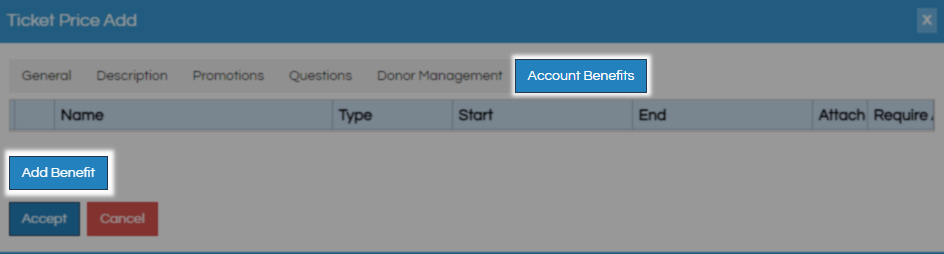
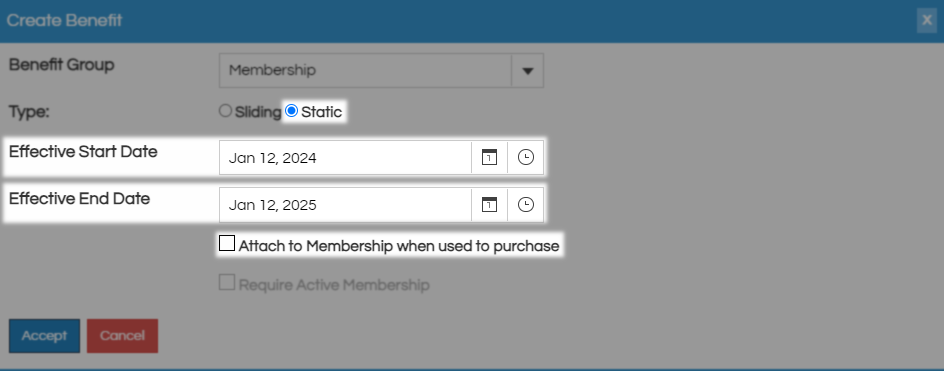
on the Create Benefit window, the Benefit Group drop-down will contain any active membership benefit groups you have so you must have built that already to select it here. You can follow These Instructions to learn how to build benefits under memberships. The two types of account benefits that you can apply are Static or Sliding.

Sliding benefits are active from the Effective Start Offset until the Effective End Offset. Start Offset is how many days from today you would like before these benefits start to work. End Offset is the number of days from today you would like this benefit to deactivate, anything between those two times is when these benefits will be active. If the price this account benefit is attached to was a member-exclusive price you can have these benefits attach to that membership using the Attach To Membership When Used To Purchase check box.

Static Benefits are active from the Effective Sale Date until the Effective End Date which are both preset windows of time. If the price this account benefit is attached to was a member-exclusive price you can have these benefits attach to that membership using the Attach To Membership When Used To Purchase check box.
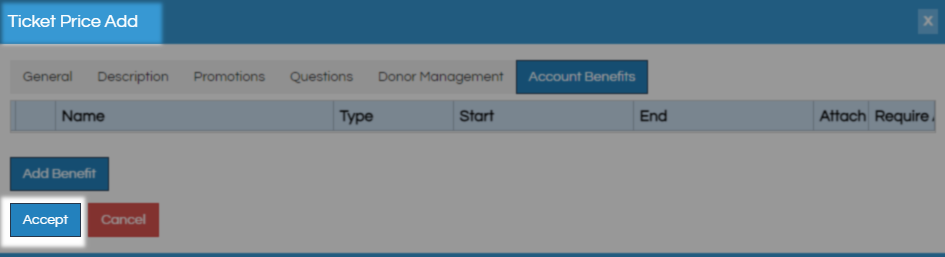
After using either method to create your benefits click Accept to go back to the previous screen.

Back on the Ticket Price Add page, you are ready to click Accept and save this new price.
ATS App New Price
Prices are built to be applied only to the nearest objects so while you can build prices in your manila Pricing Folder it is advised to build them in your Blue Folders. In this way they apply only to the items in that folder and you can more easily have recycled price names throughout your system.
Begin by Logging In to the ATS app and locate where this price will live.

The default price mode is Enterprise and its defining attribute is that you can change one price and have that change persist across a wide field of shows or events. This mode works best for daily admissions and cinema where prices usually go up all at once on a specific date. If your pricing window looks like this you need to follow the instructions for building an enterprise price.
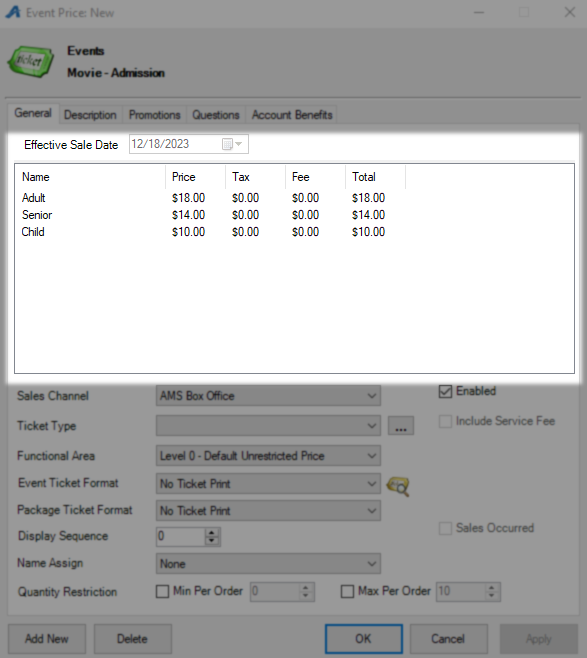
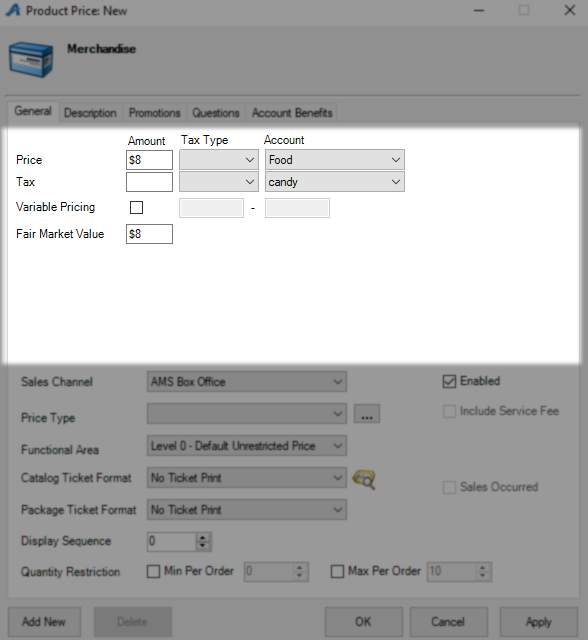
Simple is the other pricing method and is best for concessions and merchandise as well as live events where prices can vary wildly from day to day. If your pricing window looks like this you need to follow the instructions for building a simple price.
ATS App Creating an Enterprise price
Enterprise pricing takes a few extra steps to complete but the trade-off for taking the time can be far-reaching. On the General tab locate the Price Field and right-click so you can select New.

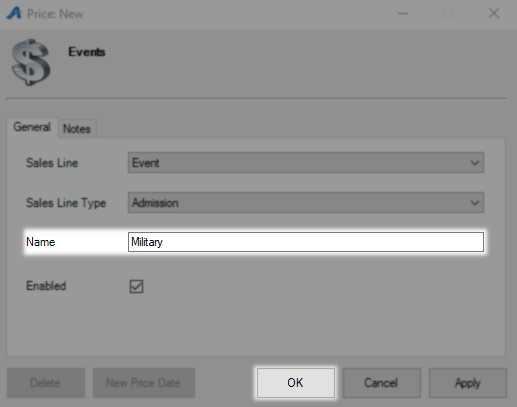
On the New Price window, you will have to pick a Sales Line and Sales Line Type from the respective drop-down menus. If you are building this price on a show or merchandise item directly these fields will already be locked in for you and new sales line types can be added with These Instructions.

Next, give this price a Name that needs to be unique to this folder but need not be unique to your entire system. Click OK to move on to the next steps.
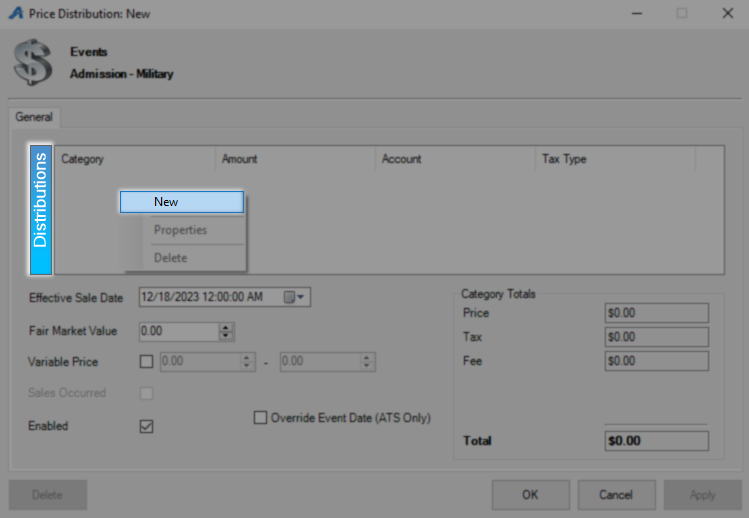
On the Price Distribution window right-click in the empty Distributions field and Select New.
Now in Distributions setup, the first field is the Price Category and your options will be Price, Tax, and Fee. Select Price in your Price Category drop-down and enter the price in Amount.
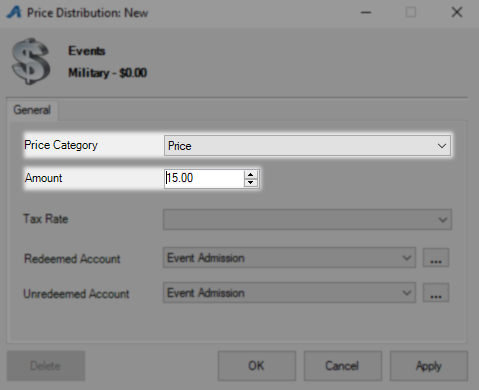
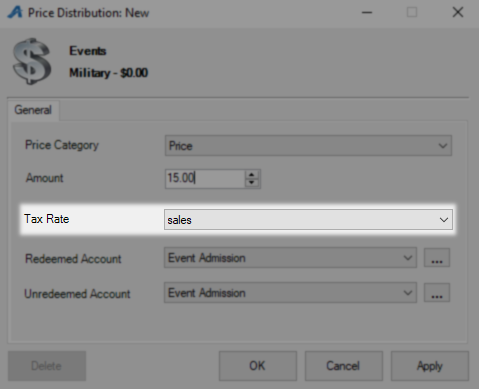
If you want the system to calculate your taxes this is where you select your predefined tax rate from the Tax Rate drop down. If the tax rate you need is not on this list you can add it to your system Here.
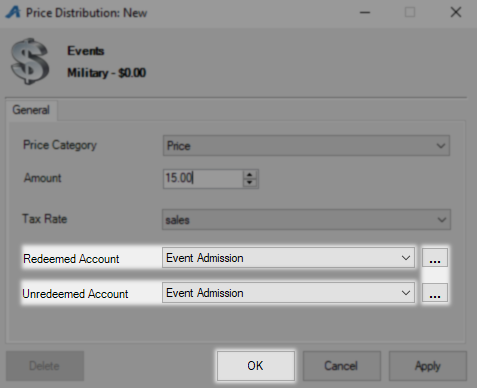
The final two options here are Redeemed Account and Unredeemed Account which are your Revenue Payments Accounts. This selection has no bearing on how money is taken only how it will be reported. You can add options by clicking on the Ellipses and following These Instructions. Click OK to save these settings and return to the previous screen, repeat this process selecting Fee or Tax at the Price Category if those need to be added.
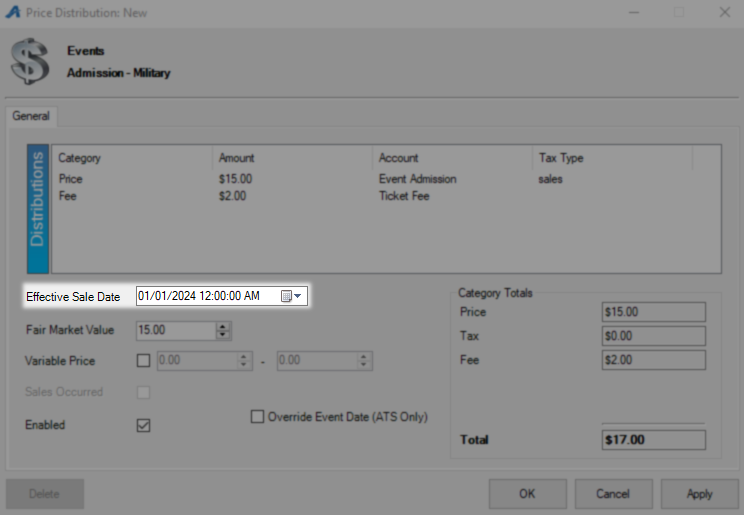
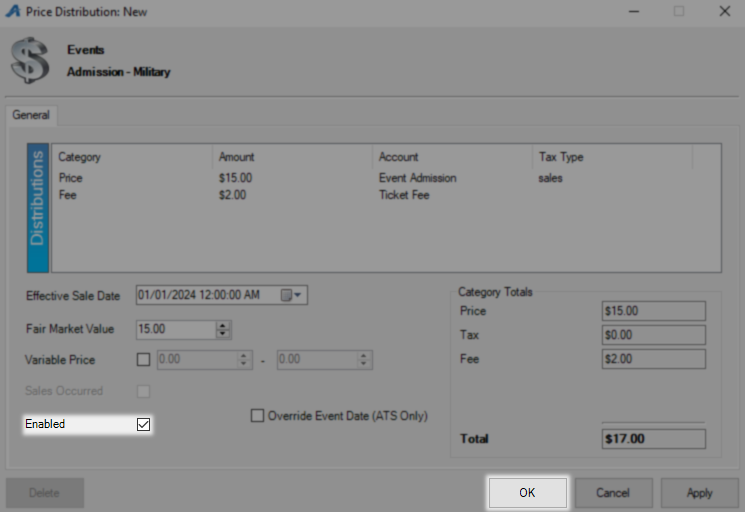
Back on the Price Distributions window Effective Sale Date is the next option to select. This is used to create a price for some future date and time so that price changes can be scheduled in advance. Leave this field unchanged to have the price take effect right away.
The next two settings for this price mode are Variable Pricing and Fair Market Value (FMV). Variable Pricing when enabled will override anything in the Price field with a range the customer can select from. FMV is used to determine what amount of an item is tax deductible with that amount being the difference between the FMV and the Price.
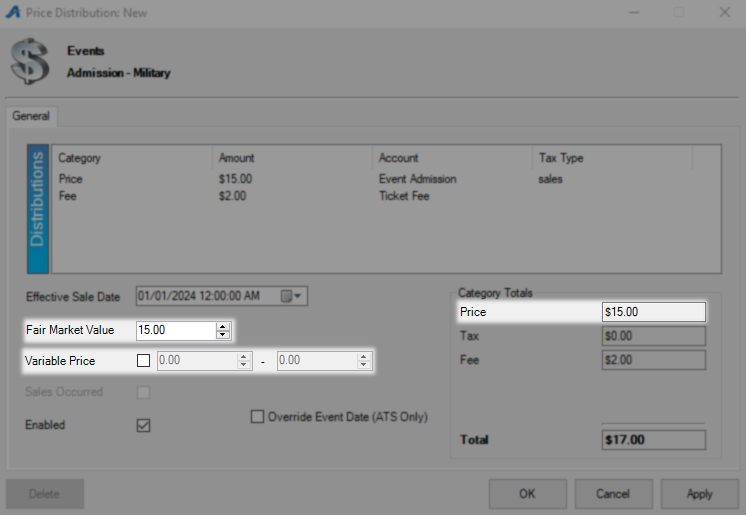
Make sure that Enabled remains checked if you want this to be an active price and click OK to save and close
ATS App Creating a Simple Price
As the name suggests this pricing structure is designed to be fast and easy with the system doing most of the lifting. On the General tab locate the Price Amount field and input your price.
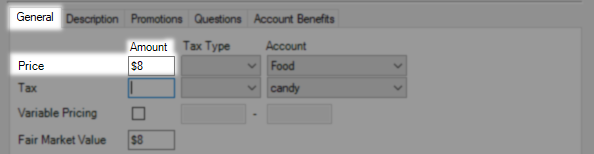
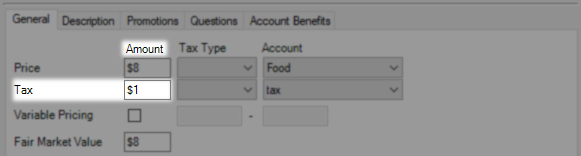
If this Price is going to have tax applied as a percentage of the total you will want to select which Tax Type from the drop-down. You can build new taxes in your accounting folder if this drop-down is empty and then re-open the price window to load it.

Taxes can also be built as a separate line item like a fee in cases where you want to be charging a specific amount and still be kept separate for accounting.
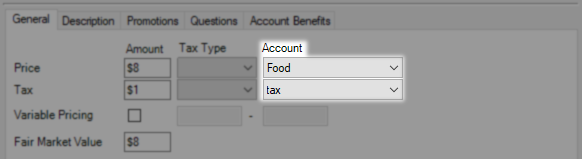
The Account drop-down is used to select how this money will be shown on reports and if the one you need isn't showing you can learn how to create more with These Instructions.
The last two settings for this price mode are Variable Pricing and Fair Market Value (FMV). Variable Pricing when enabled will override anything in the Price field with a range the customer can select from. FMV is used to determine what amount of an item is tax deductible with that amount being the difference between the FMV and what the customer pays.
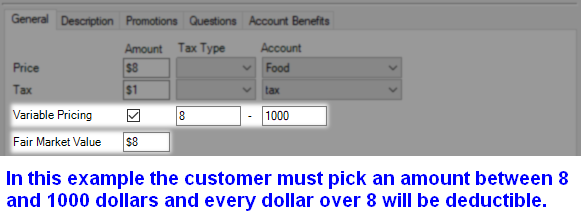
Variable Pricing as mentioned in both of the above walk-throughs is used to override standard pricing which is a set value and present your customers with a range of payment instead. The account used for this money will be the one built into the price that is being overridden.
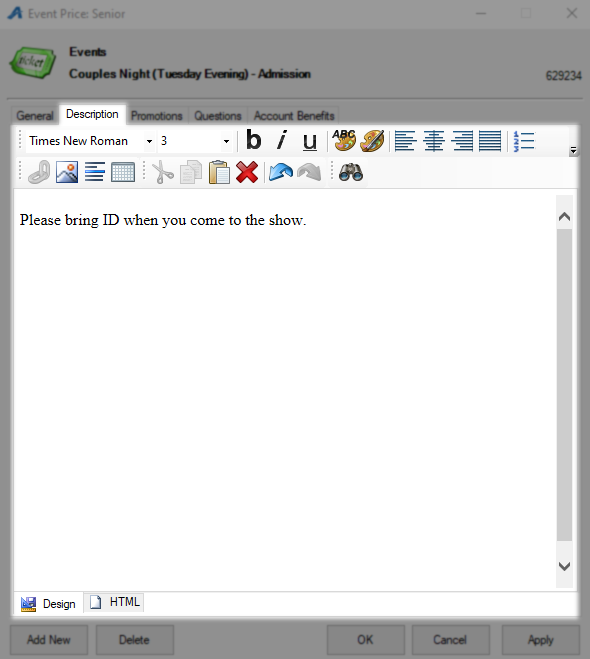
The Description tab is used for holding information that is relevant to this price specifically. Anything you put here will load directly under the price on the buy tickets page.
The Promotions Tab is where you can select any active promotions you have on this price. When a customer has this promo code it will make this price available for them to purchase online. To add a promo to this price move the desired promotion from Available Promotions to Selected Promotions using the arrow buttons between those fields. If you need a new promotion set up you can follow These Instructions to create one.

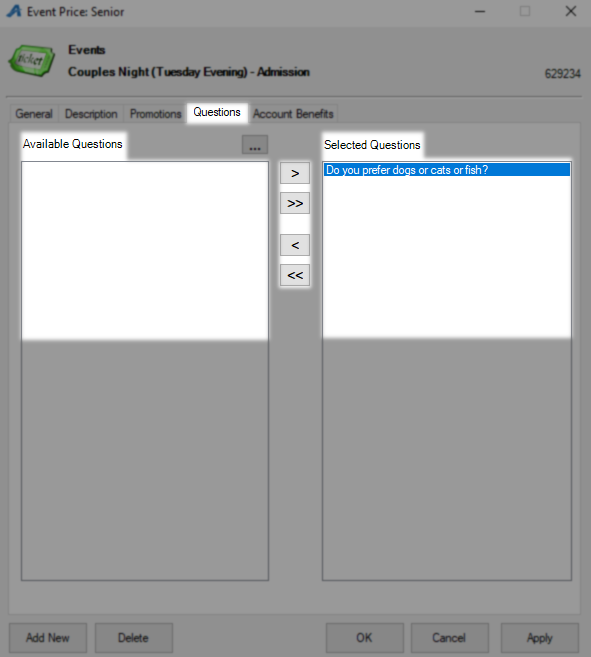
The Questions tab allows you to ask your customers for information at the time of purchase. This can be a simple yes or no, drop down with a list of choices, or open entry text field depending on what you need to collect. Follow These Instructions if you need to build a new question and use the arrow buttons to move questions you have from Available Questions to Selected Questions so it becomes active.
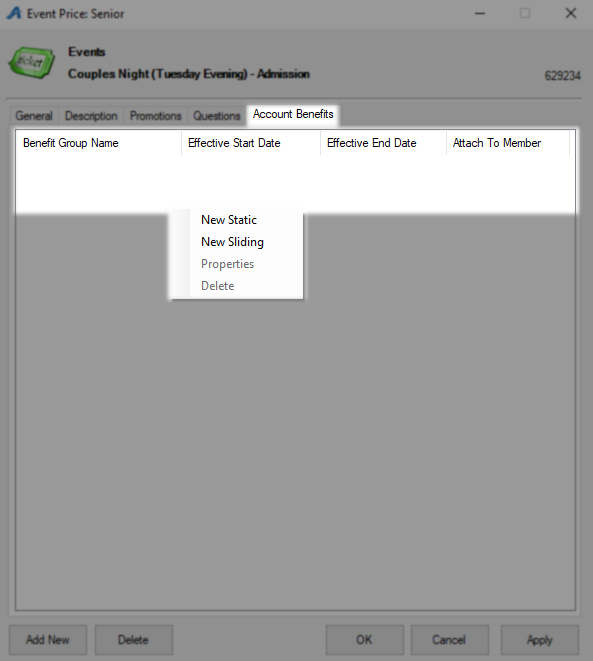
The Account Benefits tab gives you a place to set the benefits the customer will receive when making this purchase. These are built as membership benefits but when applied here are connected to the customer account, not a membership program. Right-click in the Benefits field and select either New Static which the customer will have from one specific date to another or New Sliding which goes for a period of time but no set dates to get started. You can learn more about building benefits Here in memberships.
After passing this last tab you can click OK to save and close this price.
Other ways to build a price
You can build a price independent of any specific show or item by opening the Price section of any Blue Folder and right-clicking in the top-level Price field. Select New to get started and follow the directions for Creating an Enterprise Price.
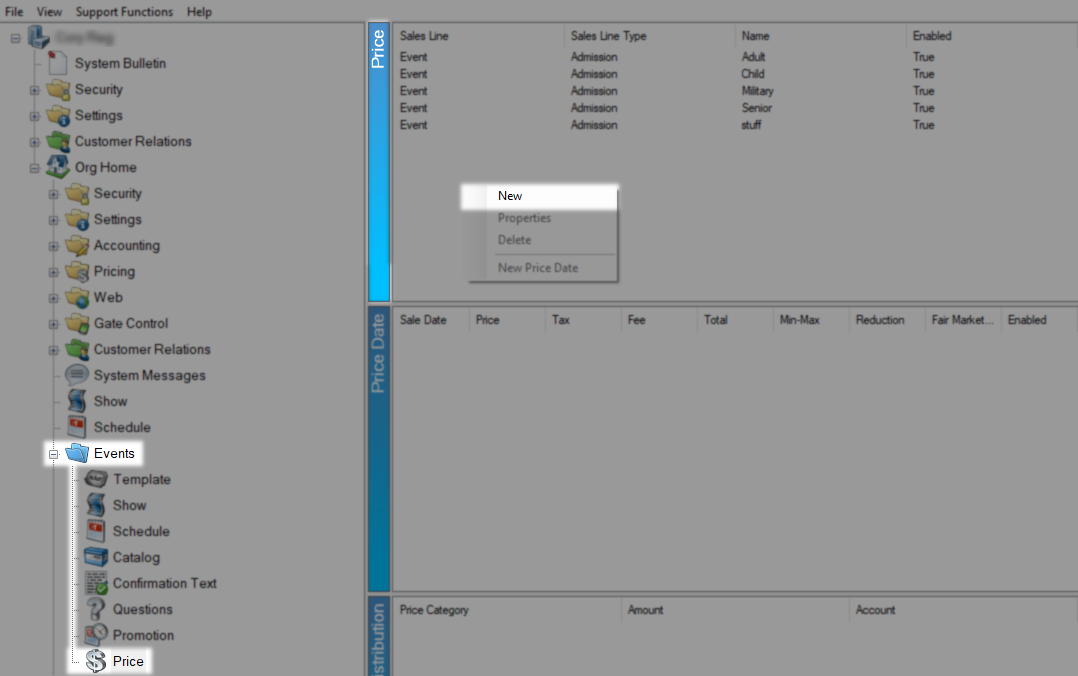
You will need to right-click in the Price Date field at the mid-level and select New after your first window closes while using this method.
