Creating a Revenue-Payment Account
How to create new GL codes for accounting and reporting

Table of Contents
Revenue-Payment Accounts are ledgers money will be recorded on as it passes through the system. You can name or number these accounts as you see fir to aid in future reporting. Follow the applicable instructions below to add a new account in the ATS App or Web Portal.
Creating a Revenue-Payment Account in ATS App
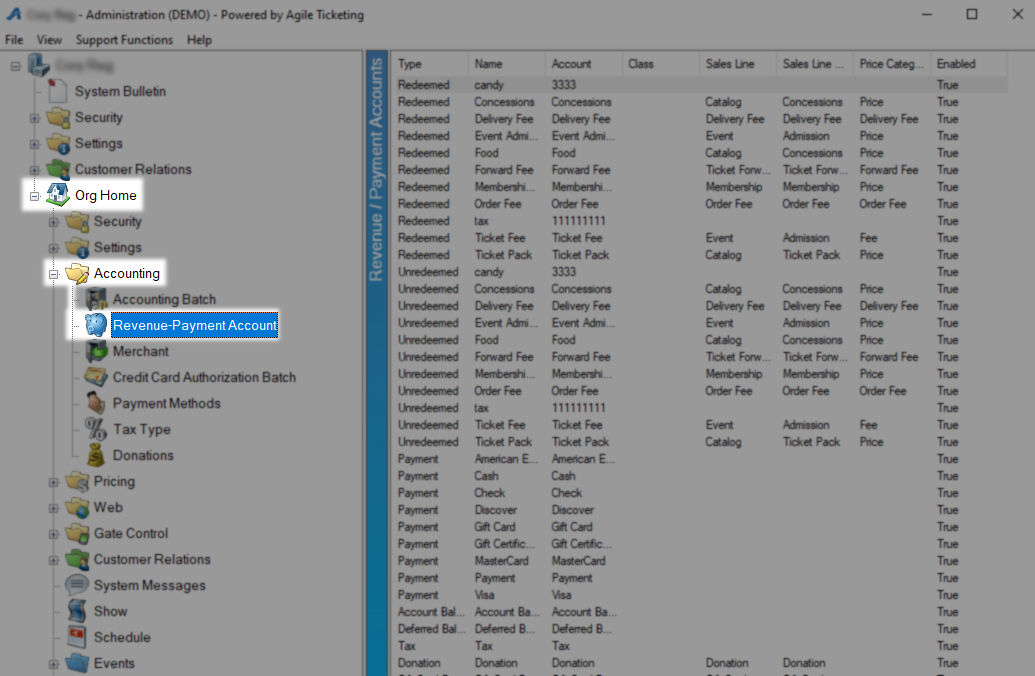
Begin by Logging in to the ATS app and locate the manila accounting folder under your Corporate Organization House. Open the Accounting folder and find the Revenue-Payment Account menu then click it to load all of your current accounts.
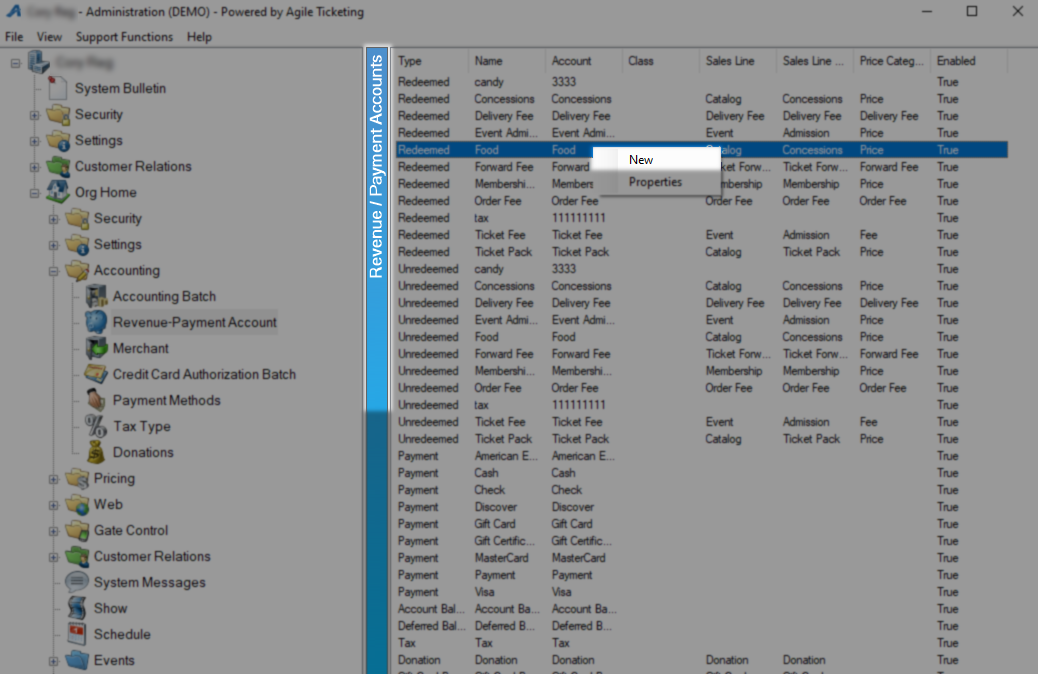
In the Revenue/Payment Accounts area right click and select New.
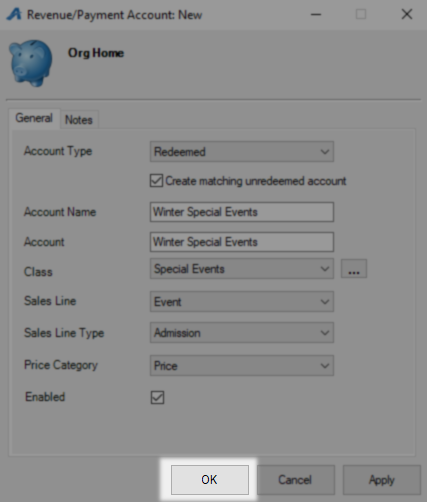
On the Revenue/Payment Accounts: New window you will be started on the General tab, locate the Account Type drop down menu. On the Account Type drop down you will find these options.
Redeemed - This is the account money will flow through on it's way to your merchant account and shows on some reports. These are the accounts used when you are building a new price
Unredeemed - This account is where money sometimes rests before becoming redeemed. You can check Create matching unredeemed account when creating a Redeemed account to create this automatically
Payment - Corresponds to a method of payment, contact your rep for help with this add as this is just one piece of that process.
Account Balance - You only need one of this account to handle all account balances.
Deferred Balance -You only need one of this account to handle all deferred balances.
Tax -You only need one of this account to handle all taxes.
Donation - Accounts for donations which can be very general or specific to a campaign.
Gift Card Program - You will have two of this account one each for gift cards and gift certificates.

When creating a Redeemed Account you can save some time by checking Create Matching Unredeemed Account and letting the system take care of that for you. Account Name is what you will pick on an account selection drop down menu and Account is the name that will show on reporting. These two account fields can be the same for simplicity. Class is a way to group Payment accounts and will appear on some reports, use the Ellipses button to add new classes if you need them.
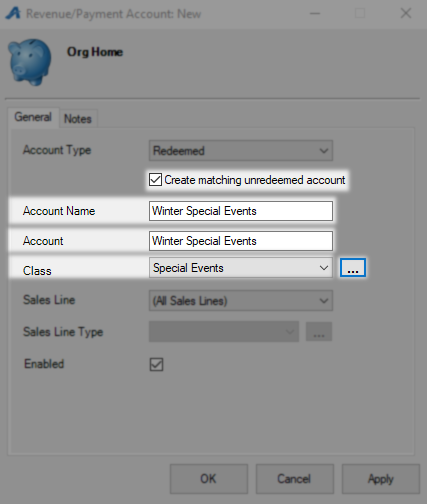
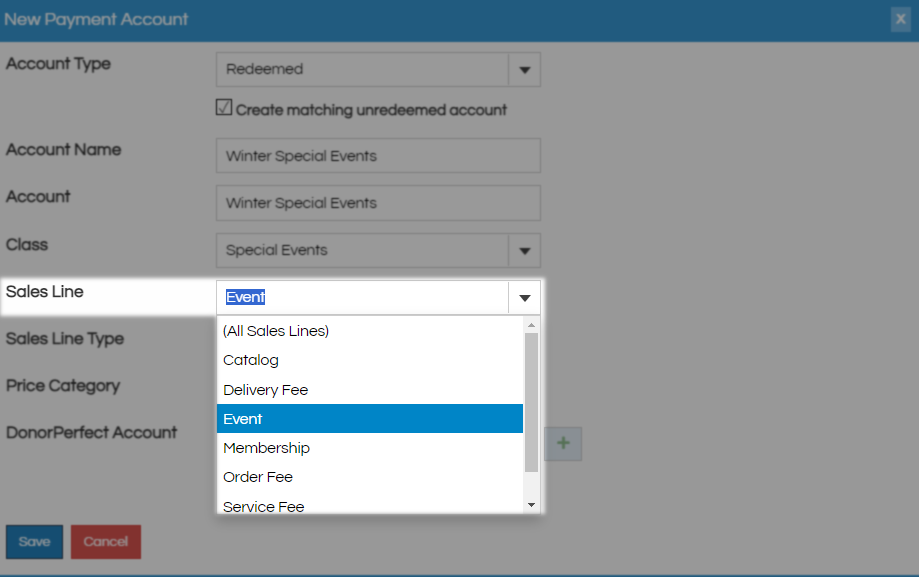
Sales Line is the broad category of item you will be using this account for, by breaking this down for specific items you keep the list of accounts for each item smaller and more manageable
(All Sales Lines) - Creates a universal revenue account that you will find on all prices.
Catalog - Creates an account for concessions, merchandise, ticket packs and some packages.
Delivery Fees - Creates an account for delivery fees like mailing.
Event - Creates an account for events and shows.
Membership - Creates an account for memberships and passes.
Order Fee -Creates an account for online or box office once per order fees.
Service Fee - Creates an account for per item fees.
Ticket Forward Fee - Creates an account for ticket forwarding fees.

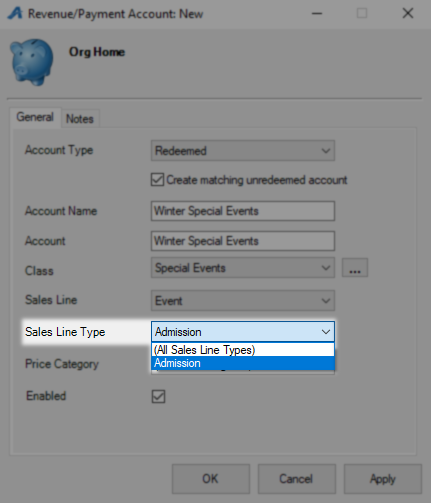
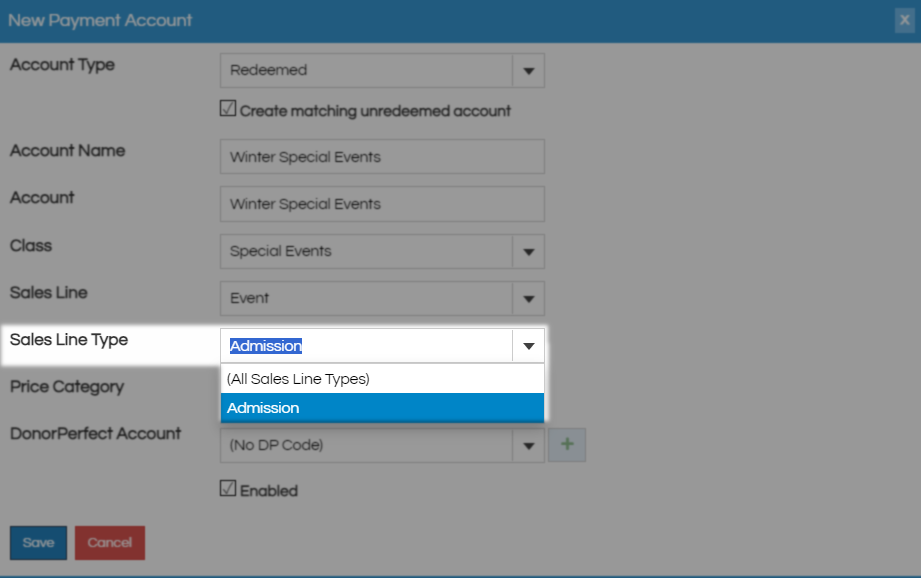
Sales Line Type is a more specific Sales Line so if you picked catalog above here is where you would pick concessions. The choice for this level should be obvious but you can pick All Sales Line Types if you are not sure.
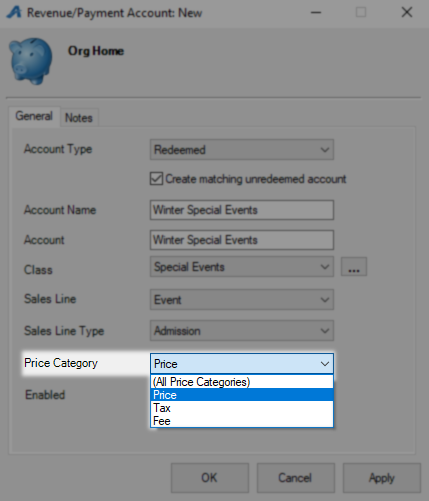
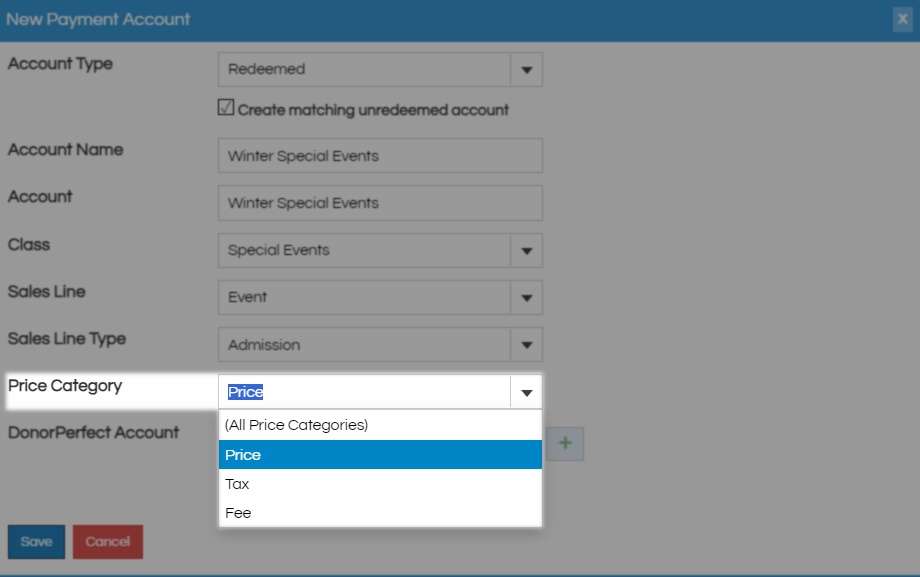
Price Category will match your Sales Line if you are building a fee or be broken down into some combination of price, tax, and fee otherwise. Pick the category that best matches what you need this account for or choose all price categories.
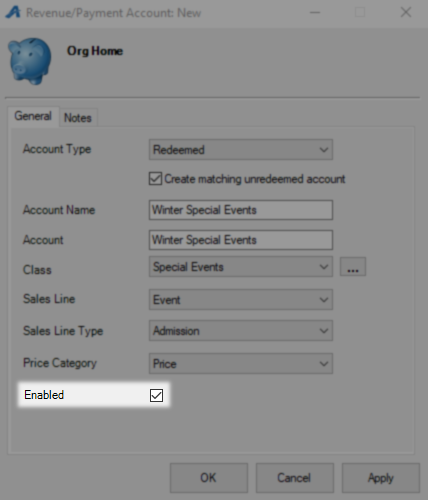
Uncheck Enabled only if you want to deactivate this account.
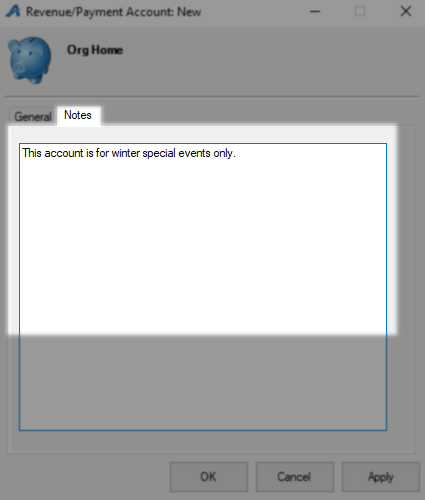
This tab stores information that may be needed or relevant in the future for this account.
Click OK to save and close this window.
Creating a Revenue-Payment Account in Web Portal
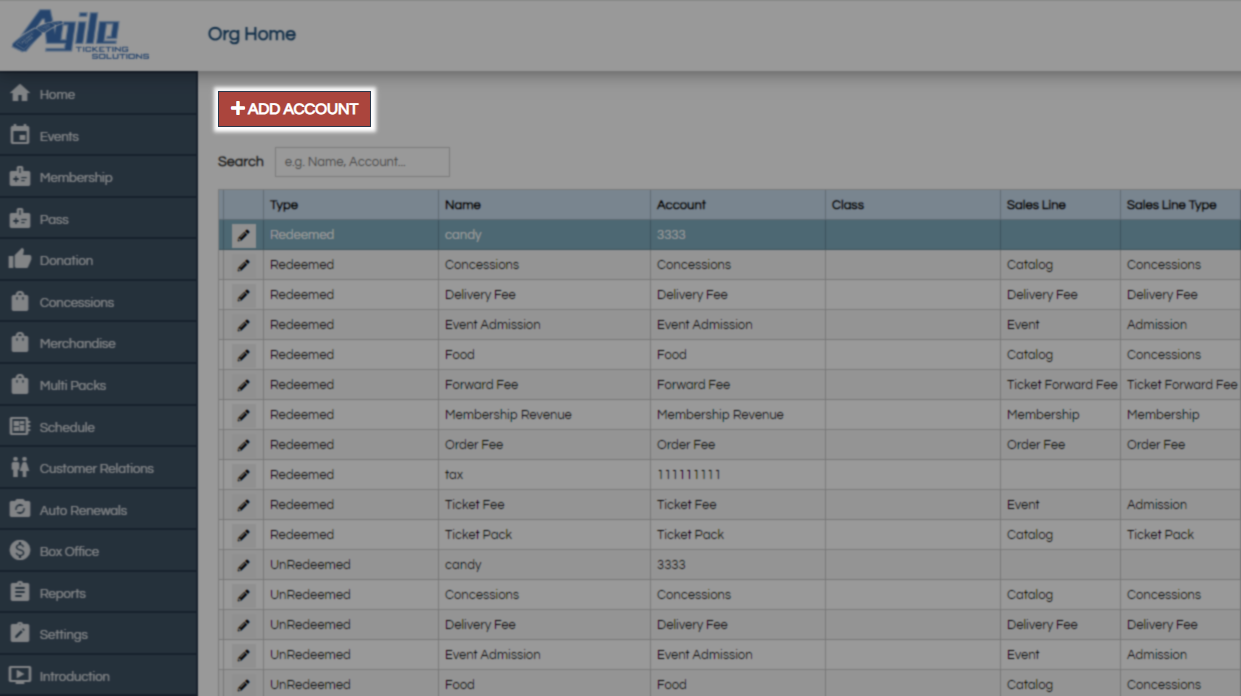
Begin by Logging In to the web portal and opening the Settings menu along the left hand side. Under the Accounting section find and click on Revenue Payment Accounts.

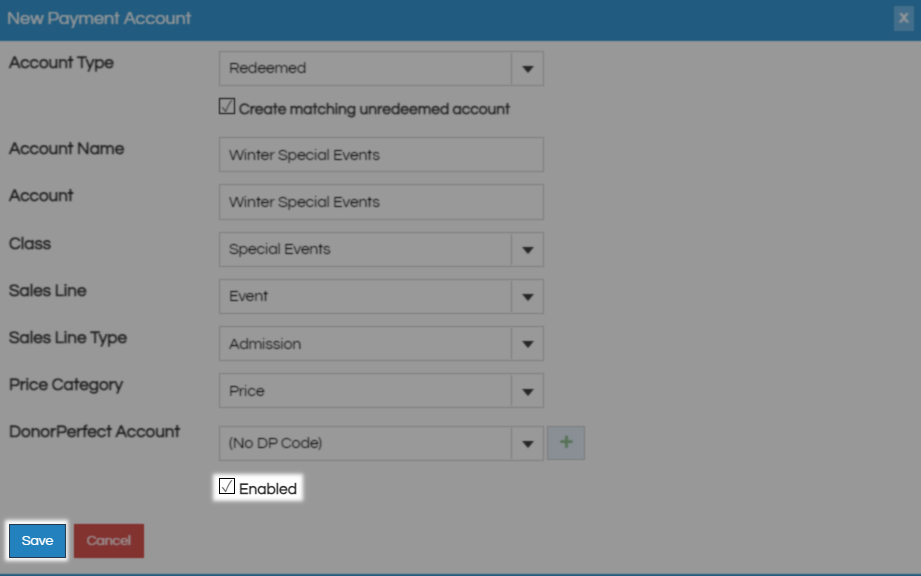
On the next page click the red Add Account button to begin creation.
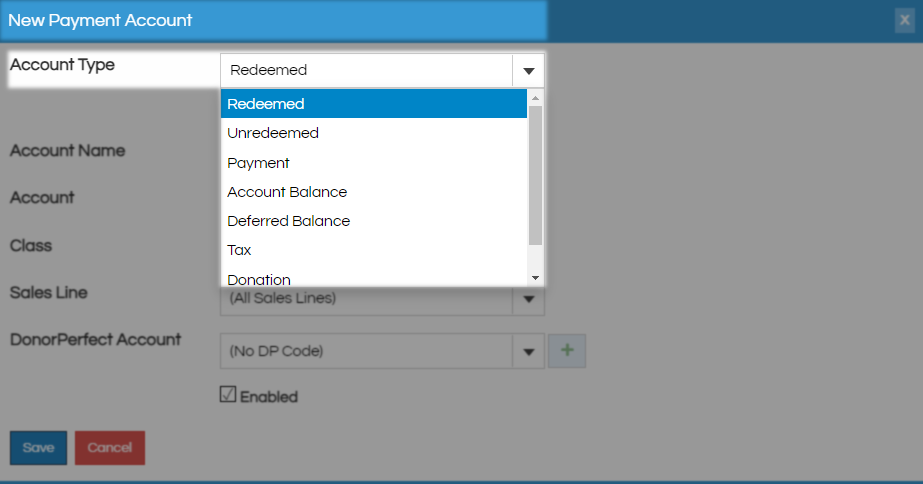
On the New Payment Account window locate the Account Type drop down menu. On the Account Type drop down you will find these options.
Redeemed - This is the account money will flow through on it's way to your merchant account and shows on some reports. These are the accounts used when you are building a new price
Unredeemed - This account is where money sometimes rests before becoming redeemed. You can check Create matching unredeemed account when creating a Redeemed account to create this automatically
Payment - Corresponds to a method of payment, contact your rep for help with this add as this is just one piece of that process.
Account Balance - You only need one of this account to handle all account balances.
Deferred Balance -You only need one of this account to handle all deferred balances.
Tax -You only need one of this account to handle all taxes.
Donation - Accounts for donations which can be very general or specific to a campaign.
Gift Card Program - You will have two of this account one each for gift cards and gift certificates.
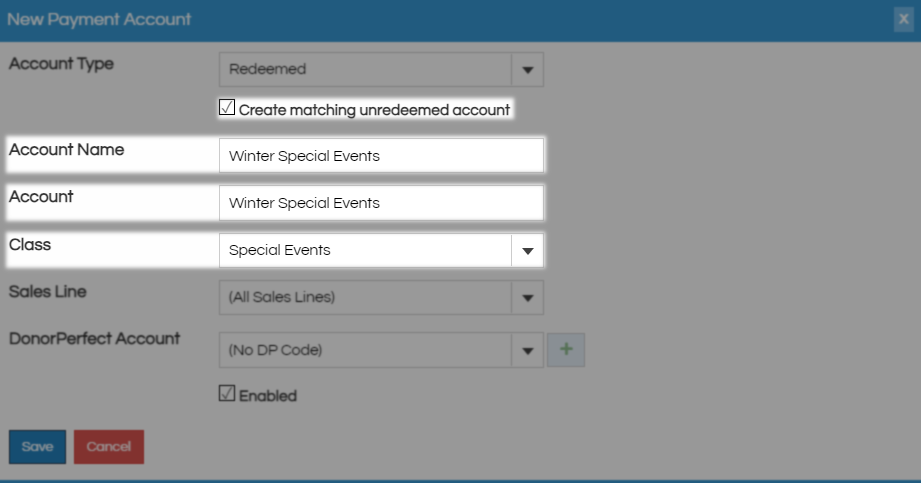
When creating a Redeemed Account you can save some time by checking Create Matching Unredeemed Account and letting the system take care of that for you. Account Name is what you will pick on an account selection drop down menu and Account is the name that will show on reporting. These two account fields can be the same for simplicity. Class is a way to group Payment accounts and will appear on some reports, type in this field to add new classes if you need them.
Sales Line is the broad category of item you will be using this account for, by breaking this down for specific items you keep the list of accounts for each item smaller and more manageable
(All Sales Lines) - Creates a universal revenue account that you will find on all prices.
Catalog - Creates an account for concessions, merchandise, ticket packs and some packages.
Delivery Fees - Creates an account for delivery fees like mailing.
Event - Creates an account for events and shows.
Membership - Creates an account for memberships and passes.
Order Fee -Creates an account for online or box office once per order fees.
Service Fee - Creates an account for per item fees.
Ticket Forward Fee - Creates an account for ticket forwarding fees.
Sales Line Type is a more specific Sales Line so if you picked catalog above here is where you would pick concessions. The choice for this level should be obvious but you can pick All Sales Line Types if you are not sure.
Price Category will match your Sales Line if you are building a fee or be broken down into some combination of price, tax, and fee otherwise. Pick the category that best matches what you need this account for or choose all price categories.
DonorPerfect Account is only used to tie this Account to a DonorPerfect campaign for external integration. Click the Green Plus and input a DonorPerfect account code and description to create a new account.
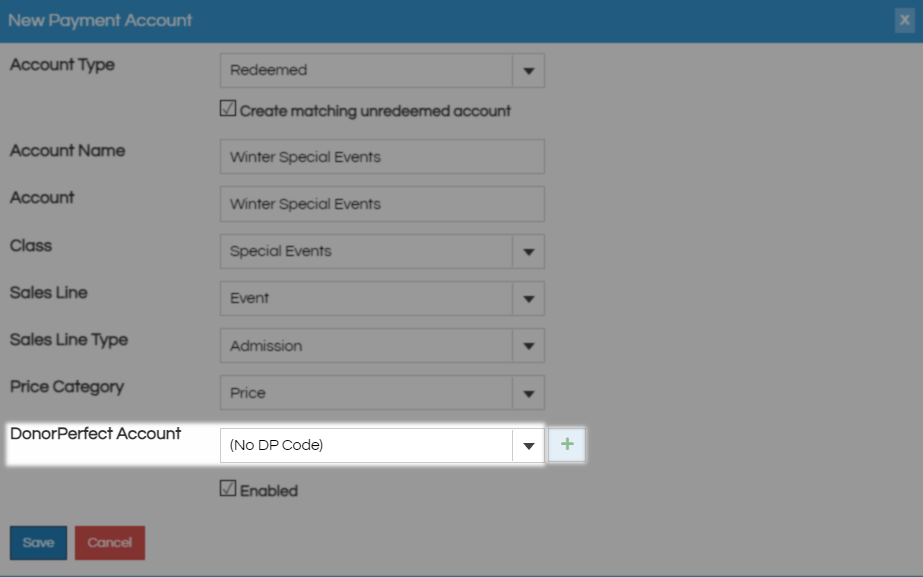
Uncheck Enabled only if you want to deactivate this account and click Save to close.