Creating Catalog Items
How to setup concessions, merchandise, and ticket packs
Catalog items are anything you wish to sell that will not have a ticket. This could include concessions, merchandise, rentals or ticket packs and you can either let the system track your inventory or set everything to unlimited and do that elsewhere.
New Catalog Item in ATS App
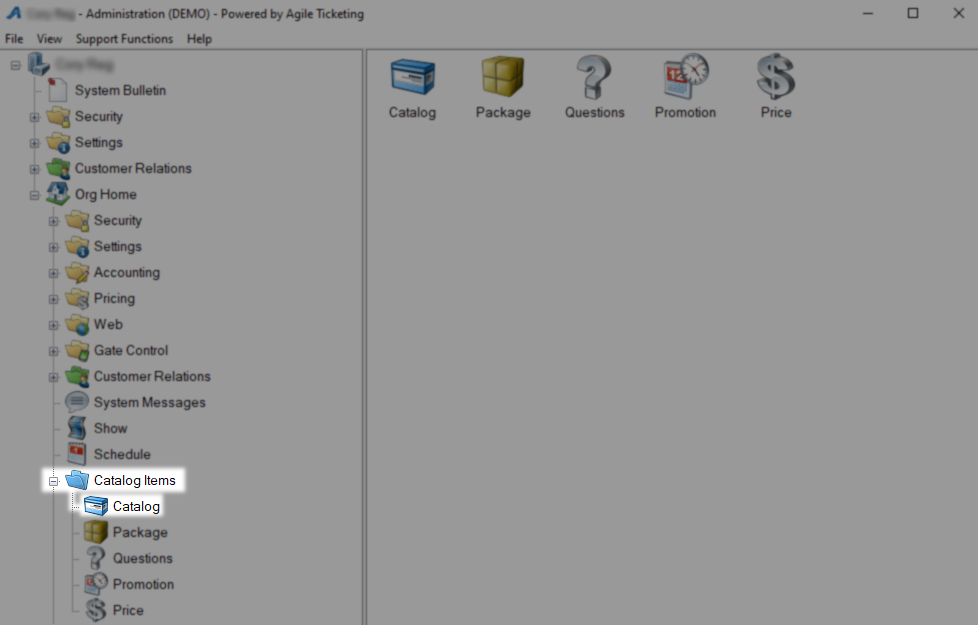
Begin by Logging In to Agile Ticketing Solutions (ATS) administration and locate where this Catalog Item is going to live. Best practice is to have a separate Blue Folder for catalogs and perhaps even separate merchandise and concessions depending on how many of each you have. Use These Instructions to add a new Blue Folder if you do not already have one for your Catalog items.
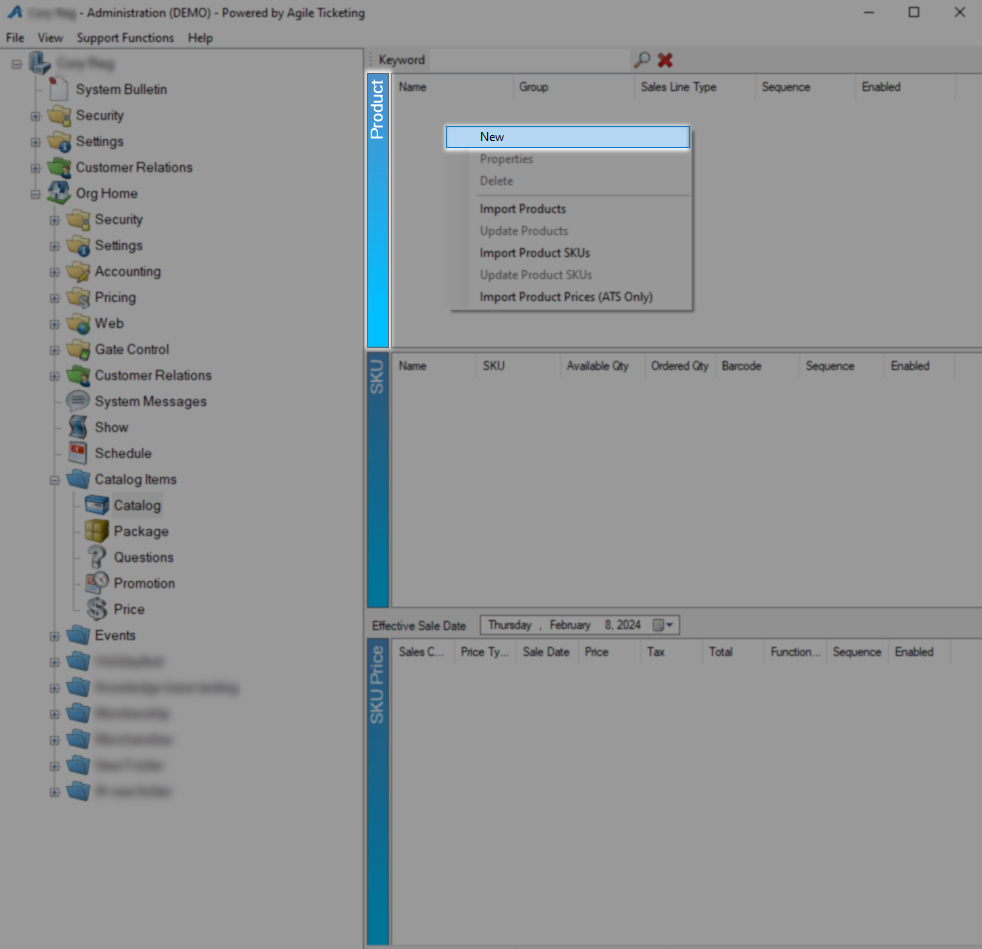
Right click in the Product area and select New to begin creating your catalog items.
Creating a new Product
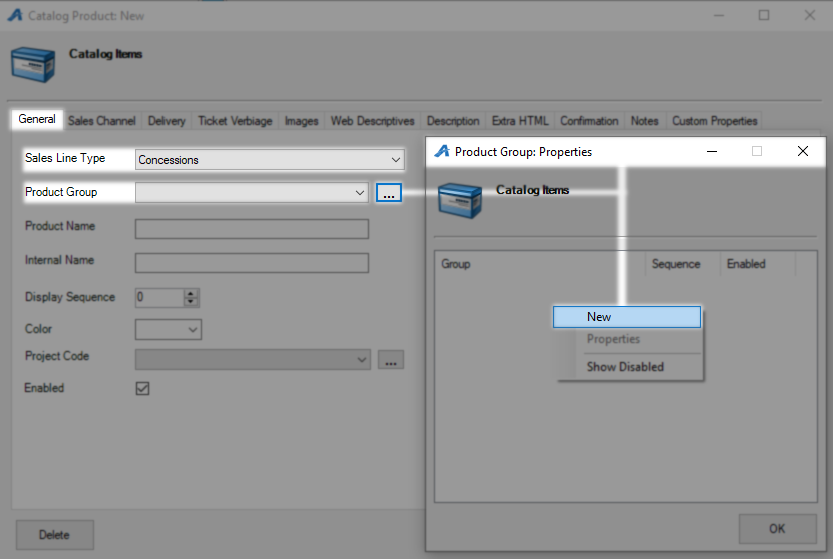
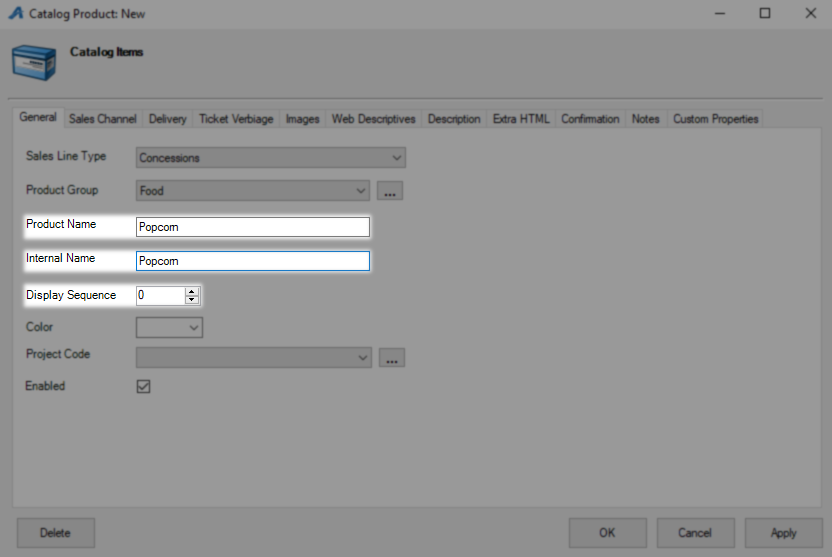
On the General tab first up is Sales Line Type which is the type of item you are building in the broadest possible terms. Product Group should be what this item is such as food or beverages. Use the Ellipses to the right to add new product groups if this drop down does not have the one you need. When the Product Group: Properties window opens right click anywhere and select New to add your product group.
Product Name should be what this items is and will print on orders. Internal Name will be used on reports and can be the same as the Product name. Display Sequence will determine where on a list this item will show up with lower numbers being higher on the list.
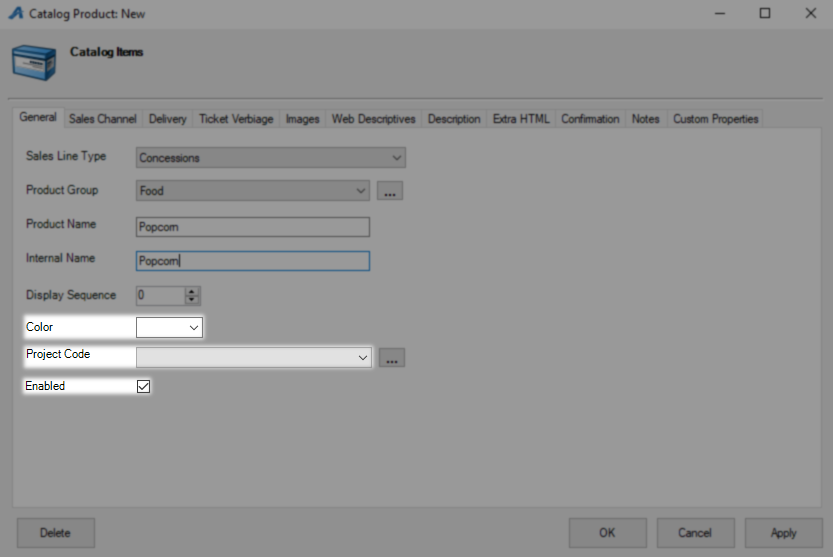
Color will set the button color for this item over on the POS. Project Code is used during reporting and make sure Enabled stays checked so this item will be available for purchase.
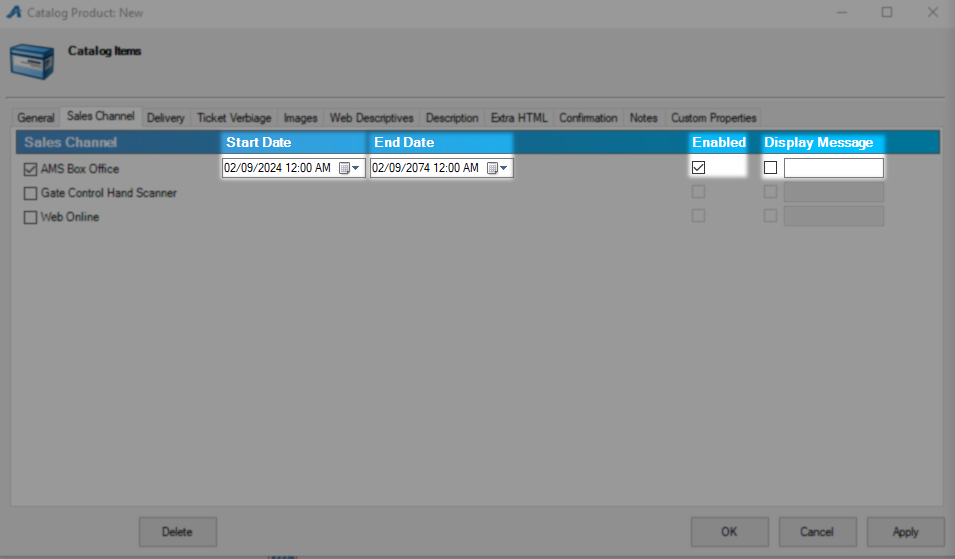
Next is the Sales Channel tab where you will put a check next to each one you would like to activate.
AMS Box Office - Prices available in your box office.
Gate Control Hand Scanner - Prices available to your iPhone scanning devices.
Web Online - Prices available to your online customers.

Start Date and End Date are when you want to start and stop selling this item, by default this will start the day you build the item and end 50 years from that date. Leave Enabled checked to keep this item on sale and you can put a sold out message for Web Online in the Display Message area if desired.
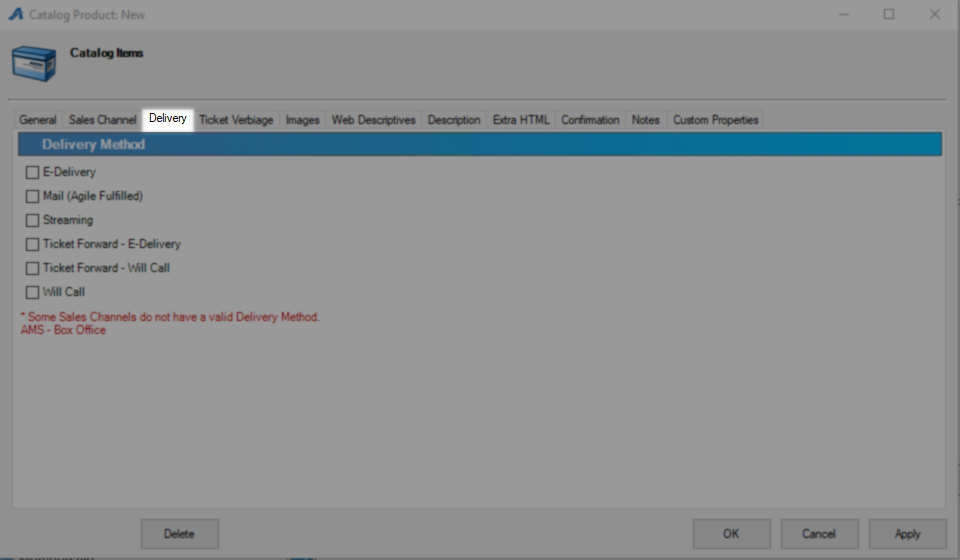
On the Delivery tab you only need to pick an option if you will be selling this item online and the customers has to choose how they will receive it. For all in house sales of catalog items you may leave this tab blank and disregard the warning message about having no delivery method set as customer will receive their items as they pay for them.
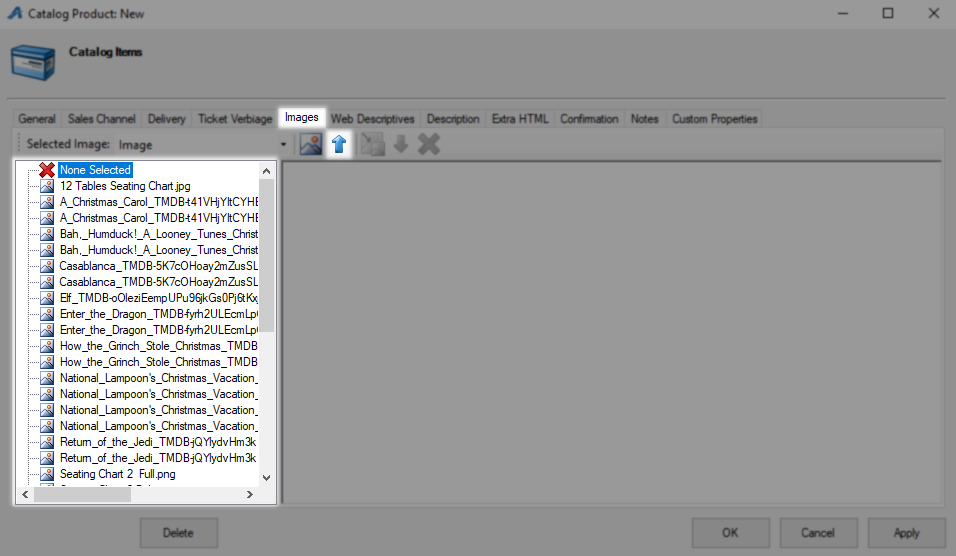
The Images tab allows you to upload images on your catalog items into the system. Once uploaded and selected this image will be used both online and if desired on your PoS screen buttons. Use the Blue Arrow to upload a new image and then click it on the Images List to the left.
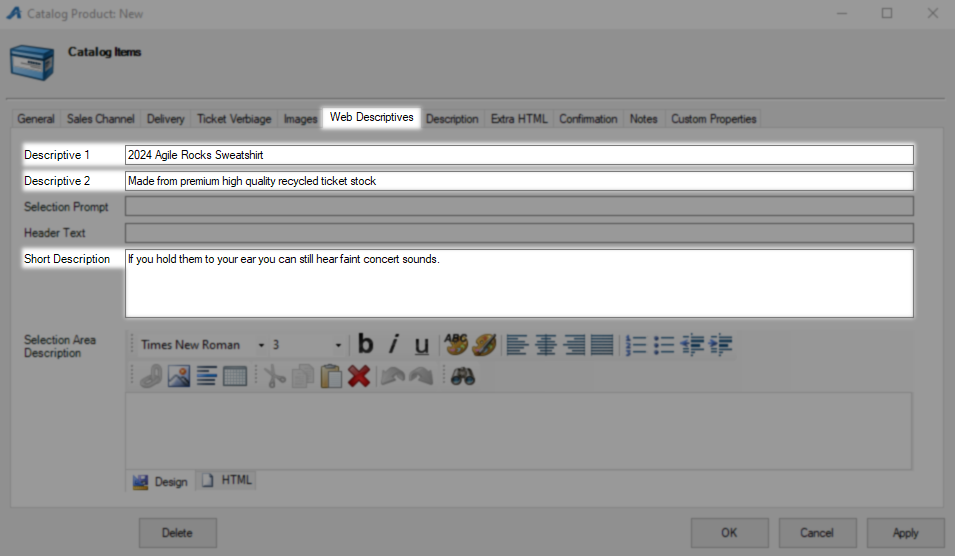
The Web Descriptives tab is for catalog items that are being sold online and gives you the fields to describe that item to your customers. Descriptive 1 and Descriptive 2 are both limited space fields for the most important information about this item while Short Description is where you will put a long form write up. Select Prompt lets you change the buy button for this item to something else for web sales.
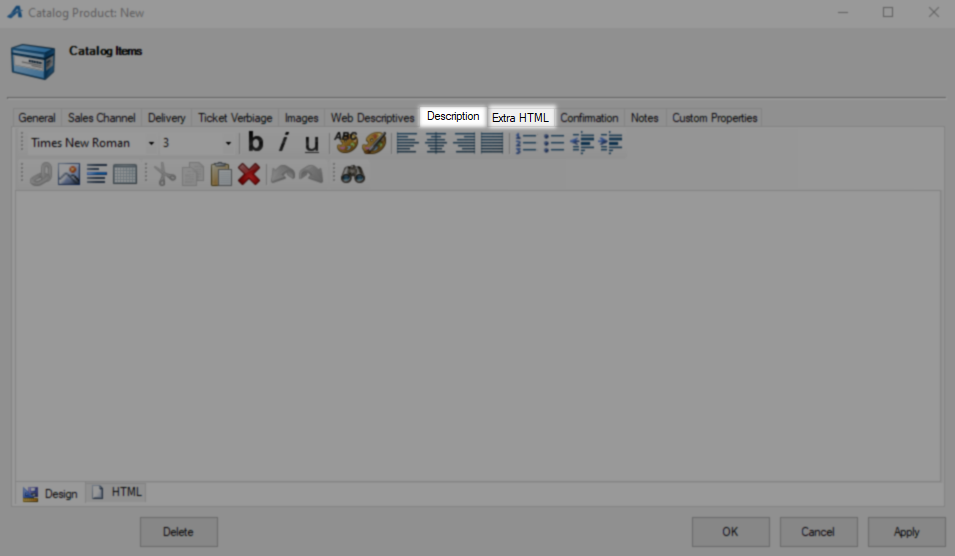
The Description tab is where you can put even more information about this catalog item that will load when customer are looking at it directly and not just on a list of items. The Extra HTML tab does this same job as overflow for the Description tab and loads below that information.
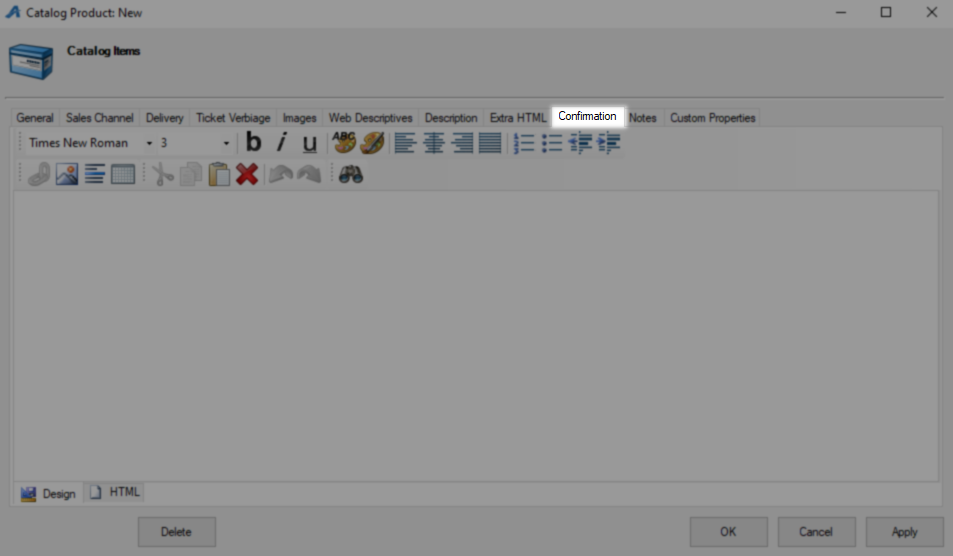
Information on the Confirmation tab will be added to the email customers receive when making an online purchase.
The Notes tab is a place to put information relevant to this item that does not need to be customer facing. On the Custom Properties tab you can be add information to fields which aid in web filtering. Use These Instructions if you need to set up new custom properties. Click OK to save and close the catalog Product window.
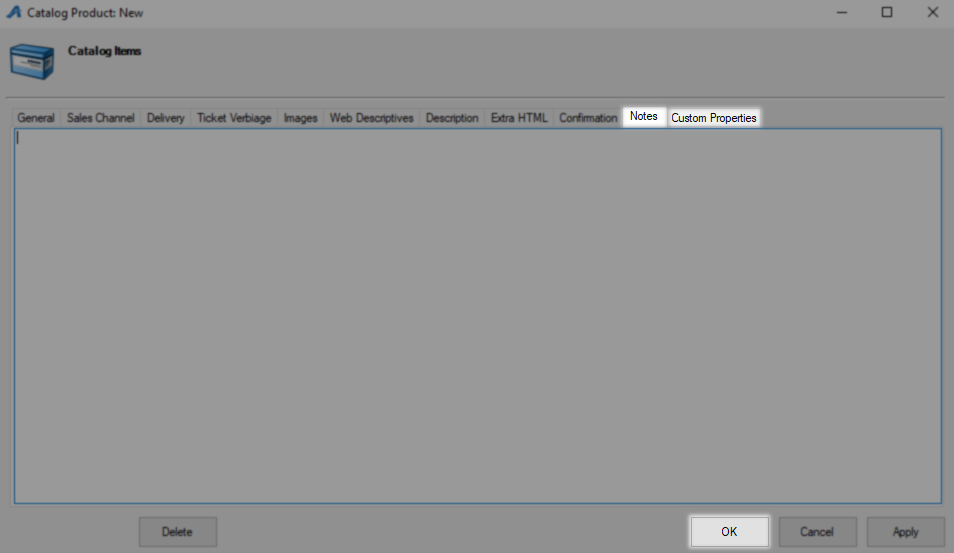
The SKU is the specific item that falls under your general product category, if popcorn is your product this is where you put large, medium and small. Right click in the SKU area and click New to begin.
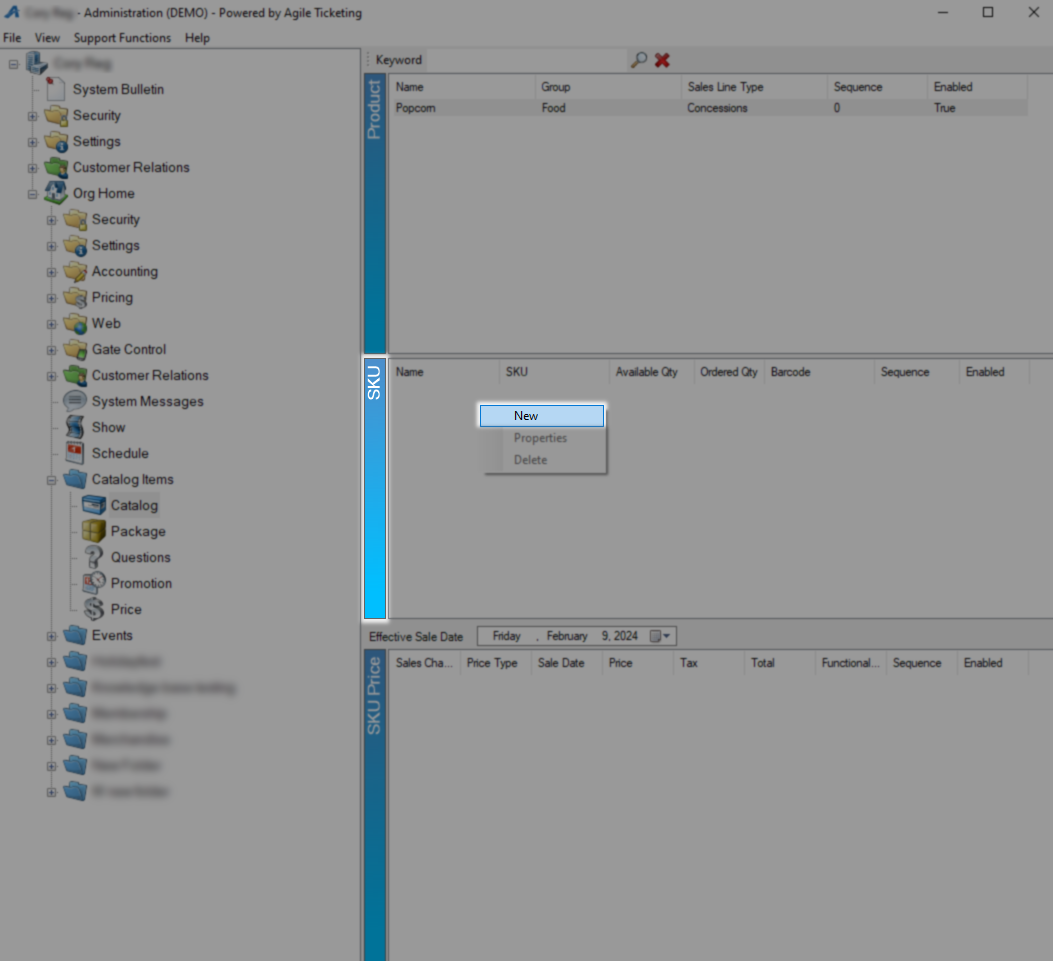
Creating a new SKU
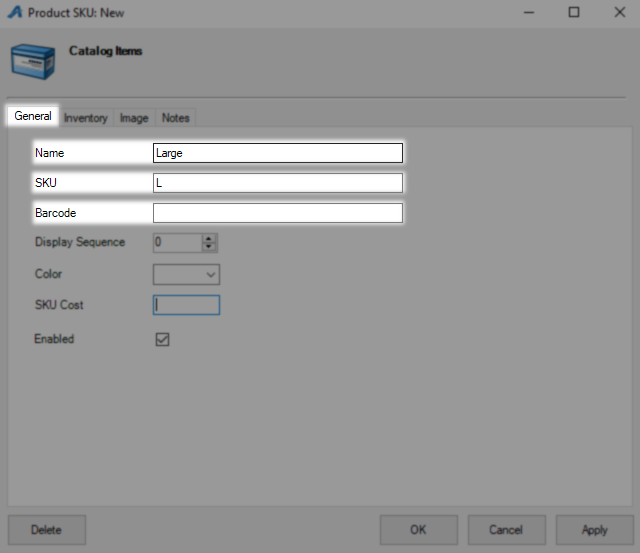
First up on the General tab is Name which will print as part of an order followed by SKU that will only appear on reports. Barcode is where you would enter barcode information from an item in your inventory so the system can find it with a scanner.
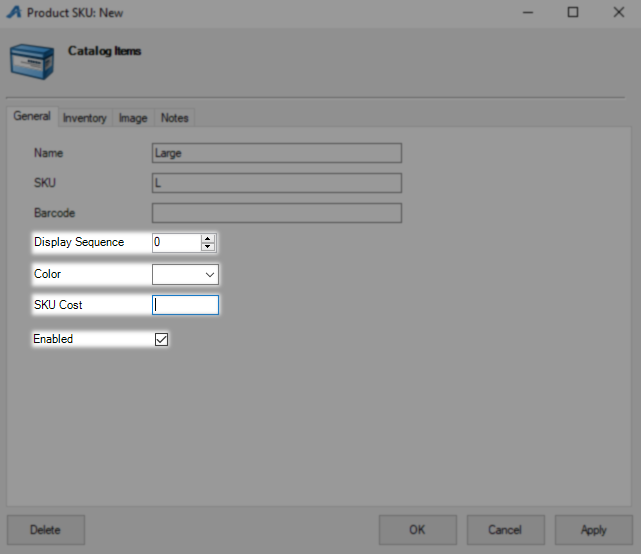
Display Sequence again controls the order in which this item will appear in a list online or on your PoS with lower numbers being higher on the list. Color allows you to set a button color for this specific SKU on your POS. SKU Cost should be your cost to acquire this item and allows Agilebreakdown to run reports against your sale price to get your cost average break down. Leave Enabled checked to keep this item on sale.
On the Inventory tab, you can see your number of this item sold at Ordered Quantity and how many you have left in stock at Available Quantity. To change this amount put either a positive or negative number in the Adjust Available Quantity field and click apply. Check Unlimited Quantity Available to bypass tracking inventory for this item.
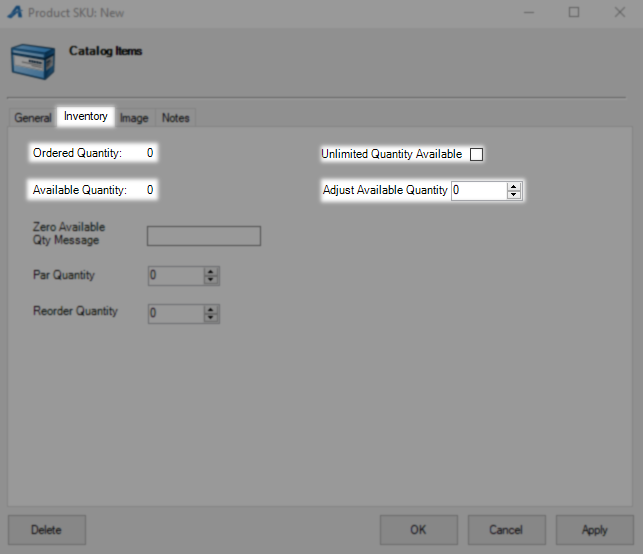
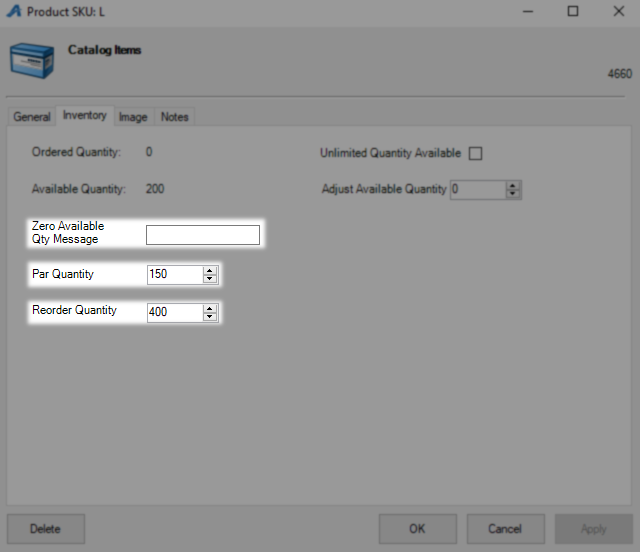
If this item is for sale online Zero Available Qty Message is what will display in place of sold out when inventory reaches zero. Par Quantity is your desired on-hand for this item and Reorder Quantity is the number you want to order if you go below the Par Quantity.
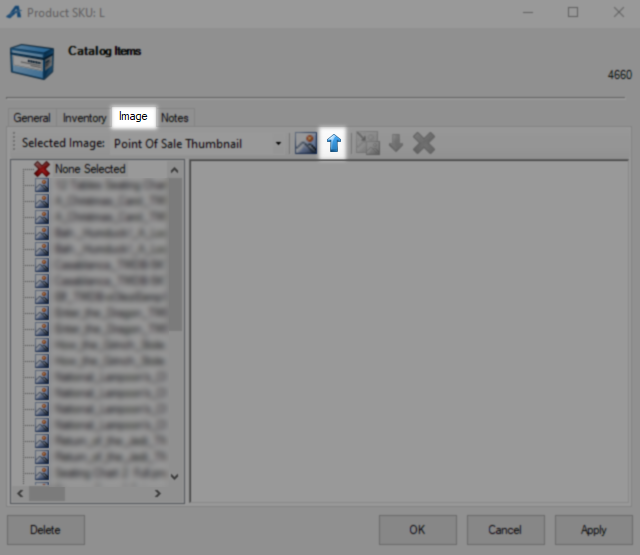
On the Images tab you can upload a thumbnail of this item that will load on your PoS screen. 500 by 500 is the recommended px size for this image and you can use the Blue Arrow to upload a local image.
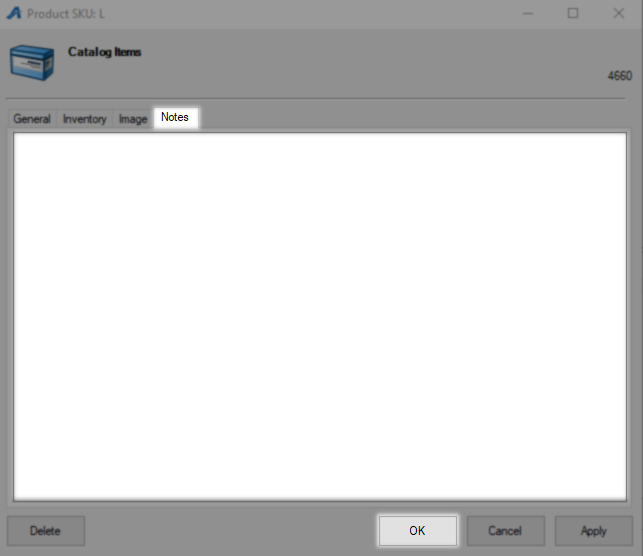
The Notes tab is for information about this product someone at your organization may need in the future. Click OK to save this SKU info.
The SKU Price is what will determine the final cost of this item as well as where that money gets reported. Right-click in the SKU Price field and select New to begin.
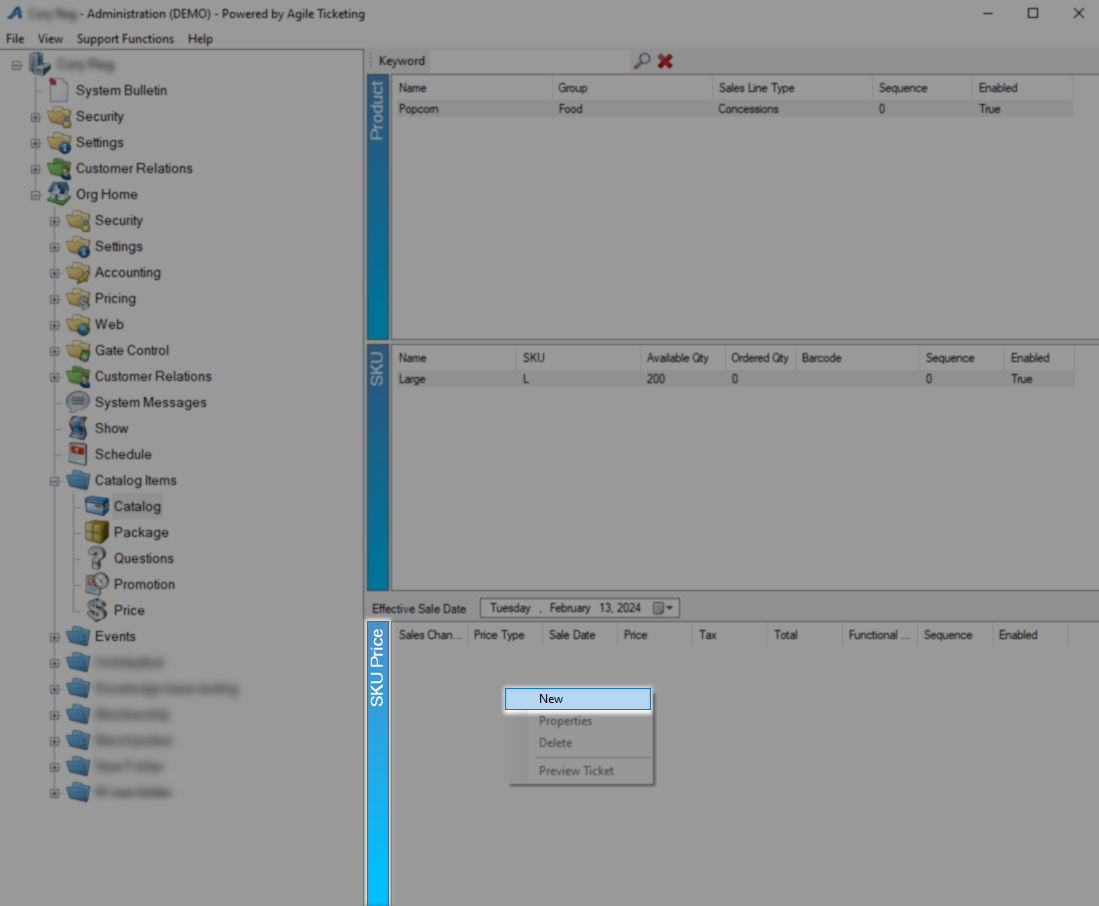
Creating a new SKU Price
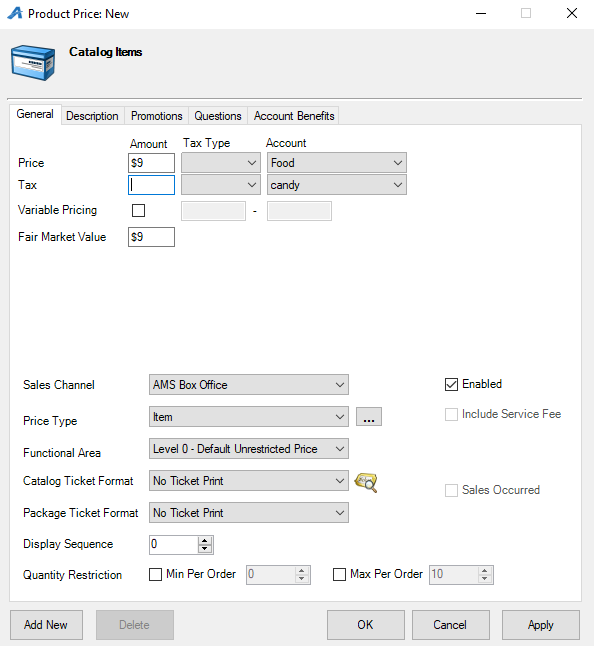
Everything you need to know about creating a price can be found Here. You will want to follow the paths for your platform of choice and simple price mode is the common setup.
To create a ticket pack navigate to the Account Benefits tab and right-click then pick one of the following options.
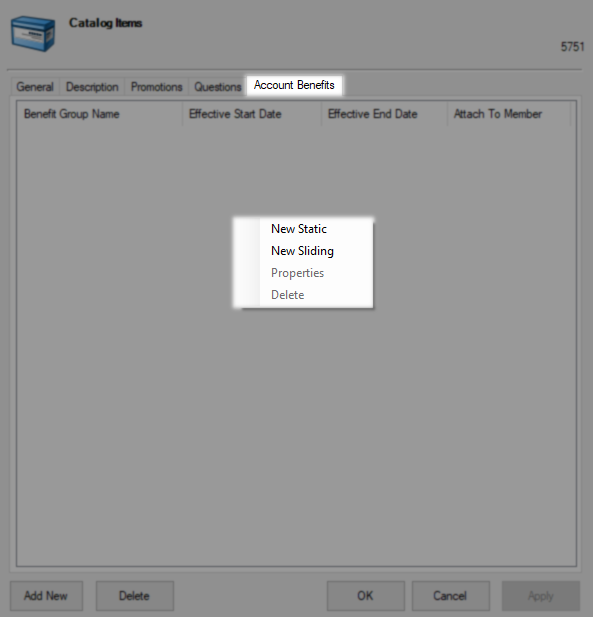
New Static - This ticket pack is only good for a predefined window of time, you will give it two dates and benefits will work only during that time.
New Sliding - This ticket pack works for a defined period from the date of purchase.
Benefit group is the first field on the New account benefit window and you will select your pre-made ticket pack benefits to have them apply at this price point. For help building a new membership benefit group Click Here and follow the instructions for new benefits.

Effective Start Date and Effective End Date are where you define the window of time when these benefits can be used.
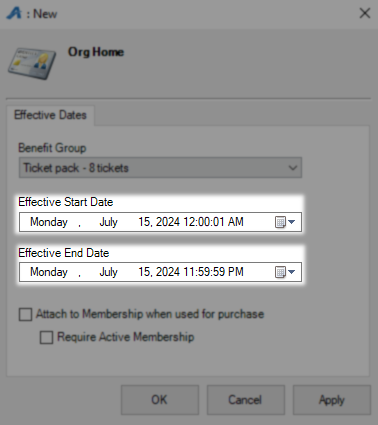
The last two check boxes control how these account benefits will be stored and recalled by the system, leave them both blank to have these apply to the customer record. Check both to have these benefits tied to and only usable by an active membership. Click OK to close and commit these settings.
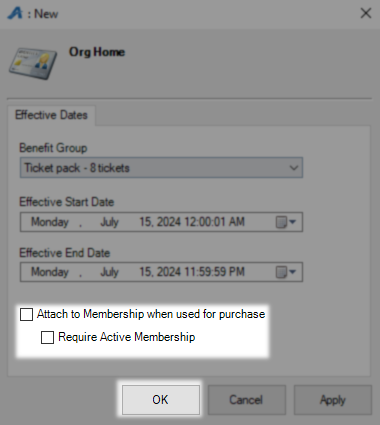
Benefit group is the first field on the New account benefit window and you will select your pre-made ticket pack benefits to have them apply at this price point. For help building a new membership benefit group Click Here and follow the instructions for new benefits.
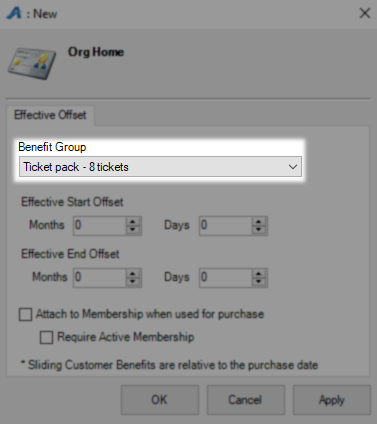
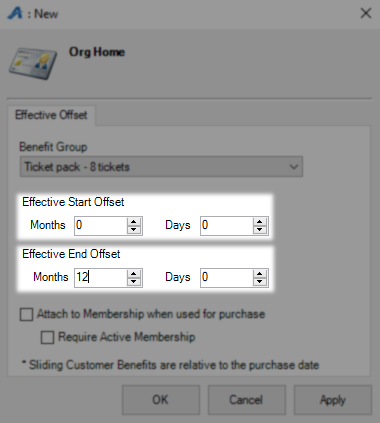
Effective Start Offset is asking how many days from now these benefits should start working with 0 being the common setup if they should work right away. Effective End Offset wants to know how long the customer will have to use these benefits with 12 months granting them a year.
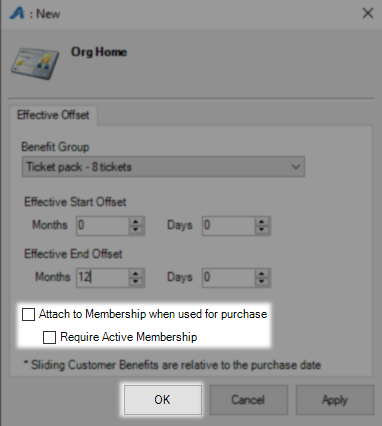
The last two check boxes control how these account benefits will be stored and recalled by the system, leave them both blank to have these apply to the customer record. Check both to have these benefits tied to and only usable by an active membership. Click OK to close and commit these settings.
You have now created a new Catalog item, repeat steps as needed until all of your SKUs and SKU Prices are complete
New Catalog Item in Web Portal
Begin by Logging In to the Web Portal and locate Concessions, Merchandise, or Multi Packs depending on which you are building. Once you have selected your category use the red button at the top of the page to Add New.
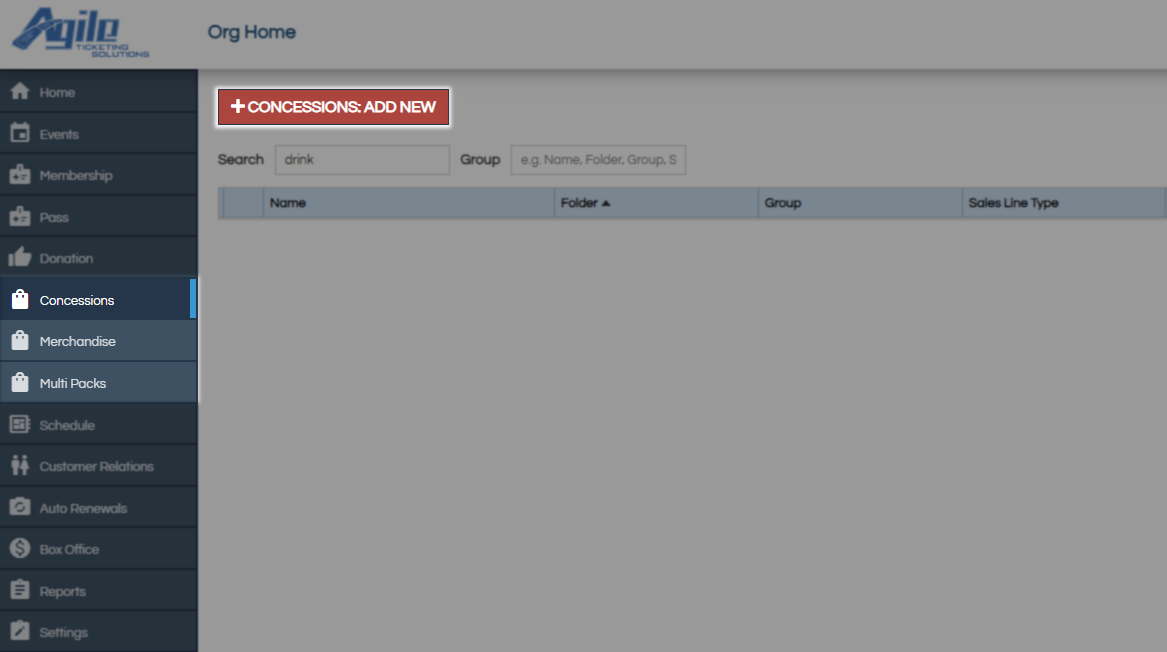
Creating a New Product
Begin by using the Select Folder drop down to pick where these items are going to live. Best practice is to have a separate Blue Folder for catalog items and perhaps even separate merchandise and concessions depending on how many of each you have. Use These Instructions to add a new Blue Folder if you do not already have one for your Catalog items. Click Continue to move forward.

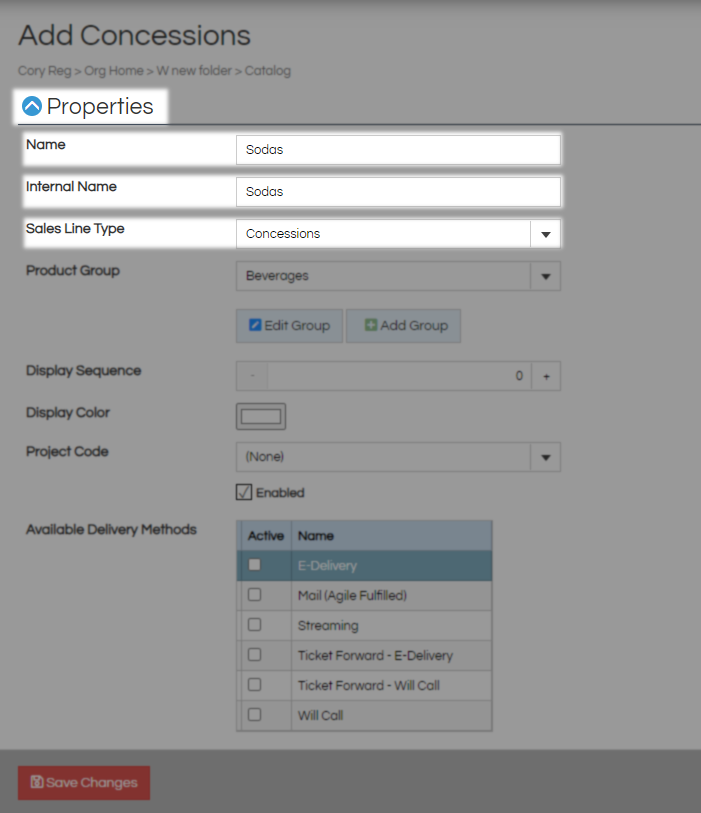
In the Properties section first up in Name which should be what this items is and will print on orders. Internal Name will be used on reports and can be the same as the Product name. Sales Line Type is the type of item you are building in the broadest possible terms.
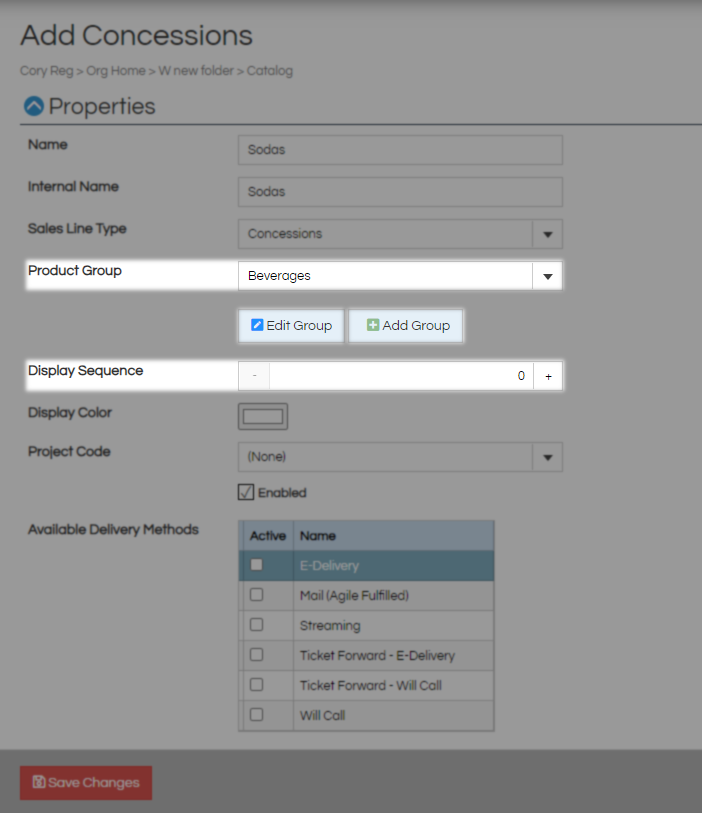
Product Group should be what this item is such as food or beverages. Use the Edit Group or Add Group buttons to add more options to this drop down menu. Display Sequence will determine where on a list this item will show up with lower numbers being higher on the list.
Color will set the button color for this item over on the POS. Project Code is used during reporting and make sure Enabled stays checked so this item will be available for purchase.
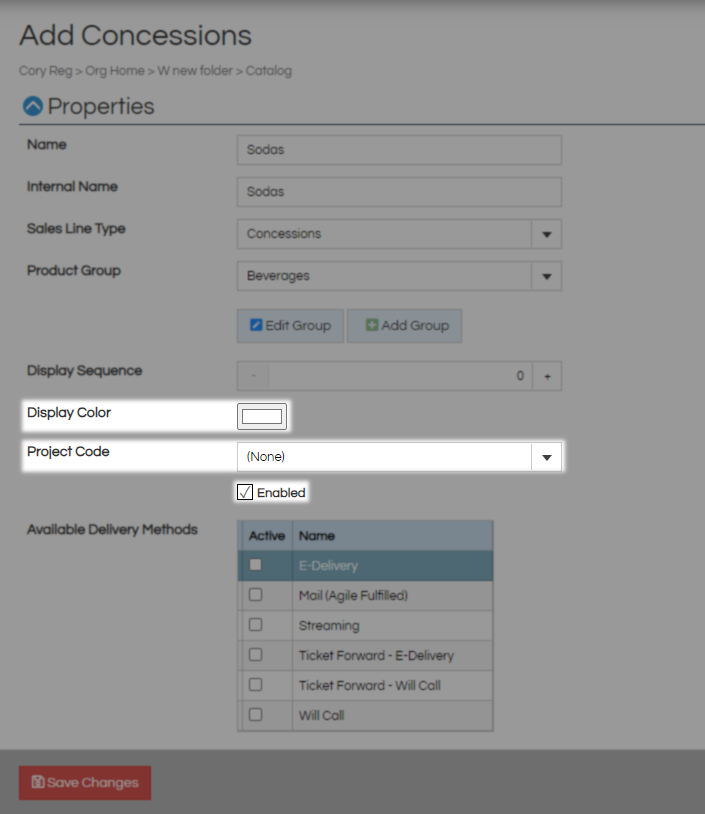
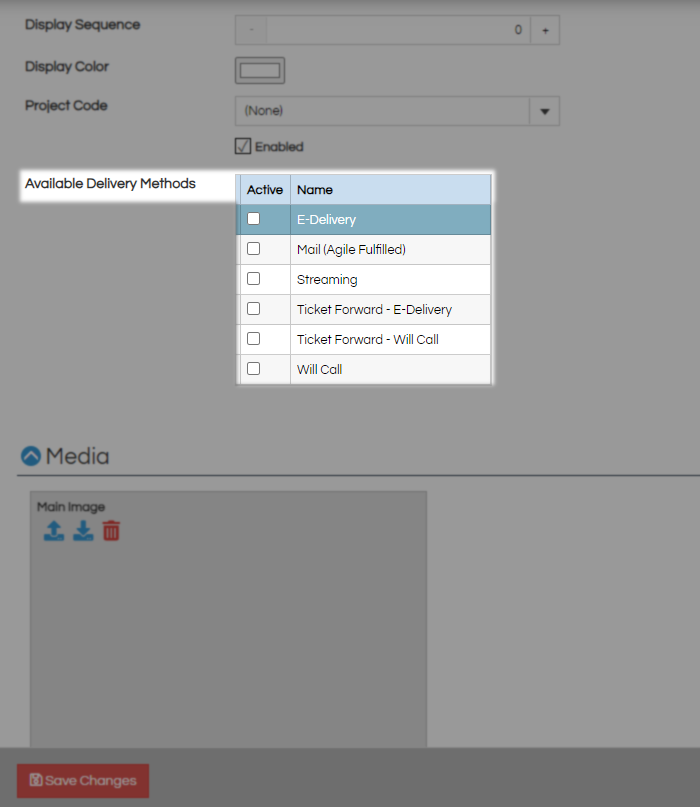
For the Available Delivery Methods you only need to pick an option if you will be selling this item online and the customers has to choose how they will receive it. For all in house sales of catalog items you may leave this tab blank and disregard the warning message about having no delivery method set as customer will receive their items as they pay for them.
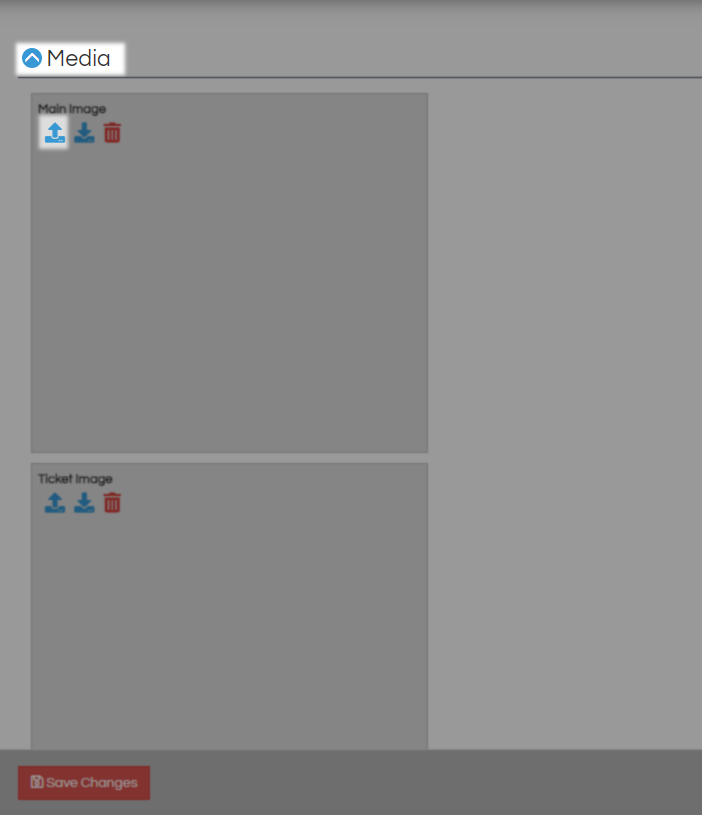
The Media section allows you to upload images on your catalog items into the system. Once uploaded and selected this image will be used both online and if desired on your PoS screen buttons. Use the Blue Arrow to upload a new image and then select it from your computer.
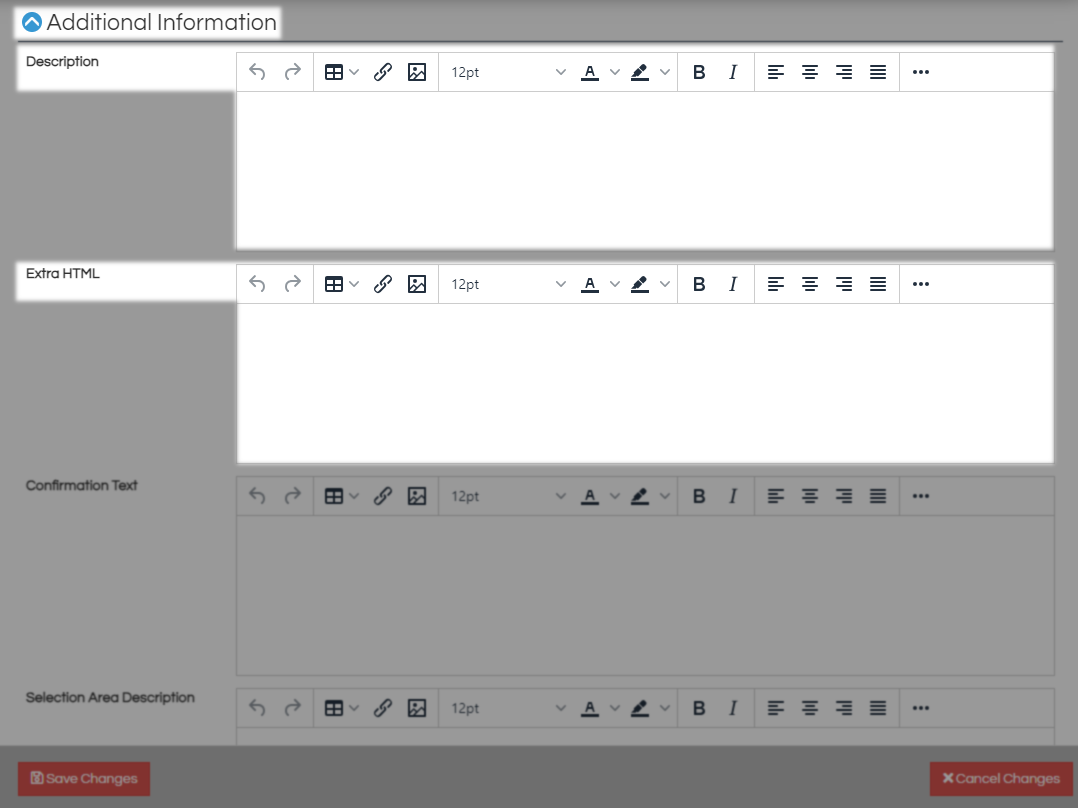
In the Additional Information section you are given all the fields you will need to make sure your box office and customers know what this item is. The Description field is where you can put the full write up of information about this item and Extra HTML acts as overflow for it if you run out of room.
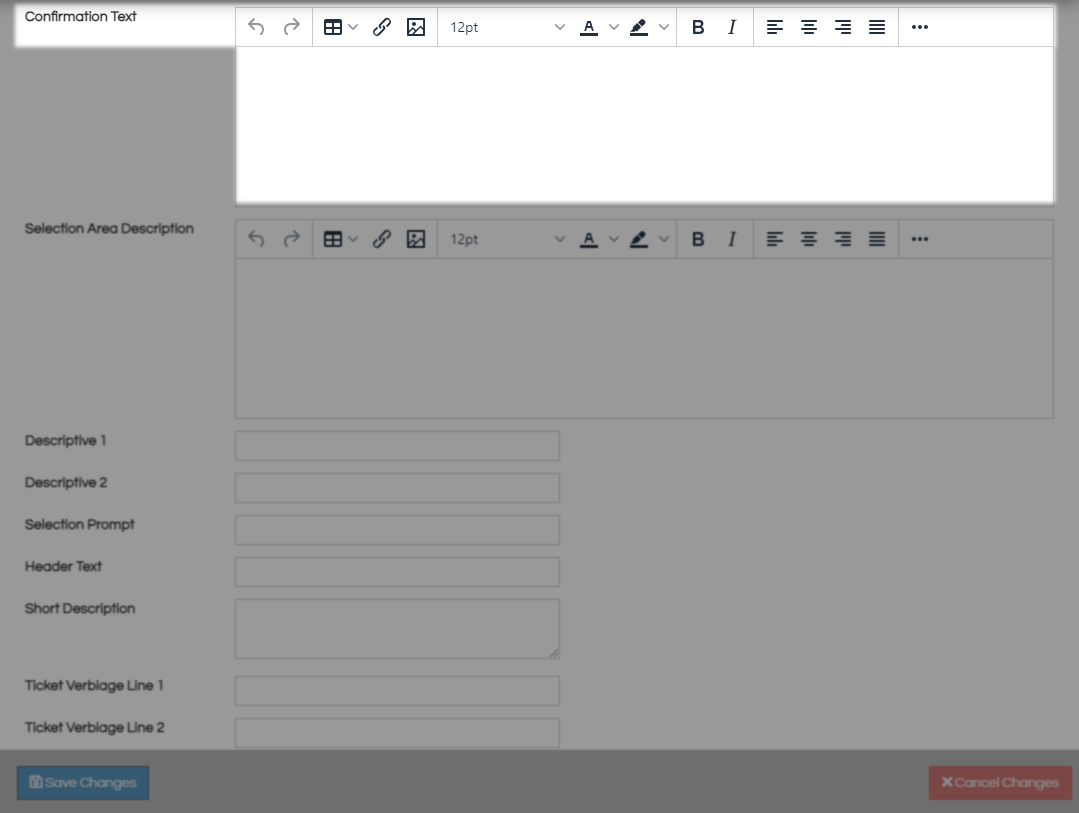
Anything placed in the Confirmation section will be emailed to customers as part of the order summary after a web purchase.
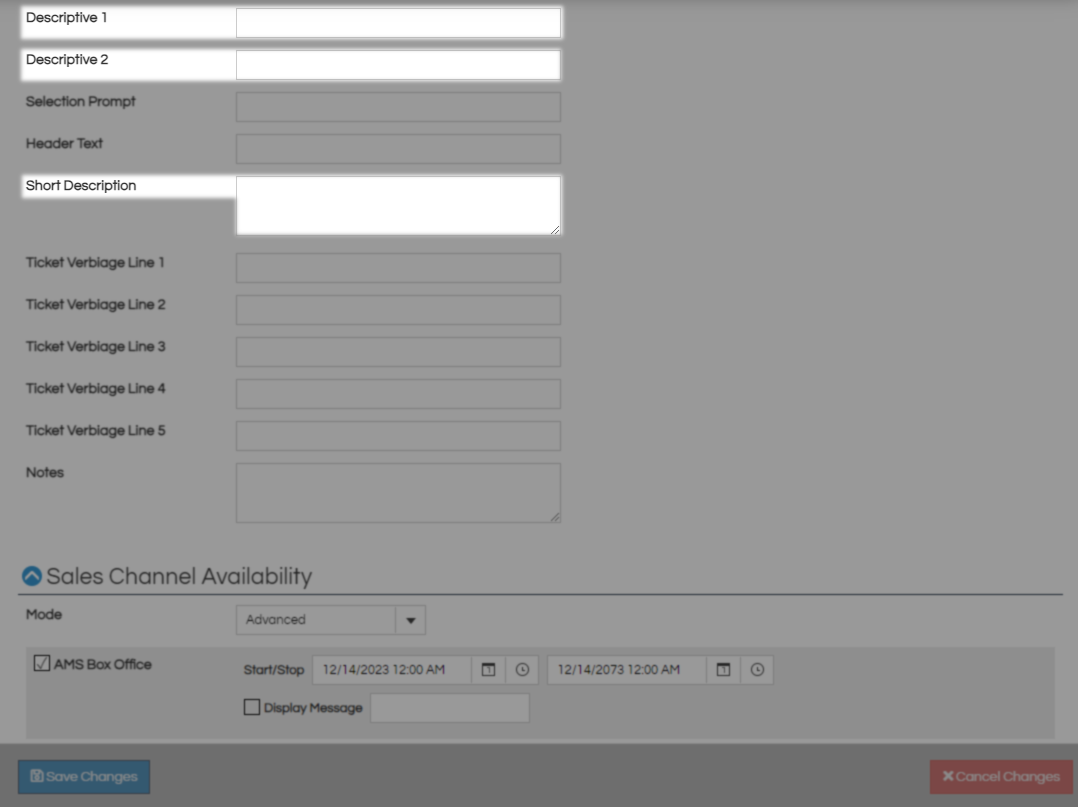
Description 1 and Description 2 both load one after another when a customer is viewing the full info page for this item. Short Description will load as part of any preview format where it can fit.
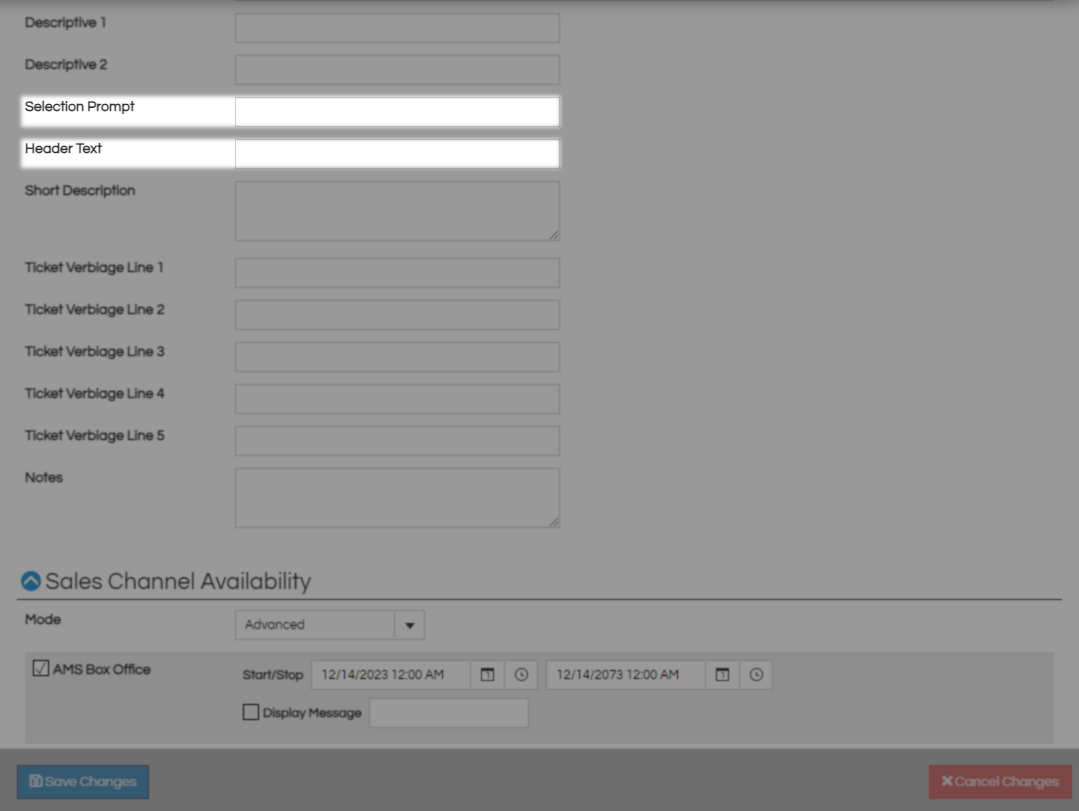
Selection Prompt changes the add button customers use to put items in their cart to say something else. Header Text loads in the header below the item title.
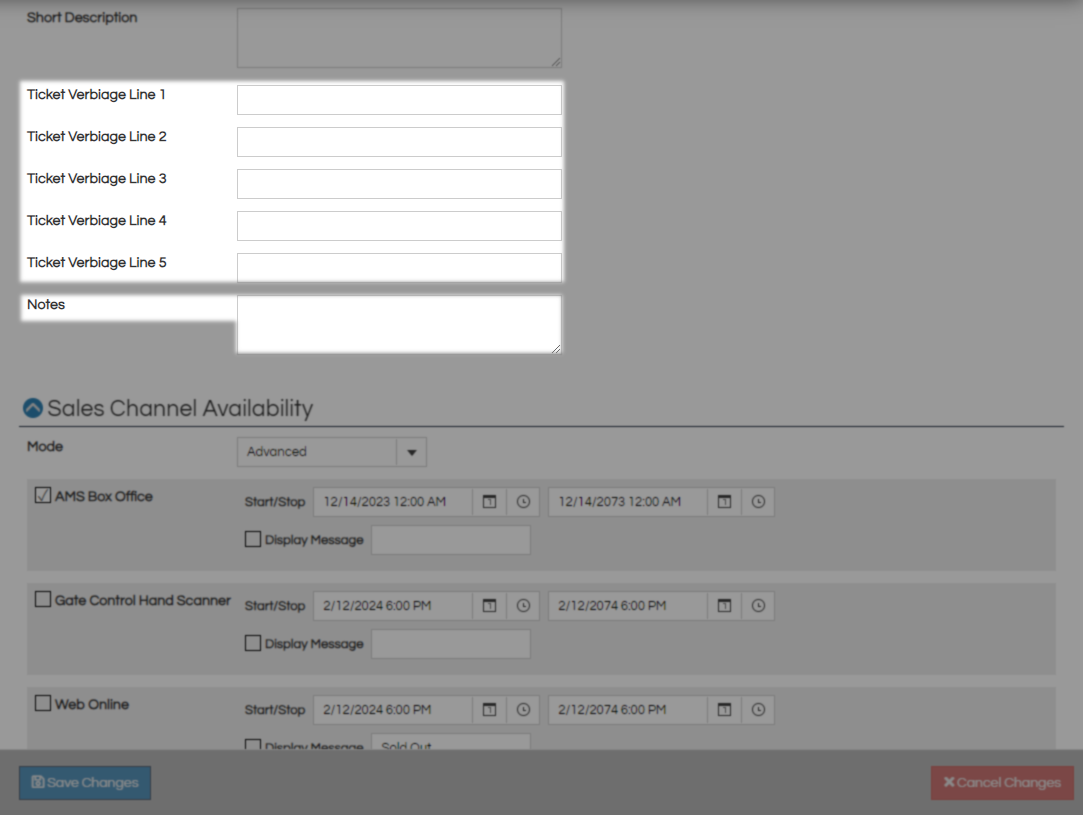
Ticket Verbiage 1-5 are all fields that relate back to ticket elements and will rarely if ever be used for catalog items. Notes is where you can put information related to this item that customers do not need.
Last is the Sales Channel section where you will put a check next to each one you would like to activate.
AMS Box Office - Prices available in your box office.
Gate Control Hand Scanner - Prices available to your iPhone scanning devices.
Web Online - Prices available to your online customers.
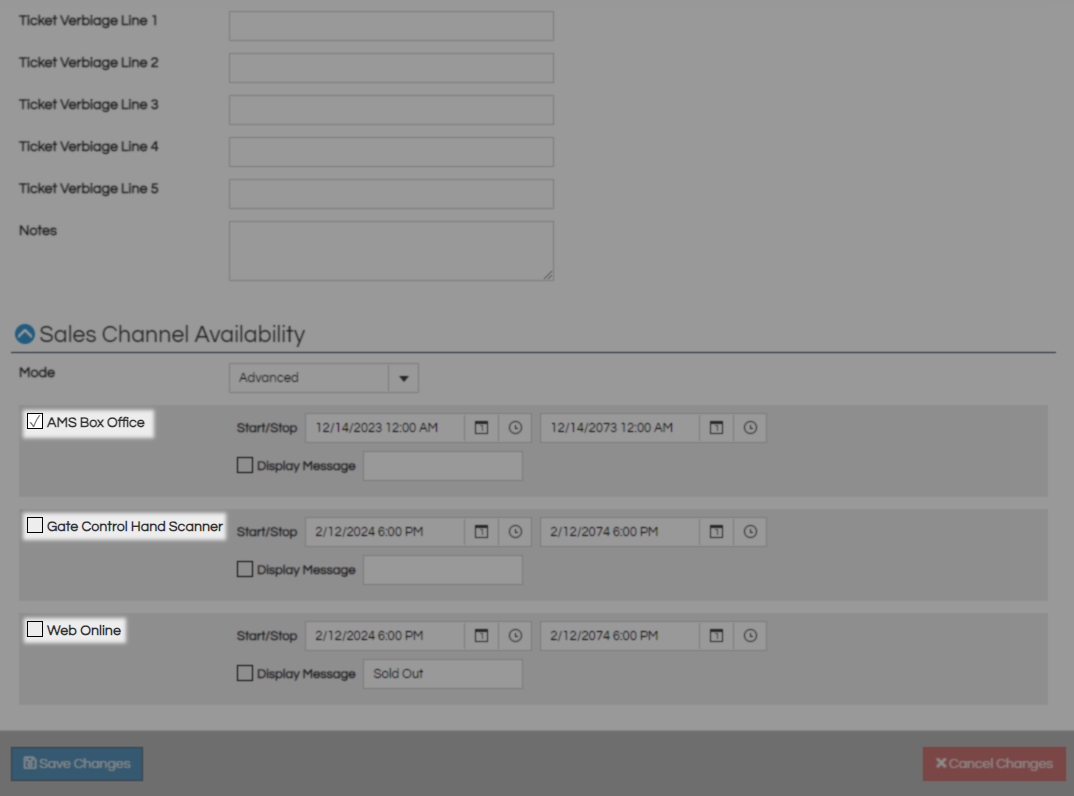
Start Date and End Date are when you want to start and stop selling this item, by default this will start the day you build the item and end 50 years from that date. Leave Enabled checked to keep this item on sale and you can put a sold out message for Web Online in the Display Message area if desired.
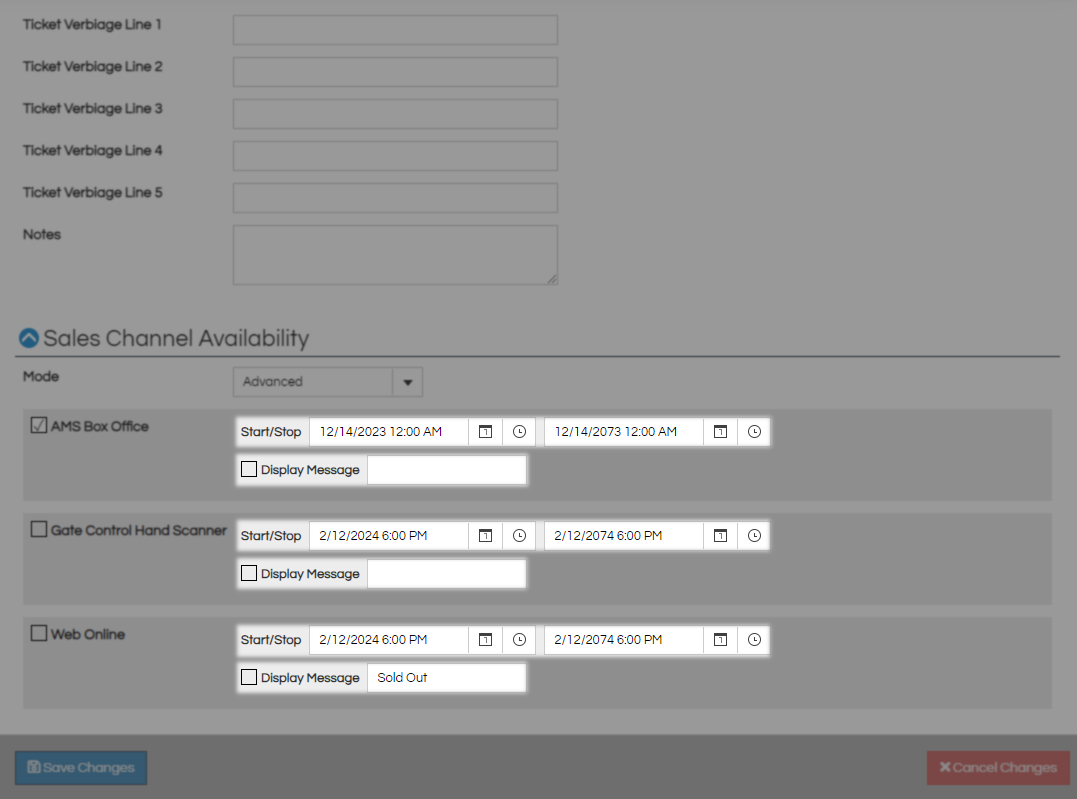
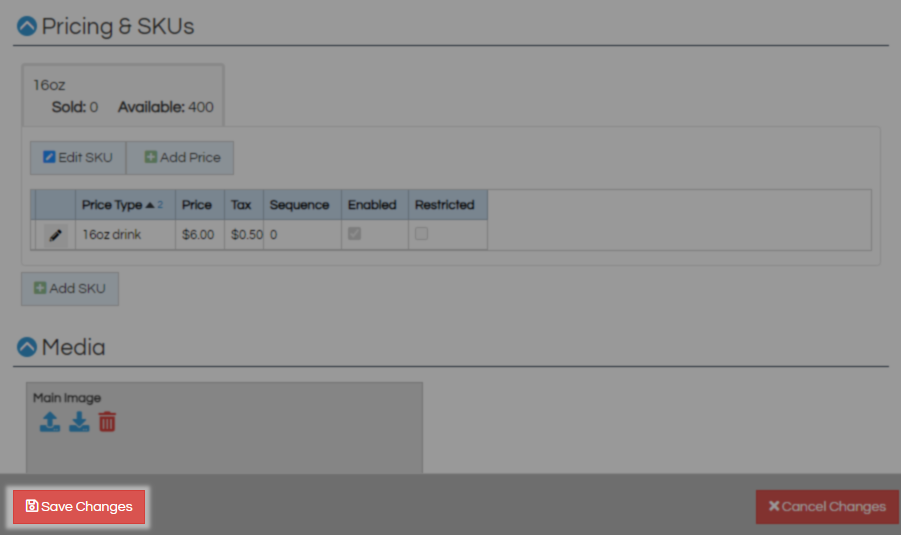
Click the Save Changes button to create this Item.
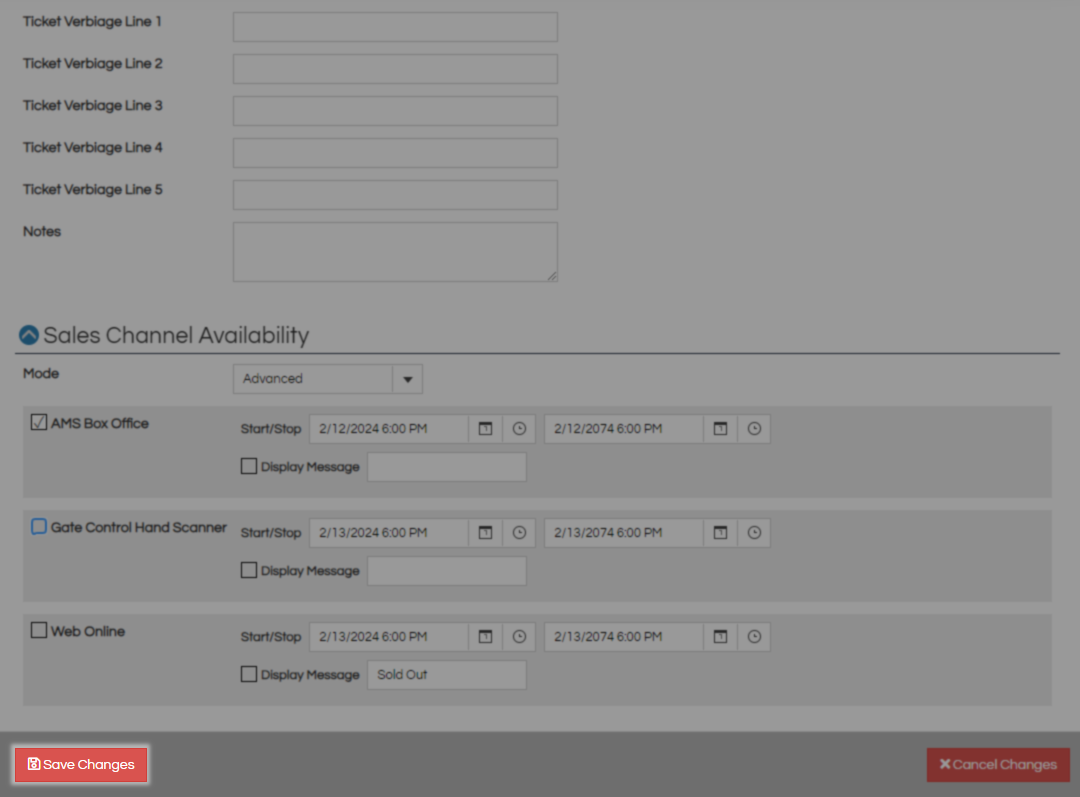
Once the Save Changes Button turns blue scroll back up to the newly created Pricing and SKUs section and click the Add SKU button.
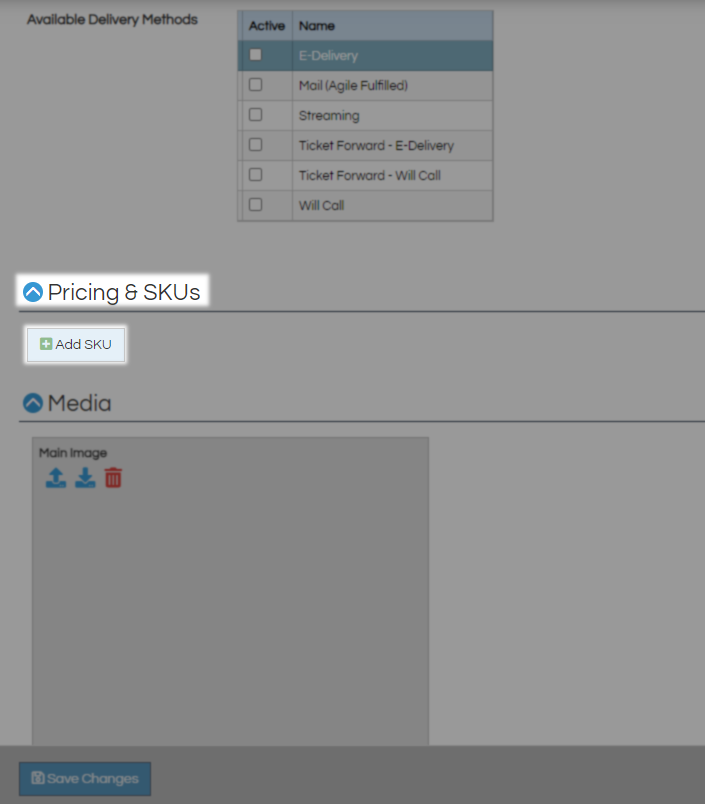
Creating a new SKU and Inventory
On the Edit Product Sku window first up is the Name field which is the type of this item you are selling. With Beverages as an example this is where you would put specific flavors or sizes. SKU is an abbreviation used by certain parts of the system and reports.

Barcode is where you would enter barcode information from an item in your inventory so the system can find it with a scanner. Display Sequence again controls the order in which this item will appear in a list online or on your PoS with lower numbers being higher on the list. Color allows you to set a button color for this specific SKU on your POS.
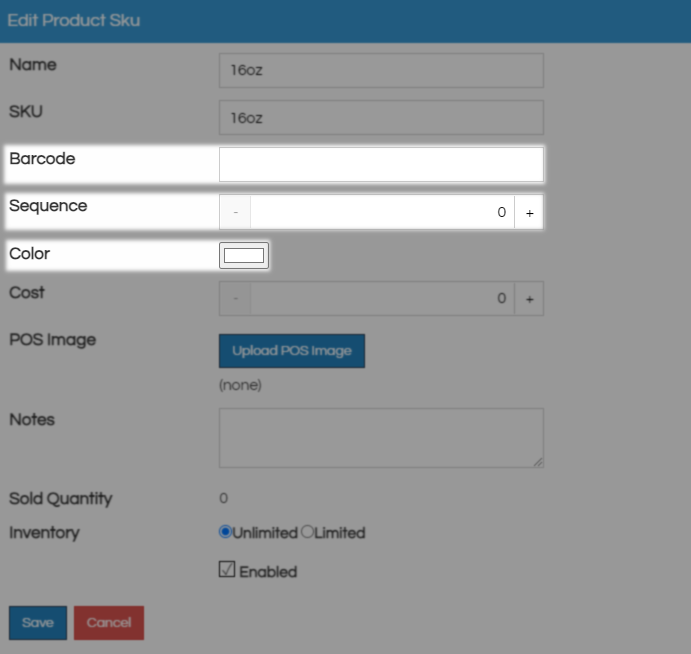
Cost should be your cost to acquire this item and allows agile to run reports against your sale price to get your cost average break down. POS Image allows you to upload a thumbnail of this item that will load on your PoS screen. 500 by 500 is the recommended px size for this image and you can use the Upload POS Image button to upload a local image.
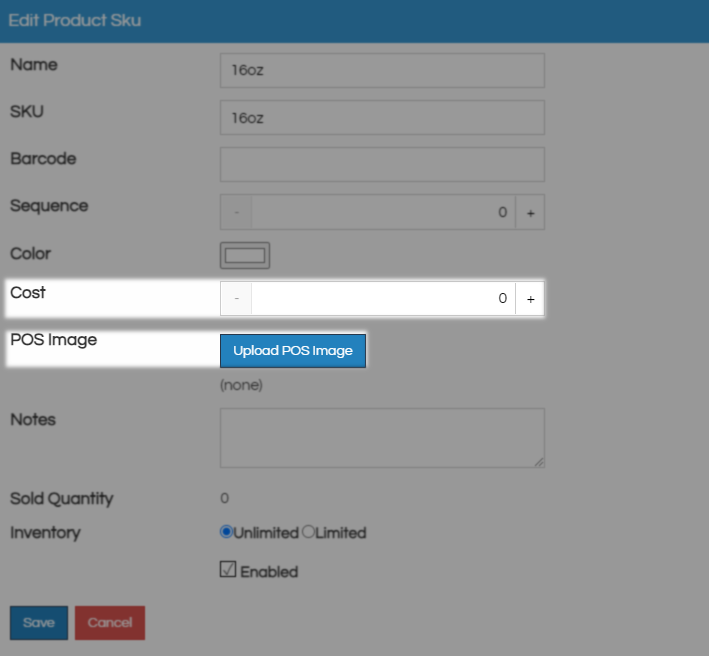
Notes is for information about this product someone at your organization may need in the future. Inventory is where you decided if you want to track this item in agile or elsewhere. Choose Unlimited to skip counting this item or Limited to set and track your inventory.
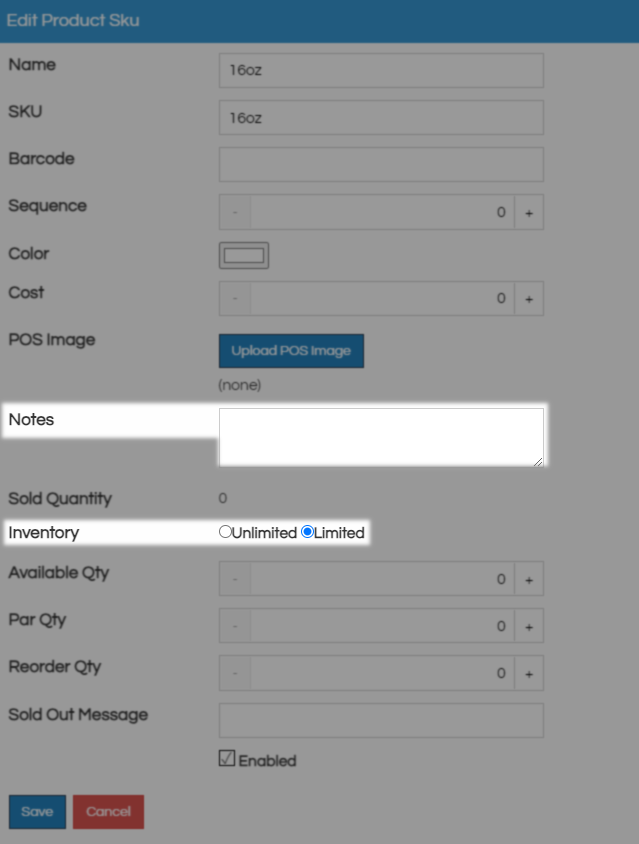
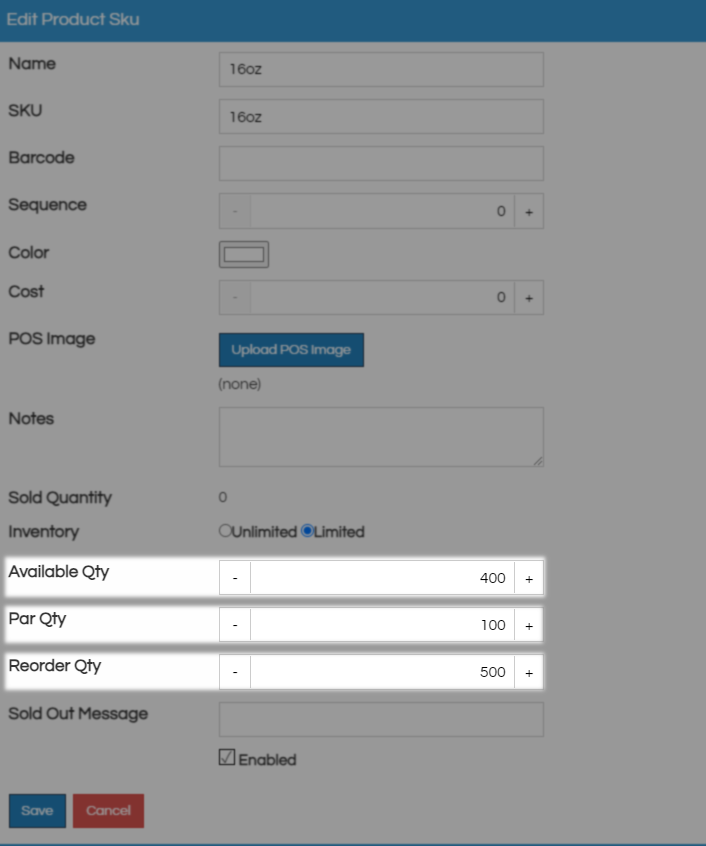
Available Qty is your current on hand for this item, Par Qty is your desired on-hand for this item, and Reorder Qty is the number you want to order if you go below the Par Qty.
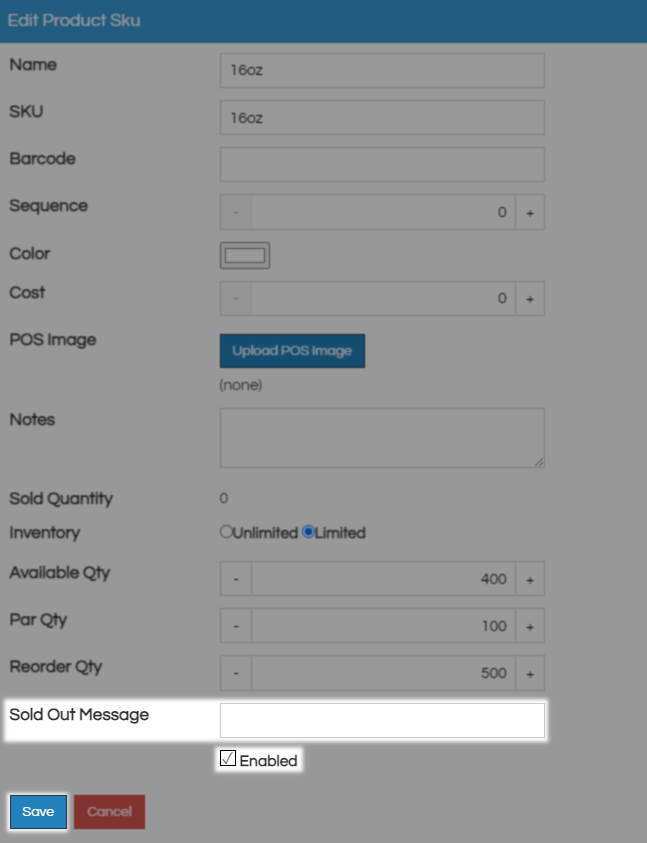
For web items Sold Out Message is what will show in place of Sold out when your inventory reaches 0. Leave Enabled checked or this item will not be available and click Save to create this SKU.
Under Pricing and SKUs you will now see the item you just created and can set up your pricing for it. Click Add Price to add a new price for this item.

Creating a new SKU Price
Everything you need to know about creating a price can be found Here. You will want to follow the paths for your platform of choice and simple price mode is the most likely set up.
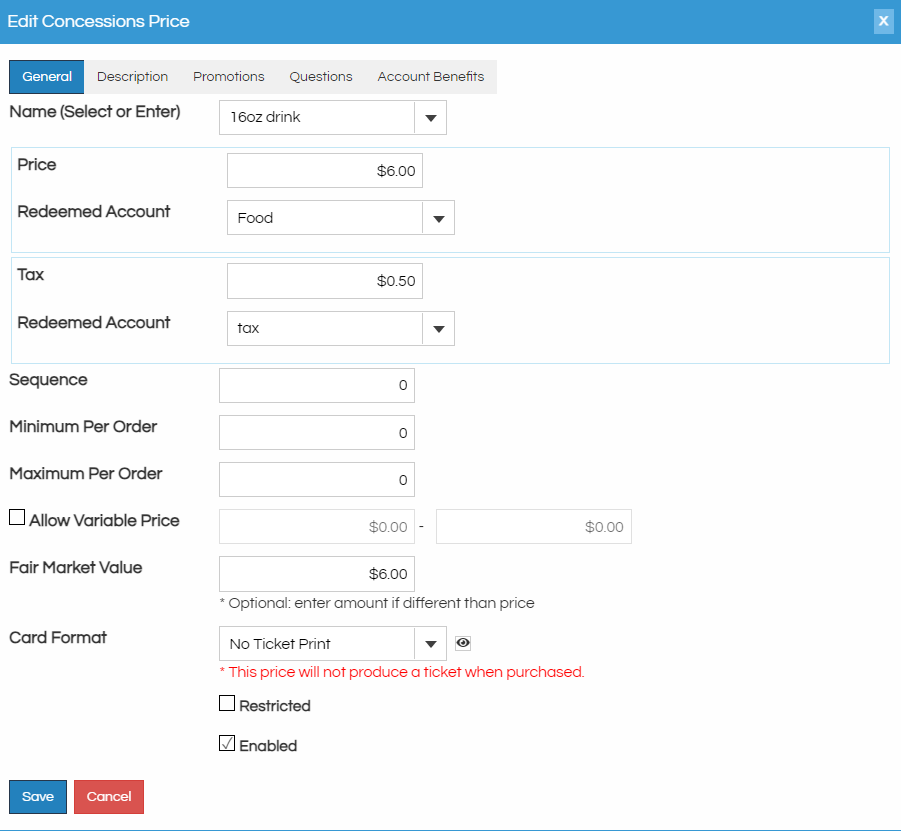
Building a ticket Pack
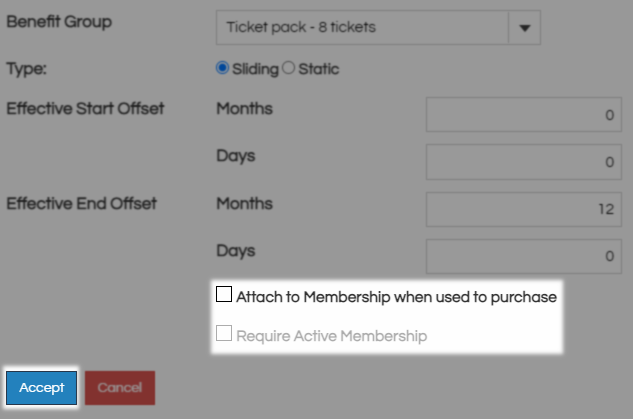
To create a ticket pack navigate to the Account Benefits tab and click the New Benefit button.

Benefit group is the first field and you will select your pre-made ticket pack benefits to have them apply at this price point. For help building a new membership benefit group Click Here and follow the instructions for new benefits.
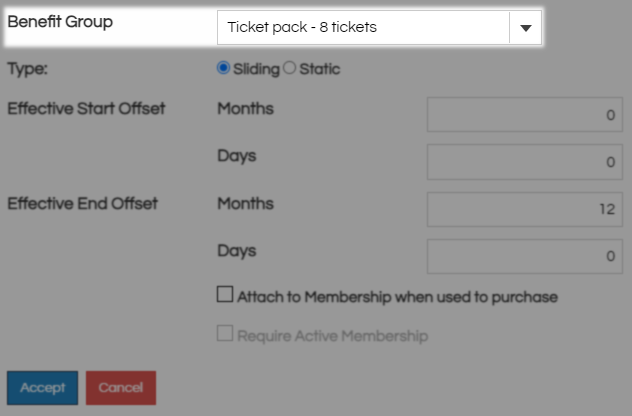
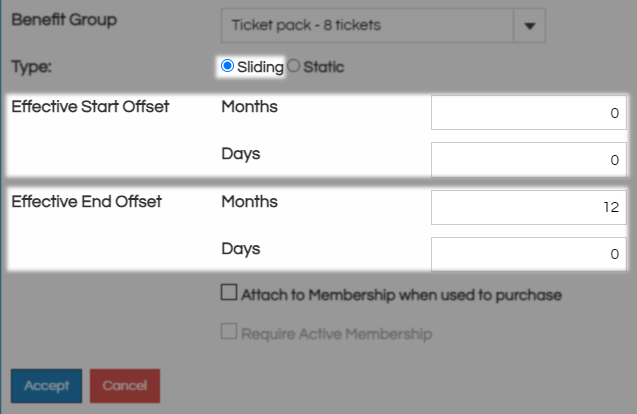
For Sliding the Effective Start Offset is asking how many days from now these benefits should start working with 0 being the common setup if they should work right away. Effective End Offset wants to know how long the customer will have to use these benefits with 12 months granting them a year.
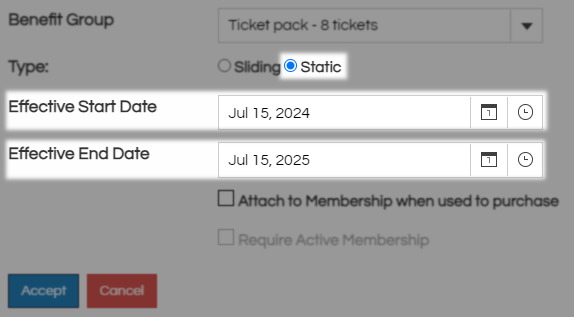
When you select Static then Effective Start Date and Effective End Date are where you define the window of time when these benefits can be used. This will be a year from today by default but can be changed to any date range.
The last two check boxes control how these account benefits will be stored and recalled by the system, leave them both blank to have these apply to the customer record. Check both to have these benefits tied to and only usable by an active membership. Click Apply to close and commit these settings.
Now that you have a SKU and Price you can Save one last time and this item should be available for purchase on all the sales channels you activated.
