Creating a Donation
A donation gives your customers the chance to support your organization without making a purchase.
Donations can be built in the ATS App or the Web Portal and set to pop up during the check out process or on the payment screen. Donations when combined with an entry point may also stand alone as a link on your website.
Creating a Donation in ATS App
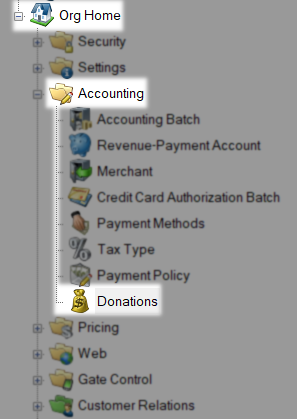
Begin by Logging In to Agile Ticketing Solutions (ATS) administration and find where this donation will be built. Donations can go either in your Accounting folder or any blue folder that contains the donation item type. All of these options will be found under your Corporate House.
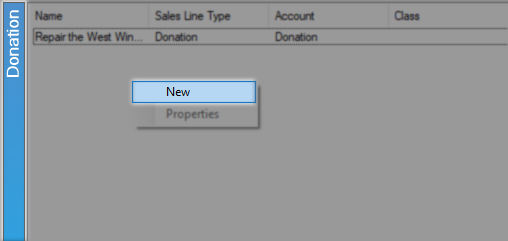
In the Donations area right right-click and select New to begin.
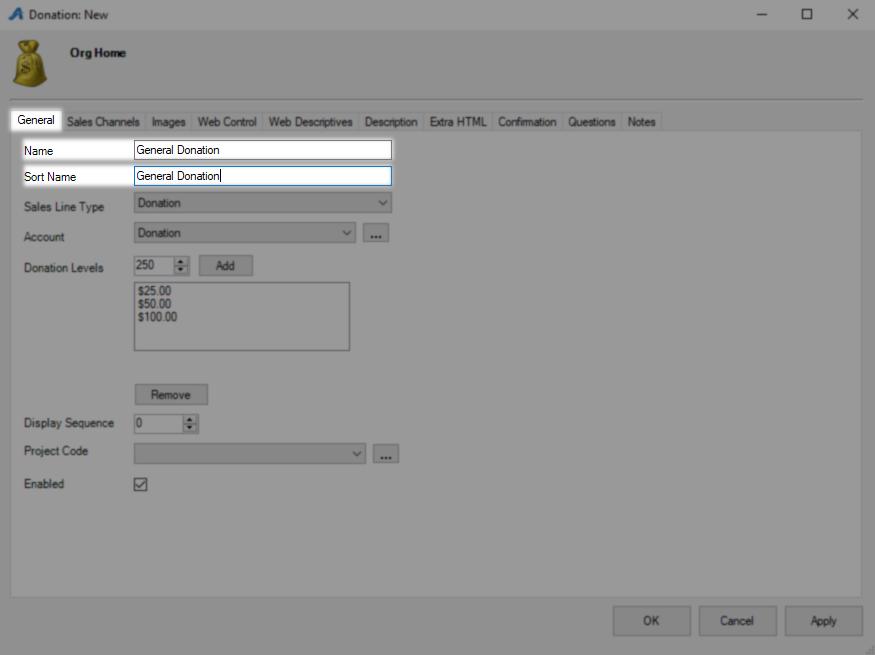
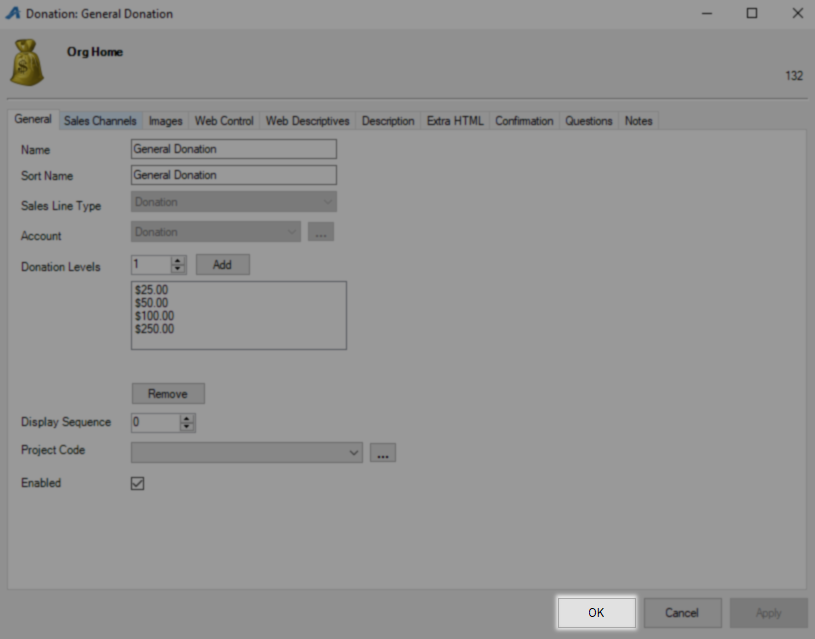
You will start on the General tab with the Name of this donation which is customer-facing. Sort Name will be used online to alphabetically list this donation with any others you have in cases where display sequence is not used.
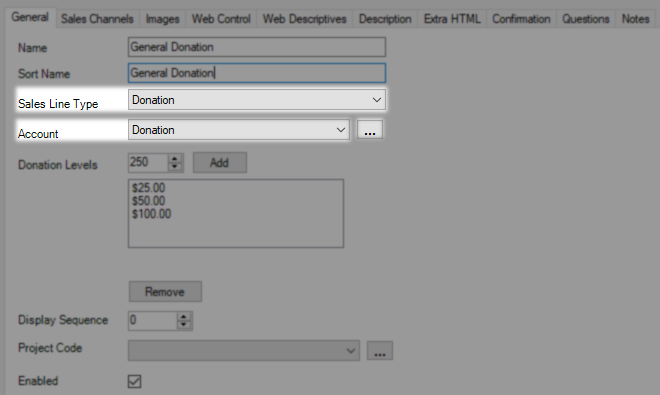
Sales Line Type is the type of item this is which in this case is a donation which have their own category. Account is where you would like money collected via this donation to be reported and the ellipses can be used to add an account using These Instructions.
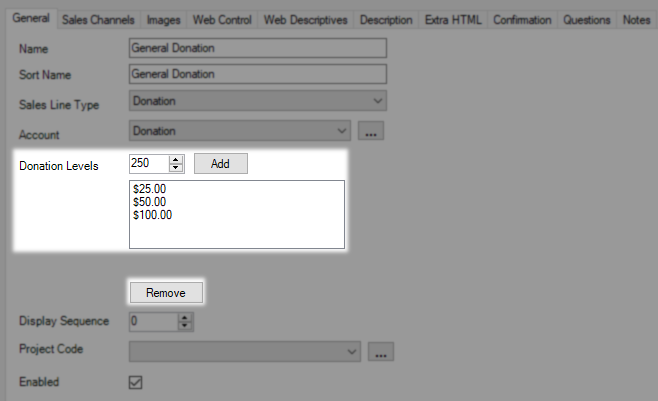
Donation Levels is where you build all of the preset options you want to present customers with. To add a value enter it into the box and click Add, repeat as needed until you have all of your options. To remove an item from this list select it and use the Remove button.
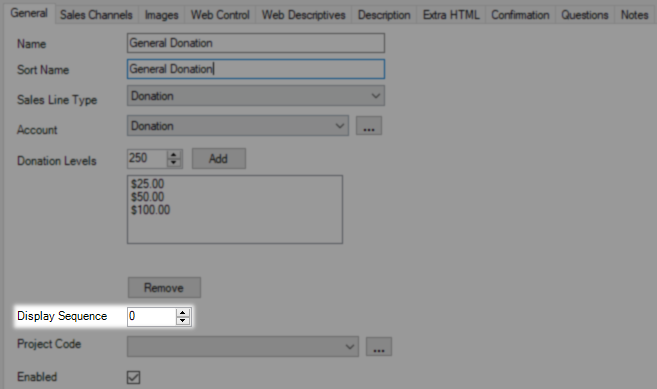
Display Sequence can be used to decide where on your list of donations this one will load. The closer to 0 the higher up the list this will load and the sort name will be used if two donations share a display sequence.
Project Codes are an additional layer of reporting, if your organization uses project codes you can select that here or add more using the ellipses. Leave Enabled checked to have this donation be active for use.
Next on the Sales Channel tab put a check next to each one you would like to activate.
AMS Box Office - Donation is available in your box office.
Gate Control Hand Scanner - Donation is available to your iPhone scanning devices.
Web Online - Donation is available to your online customers.
The Start and End Date will be pushed out 50 years by default so you don't have to worry about setting it.
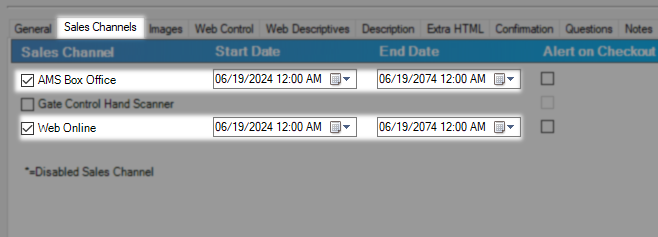
To the right is the Alert on Checkout and Alert on Payment check boxes that can be used with the web online sales line to prompt online customers with a donation window.
If Alert on Payment is selected, this will allow a prompt during the final payment process for Web Sales Channels only. Online, this will present as a donation slider prompt at the top of the final payment page

Donation Pop-up examples
If Alert During Checkout is selected, then the system will display a prompt for this donation program whenever a user proceeds to check out on this Sales Channel. Online, this will present the donation as a full-page advertisement in the purchase process after the "Checkout" button is clicked.
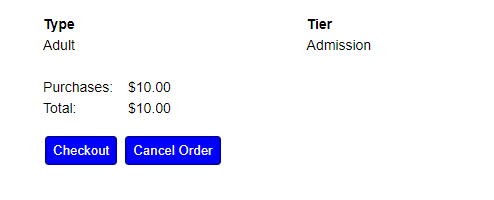
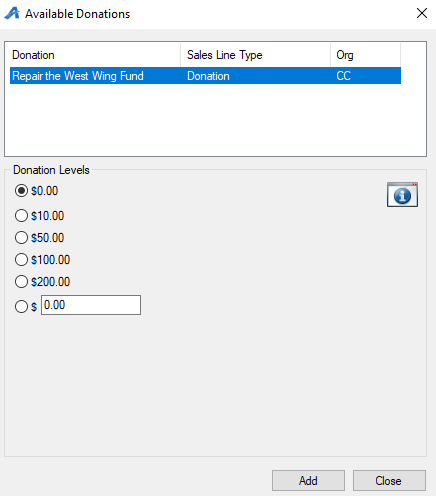
On the AMS screen, this will present the donation as a pop-up window prompt for the cashier once the "Proceed" button is selected. On the POS screen, you can use the Donation Settings menu to make the donation appear one of two ways. The first is as a pop-up as seen below.
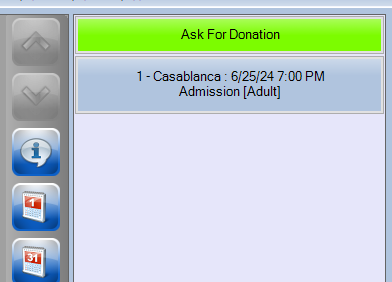
The Second is it can be asked as an in-line question in the basket area of all transactions.
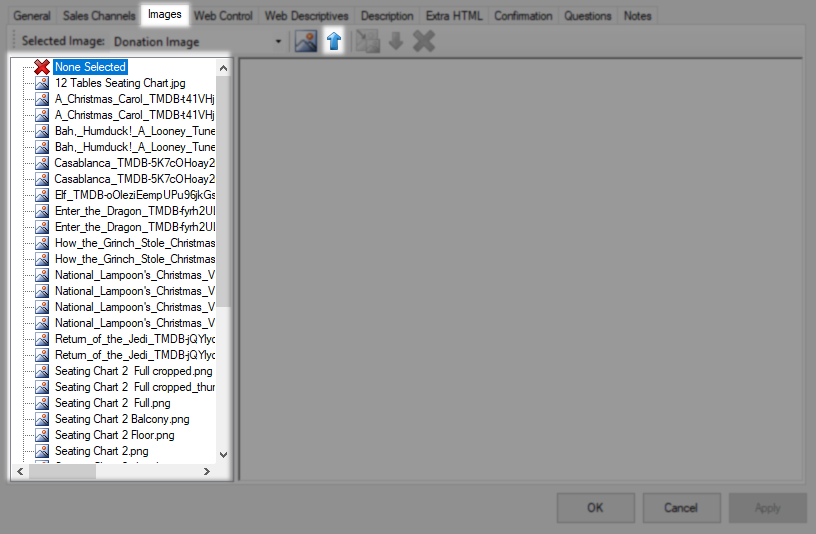
Images is the first tab where you can add an image that the system will use when it's looking for media. Use the Blue Arrow to upload a new image and then select it in the Library to the left to use it.
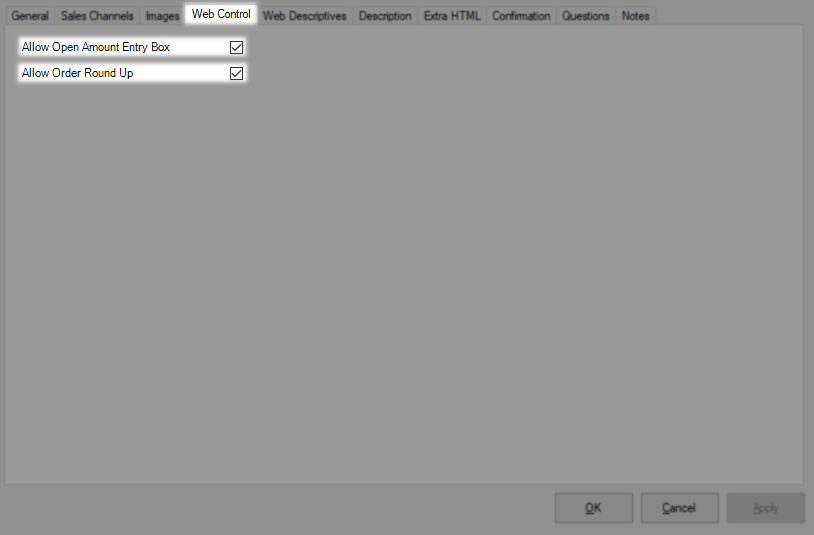
Web Control has two options but both of them are commonly used. Allow Open Entry Box gives customers who want to donate the chance to donate any amount they want. Allow Order Round Up places a button on the payment screen that allows customers to round up to the nearest whole dollar value as a donation.
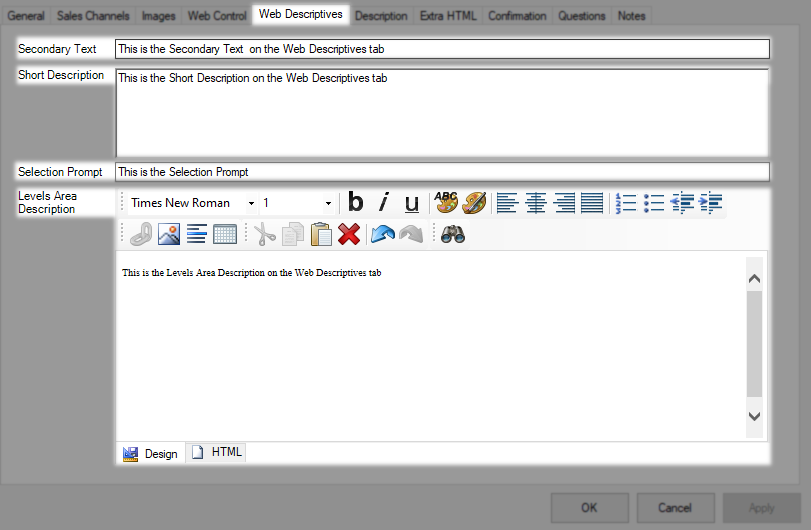
Web Descriptives tab holds information about your donation program and any benefits that come with giving to your organization. What you put in the Secondary Text area will be placed between the name of the donation and the Level Areas Description on the donation page. Some organizations put a short thank-you message here. Others choose to leave Secondary Text blank. Anything put in the Short Description area will be seen under the Donation Name on a Donation List Page. The Selection Prompt area will appear above the donation levels. If you leave this area blank, it will default to displaying "Available Levels" in this area instead. Levels Area Description allows you to present important information about the Donation Levels.
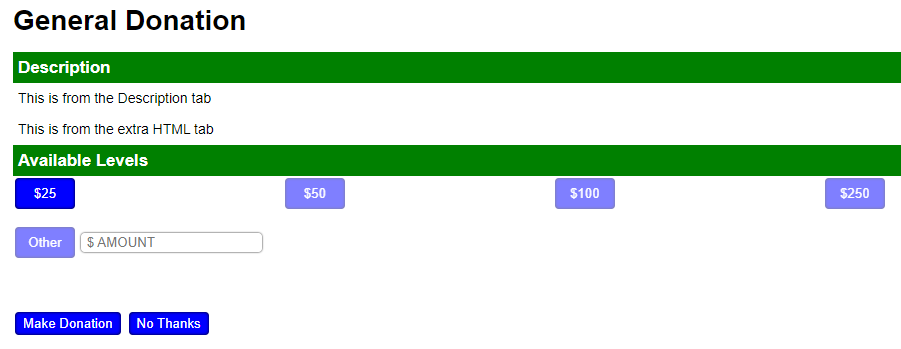
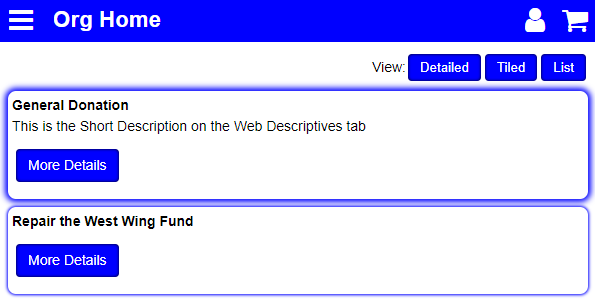
This is what the donation page looks like when you have something in all those fields and what a list of donations can include.
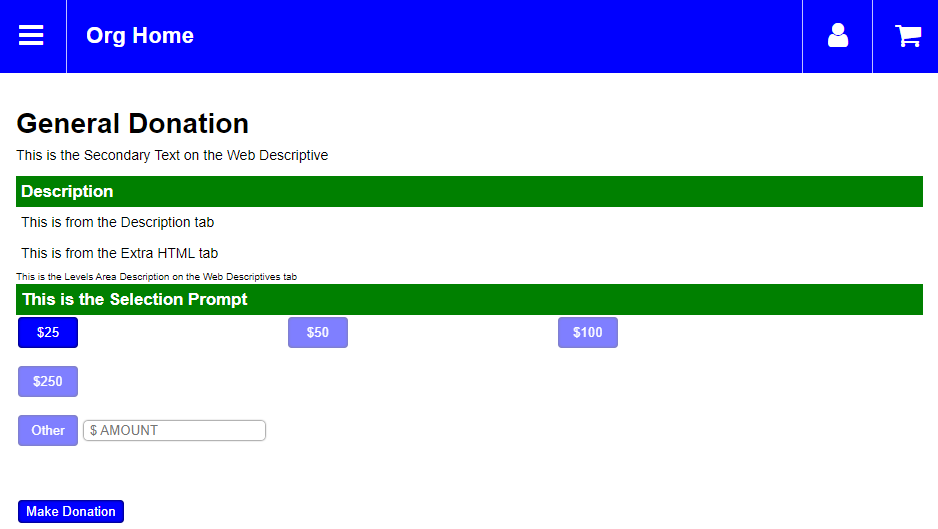
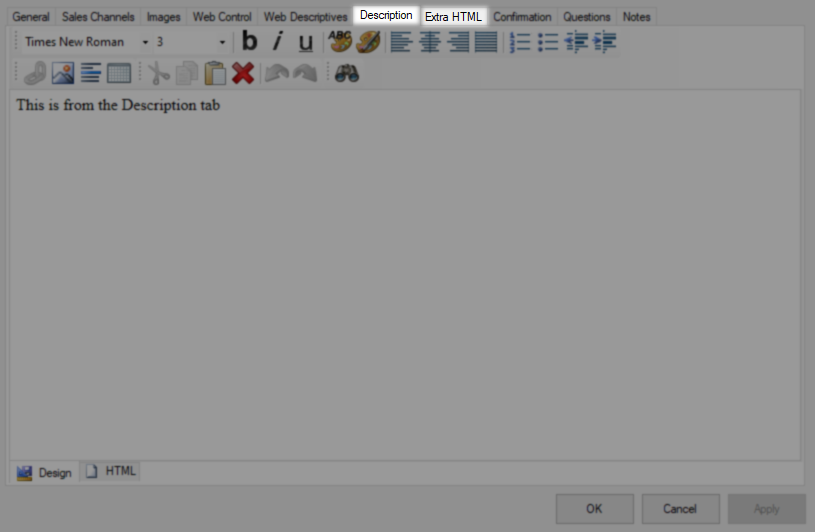
The Description and Extra HTML tabs both display more information about your donation program and can be found in the examples above for the exact location. Both tabs may include images, links, and HTML as desired.
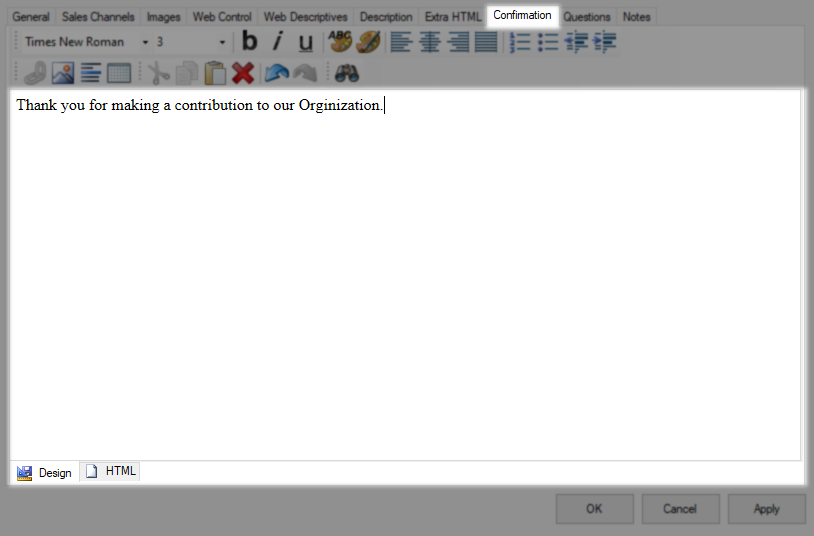
Anything placed on the Confirmation tab goes out as part of the email when this item is purchased. This information will load at the very top of the email making this a great place for thanks and acknowledgments.
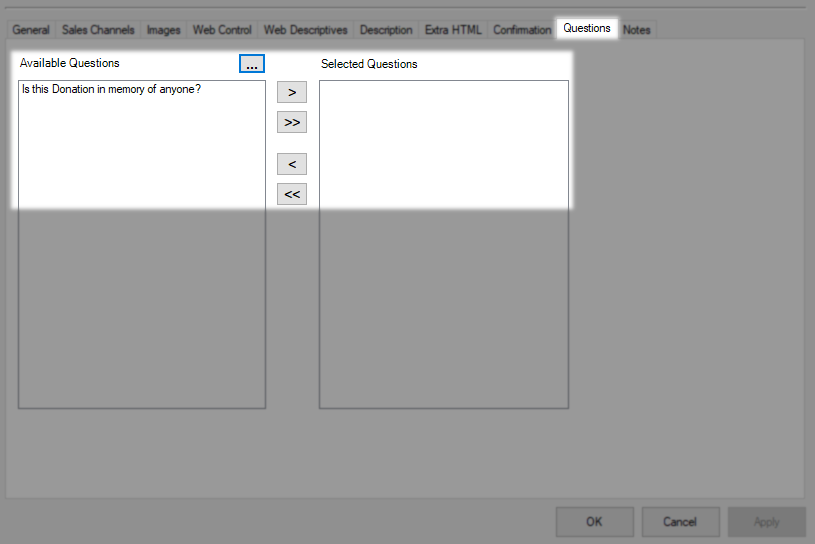
The Questions tab allows you to apply any questions you have created to this donation. When you want to find out if a donation was in memory of someone this is the best way to ask.
Lastly, the Notes tab can hold internal notes for this donation. These will only be seen by people who come here to find them.
Click OK to save and close this Donation.
Creating a Donation in Web Portal
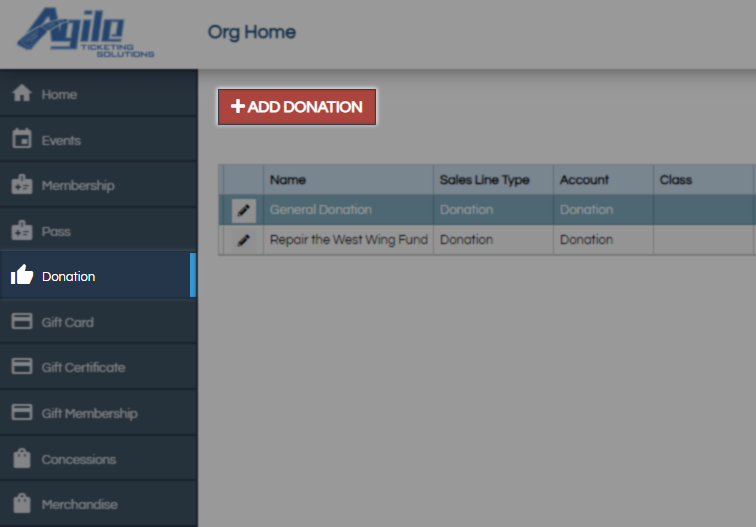
Begin by Logging In to the Web Portal and locate the Donation section on the left menu and then click Add Donation to get started.
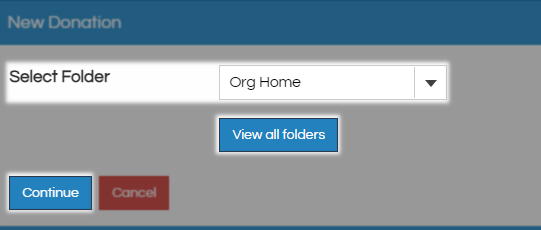
Start by picking the folder this Donation is being built in and click Continue, the View all Folders button can be used to place it in a new folder.
Name is a customer-facing field that will display online where this donation is available. Sort Name will be used online to alphabetically list this donation with any others you have in cases where display sequence is not used.
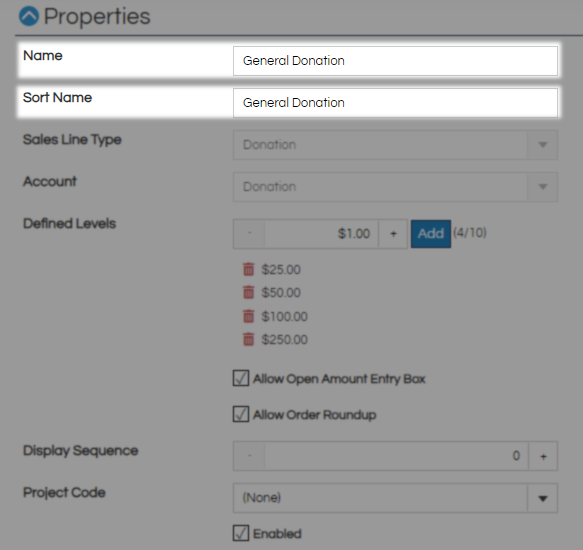
Sales Line Type is the type of item so in this case a donation. Account is where you would like money collected via this donation to be reported.
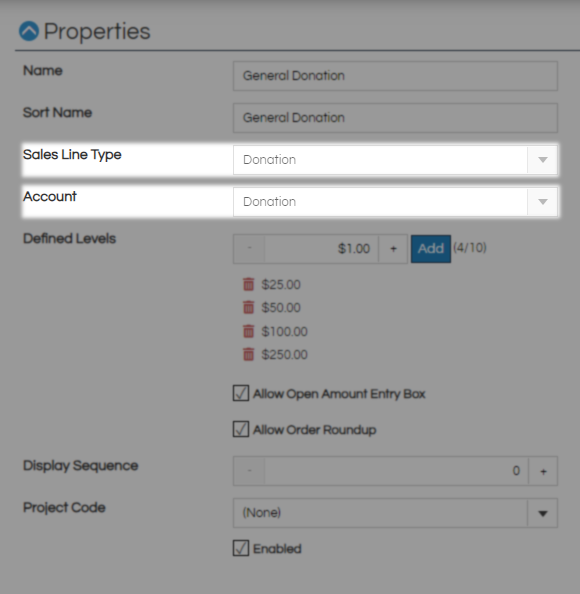
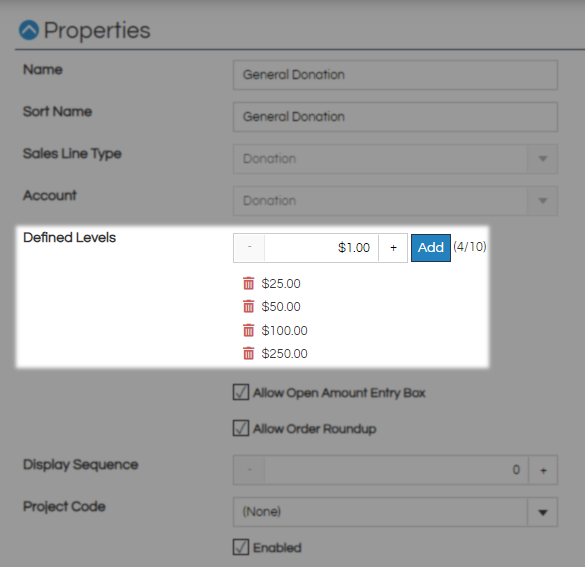
Defined Levels is where you build all of the preset options you want to present customers with. To add a value enter it into the box and click Add, repeat as needed until you have all of your options. To remove an item from this list use the red trash can icon next to it.
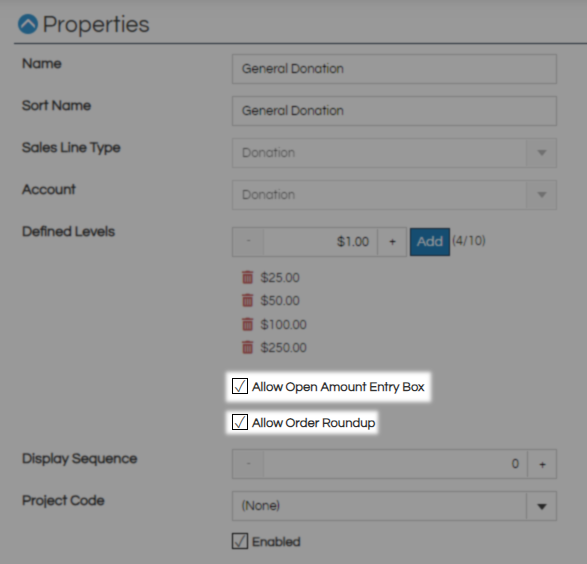
Allow Open Entry Box gives customers who want to donate the chance to donate any amount they want. Allow Order Roundup places a button on the payment screen that allows customers to round up to the nearest whole dollar value as a donation.
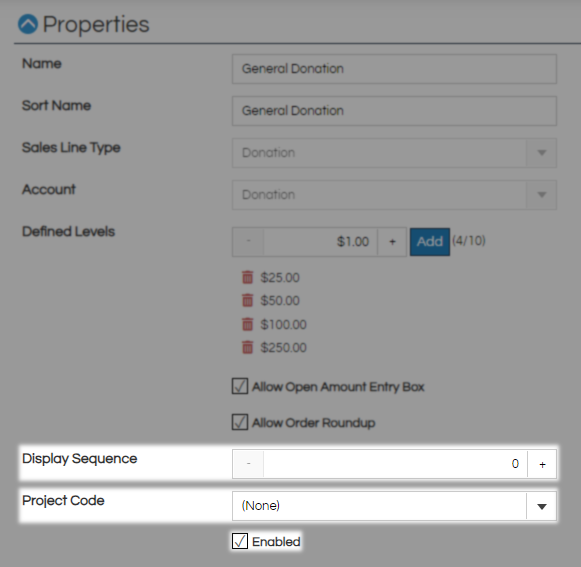
Display Sequence can be used to decide where on your list of donations this one will load. The closer to 0 the higher up the list this will load and the sort name will be used if two donations share a display sequence. Project Codes are an additional layer of reporting, if your organization uses project codes you can select that here or add more using the ellipses. Leave Enabled checked to have this donation be active for use.
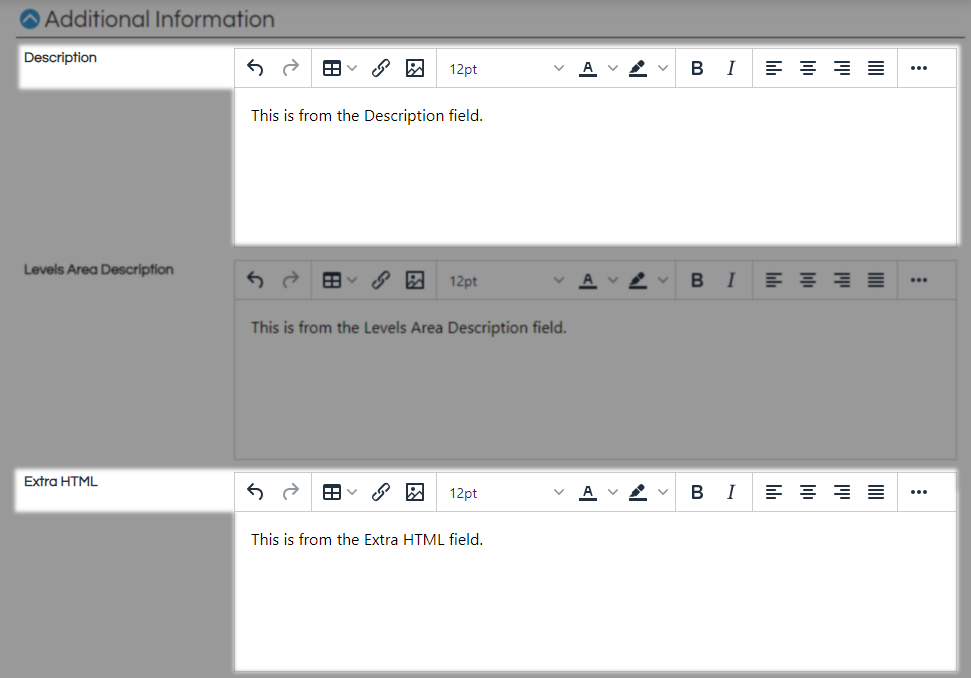
The Description and Extra HTML fields both display more information about your donation program and can be found in the examples below for the exact location. Both fields may include images, links, and HTML as desired.
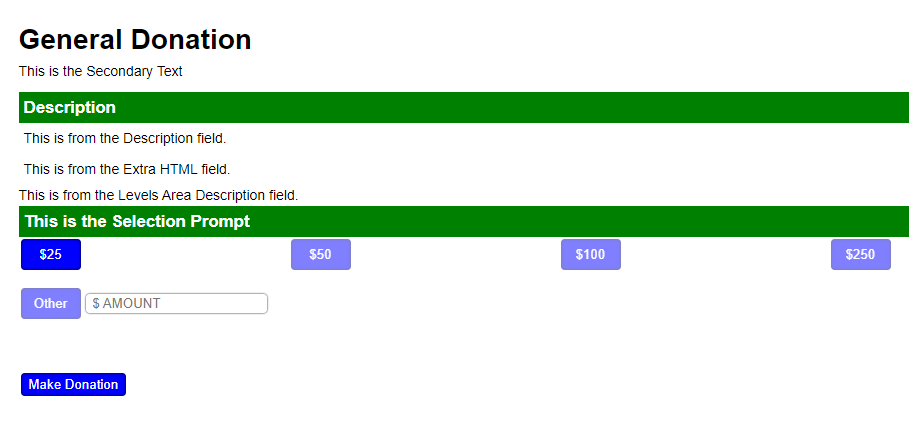
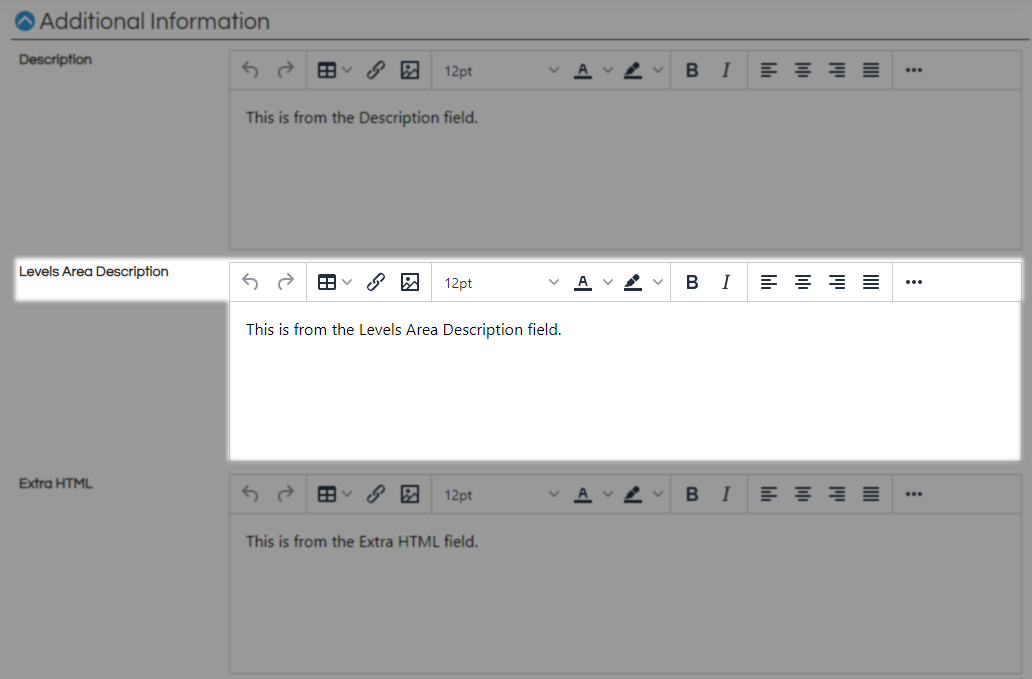
Levels Area Description allows you to present important information about the Donation Levels and can be seen in the example above.
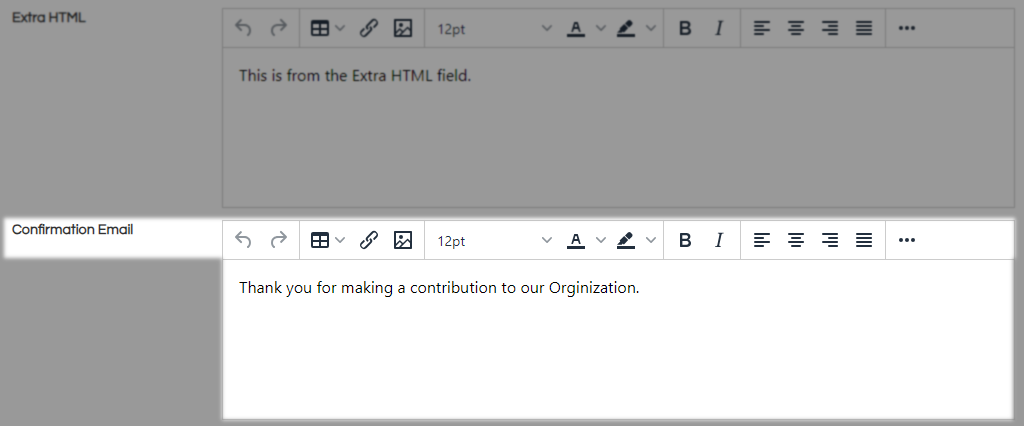
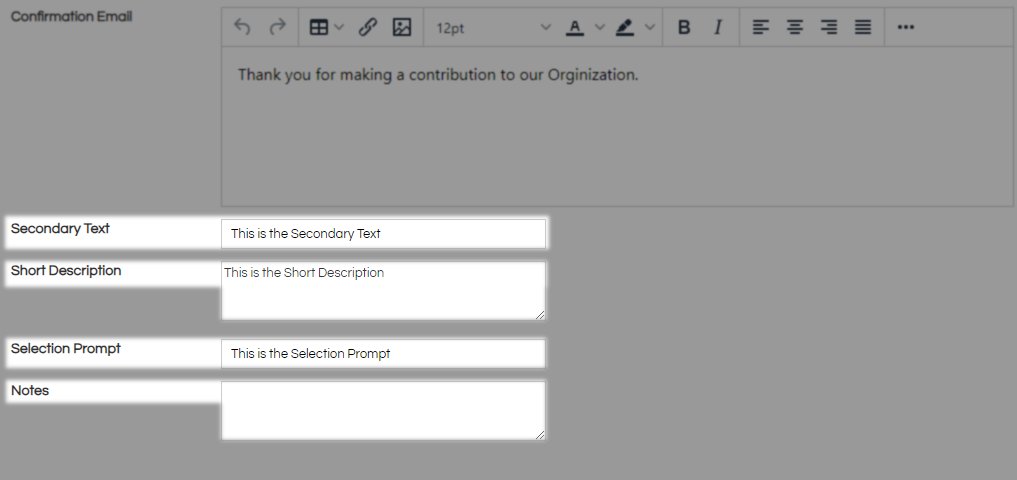
Anything placed in the Confirmation field goes out as part of the email when this item is purchased. This information will load at the very top of the email making this a great place for thanks and acknowledgments.
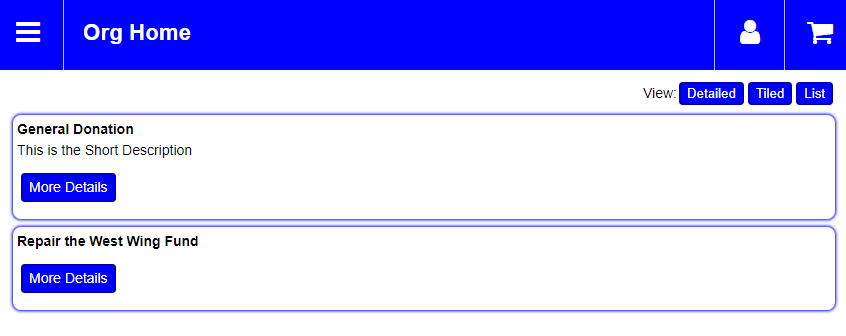
What you put in the Secondary Text area will be placed between the name of the donation and the Level Areas Description on the donation page. Some organizations put a short thank-you message here. Others choose to leave Secondary Text blank. Anything in the Short Description area will be seen under the Donation Name on a Donation List Page. The Selection Prompt area will appear above the donation levels. If you leave this area blank, it will default to displaying "Available Levels" in this area instead. Lastly, the Notes field can hold internal notes for this donation. These will only be seen by people who come here to find them.
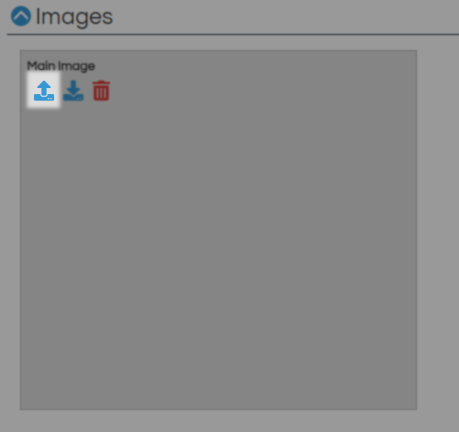
Images is where you will be able to attach promotional material that will be displayed online for this donation. Use the blue up arrow to add an image to this area.
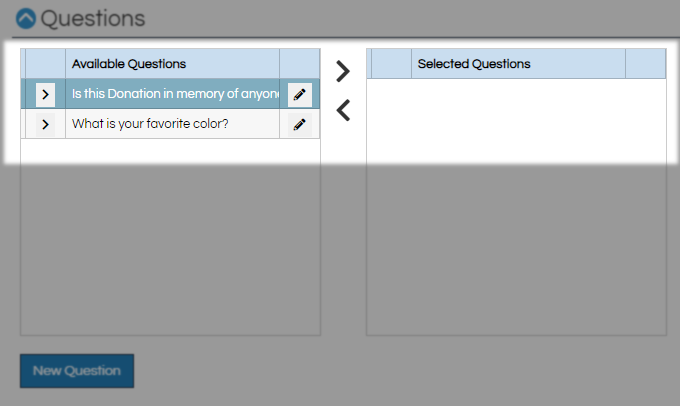
The Questions field allows you to apply any questions you have created to this donation. When you want to find out if a donation was in memory of someone this is the best way to ask.
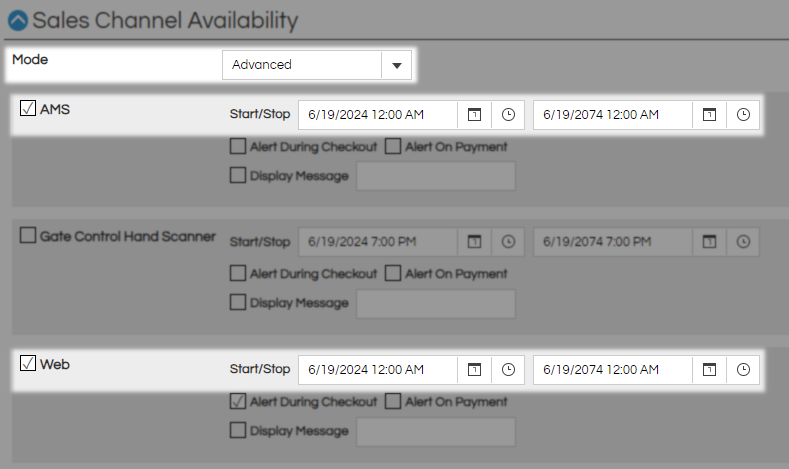
Next in the Sales Channel Availability section put a check next to each one you would like to activate. It is advised that you keep this in Advanced Mode so that you have more control over when you prompt for donations.
AMS Box Office - Donation is available in your box office.
Gate Control Hand Scanner - Donation is available to your iPhone scanning devices.
Web Online - Donation is available to your online customers.
The Start and End Date will be pushed out 50 years by default so you don't have to worry about setting it.
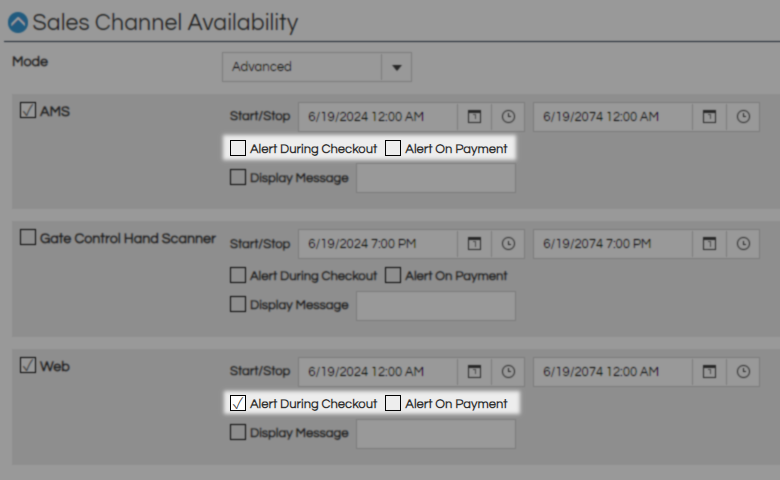
Under the Sales Channels are the Alert on Checkout and Alert on Payment check boxes that can be used with the web online sales line to prompt online customers with a donation window.
If Alert on Payment is selected, this will allow a prompt during the final payment process for Web Sales Channels only. Online, this will present as a donation slider prompt at the top of the final payment page
Accordion Title
If Alert During Checkout is selected, then the system will display a prompt for this donation program whenever a user proceeds to check out on this Sales Channel. Online, this will present the donation as a full-page advertisement in the purchase process after the "Checkout" button is clicked.


On the AMS screen, this will present the donation as a pop-up window prompt for the cashier once the "Proceed" button is selected. On the POS screen, you can use the Donation Settings menu to make the donation appear one of two ways. The first is as a pop-up as seen below.

The Second is it can be asked as an in-line question in the basket area of all transactions.
