Making changes to Tier/Inventory
How to transfer, add, or subtract inventory from an existing event, show, or template.
The Tier/Inventory of a show or event is how the system knows what quantity of tickets to sell. The instructions for this process vary from general admission to reserved seating so follow the appropriate directions for your platform of choice. At this time Reserved Seating can only be modified from the ATS App Admin side.
ATS App
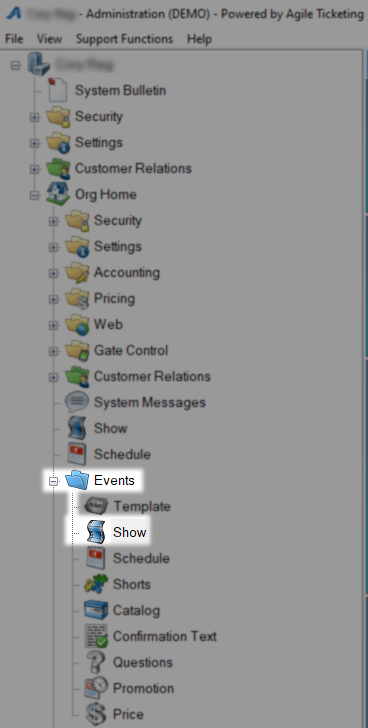
Begin by Logging In to Agile Ticketing Solutions (ATS) administration and find the Blue Folder where your Show, Event, or Template was created.
General Admission
Click on your Show/Showing or Event to unlock the Tier/Inventory area.
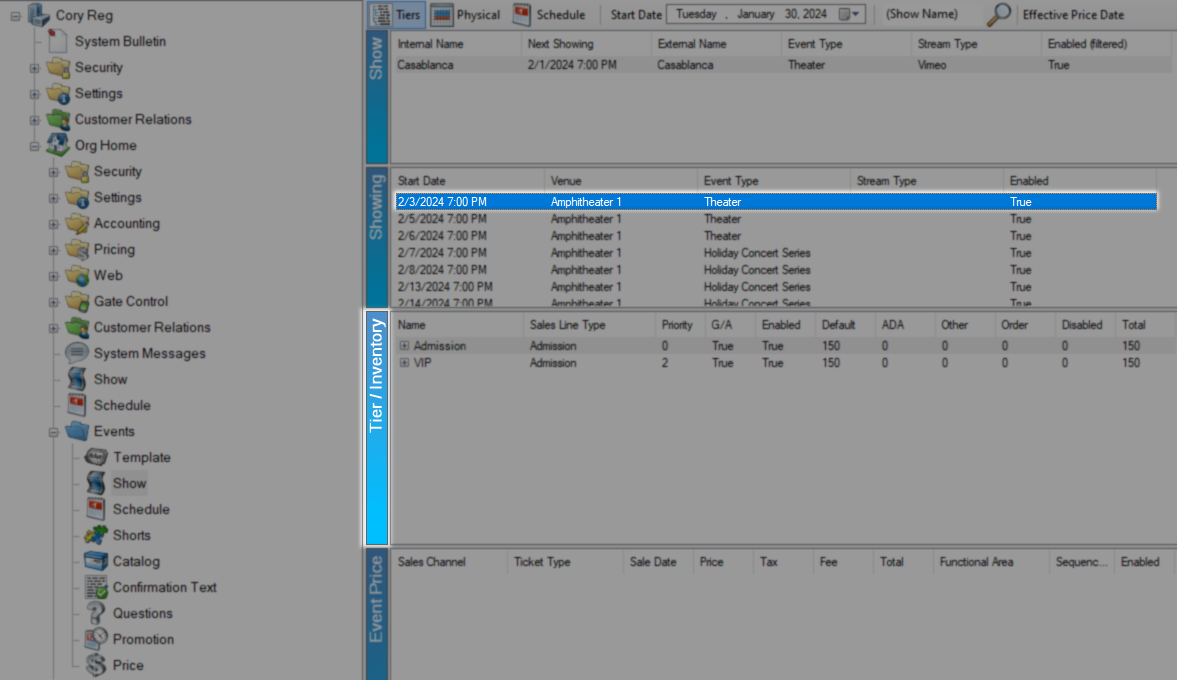
Now at the Tier/ Inventory level pick the action you are trying to perform
To add a new General Admission tier right click in the Tier/ Inventory area and select New Tier

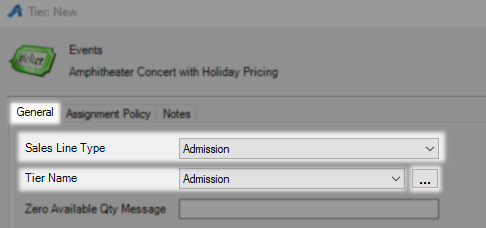
You will be started on the General tab and the first option to be addressed is Sales Line Type which defines the actual items being sold. For events and shows your default will be Admission to denote ticket sales but you can add more Sales Line Types Here if you find that you need them. Tier Name can be anything you want but must be unique for this showing or event and is customer facing so Admission is a common choice. New Tier Names can be added using the Ellipses.
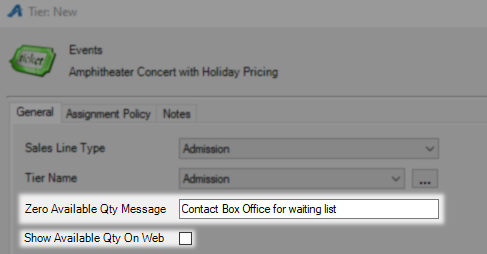
The next text field is Zero Available Qty Message and if you sell out this is the message that will be shown to customers instead of "Sold Out". Below that is the Show Available Qty On Web check box which when checked will display this shows inventory online for customers to see.
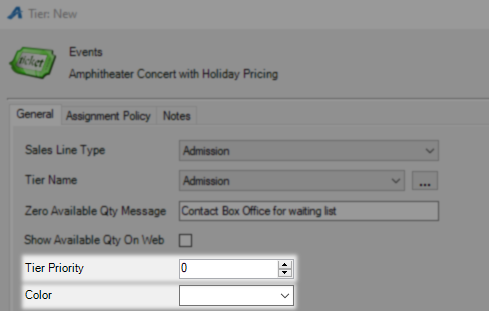
The Tier Priority determines where on a list this Tier will appear if this showing or event has multiple Tiers. A Tier Priority of 0 will have this Tier at the top of the list and the higher the number used the further down the list it will be pushed. Color is a selection that will apply to the buttons which appear on your PoS system and as a border online, if left blank the default color of your buttons will be white.
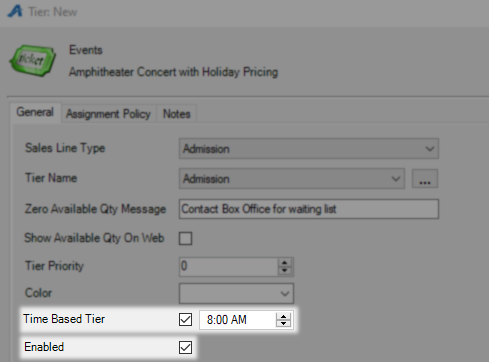
Next is Time Based Tier which is usually paired with the Event show type to create windows of entry with smaller inventory pools. This setting can be used to create tour groups of a more manageable size throughout the day. The Enabled box should be left checked or this Tier will not be available to sell.
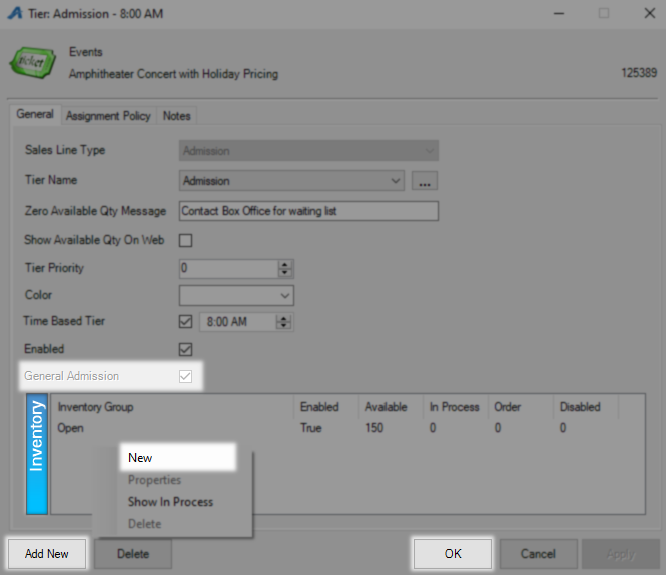
With all of that in place check the General Admission check box. If you do not check this box this Tier will only accept inventory information from a seating map and this setting can not be changed without rebuilding the Tier. The Initial Default Inventory is how much open inventory you want this Tier to start with. Click Apply to save all these changes and create your inventory pool.

General Admission will now be locked in and you can add more inventory by right clicking in the Inventory field and selecting New . Clicking Add New will start this process over again for shows with more than one Tier and OK will save all settings and close so you can begin creating prices.
To add or remove inventory from your existing tier locate it in the Tier/Inventory area then click the Plus beside the Tier name to see the list of inventory. Right click the one you want to change and choose Adjust Inventory.

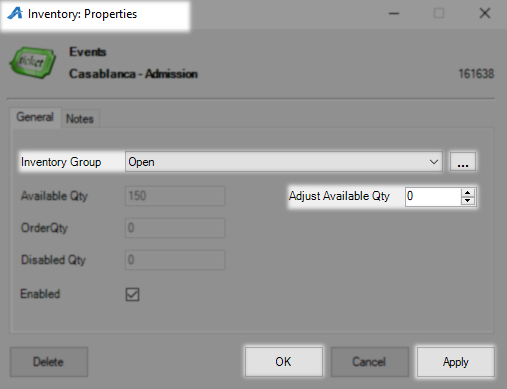
On the Inventory Properties window the inventory group you selected will be preloaded into the Inventory Group field. If this field is wrong use the drop down menu to change it or the Ellipses to add a new group. In the Adjust Available Qty field enter the amount you would like to alter this inventory by using a negative number to subtract from the current total and click apply to save that change. Continue making changes until you are done and then hit OK.
To transfer inventory from one existing tier to another locate the starting tier in the Tier/Inventory area then click the Plus beside the tier name to see the list of inventory. Right click the one you want to change and choose Adjust Inventory.

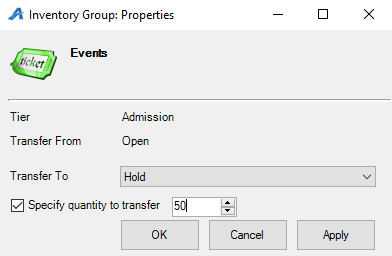
On the Inventory Group Properties window the Tier and Transfer From will be locked in based on where you launched this option, if either of these are not correct go back one screen and select the correct option. In the Transfer To field select the Inventory group you are moving this inventory to then click OK to move all inventory or check the Specify Quantity to Transfer box and enter the number of inventory to transfer.
Using the Multi Tier tool it is possible to build a tier in one place and then copy it to many others. Start by locating the tier you want to copy and right click to select Multi Tier

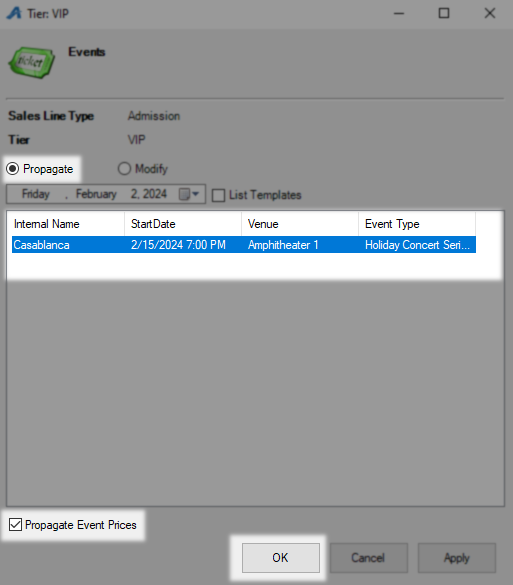
On the Tier window select the Propagate option and a list of shows this tier can be copied to will appear if any can be found. Select the show or shows on the list by holding Ctrl or Shift and clicking them. If you also want this tier to pull over any pricing make sure to check Propagate Event Prices before you hit OK.
Reserved Seating
In order to modify the inventory for a reserved seating Event , Showing, or Template you must manipulate the seating map directly and let the system take care of the change in amounts. Pick the action you are trying to perform on the list below.
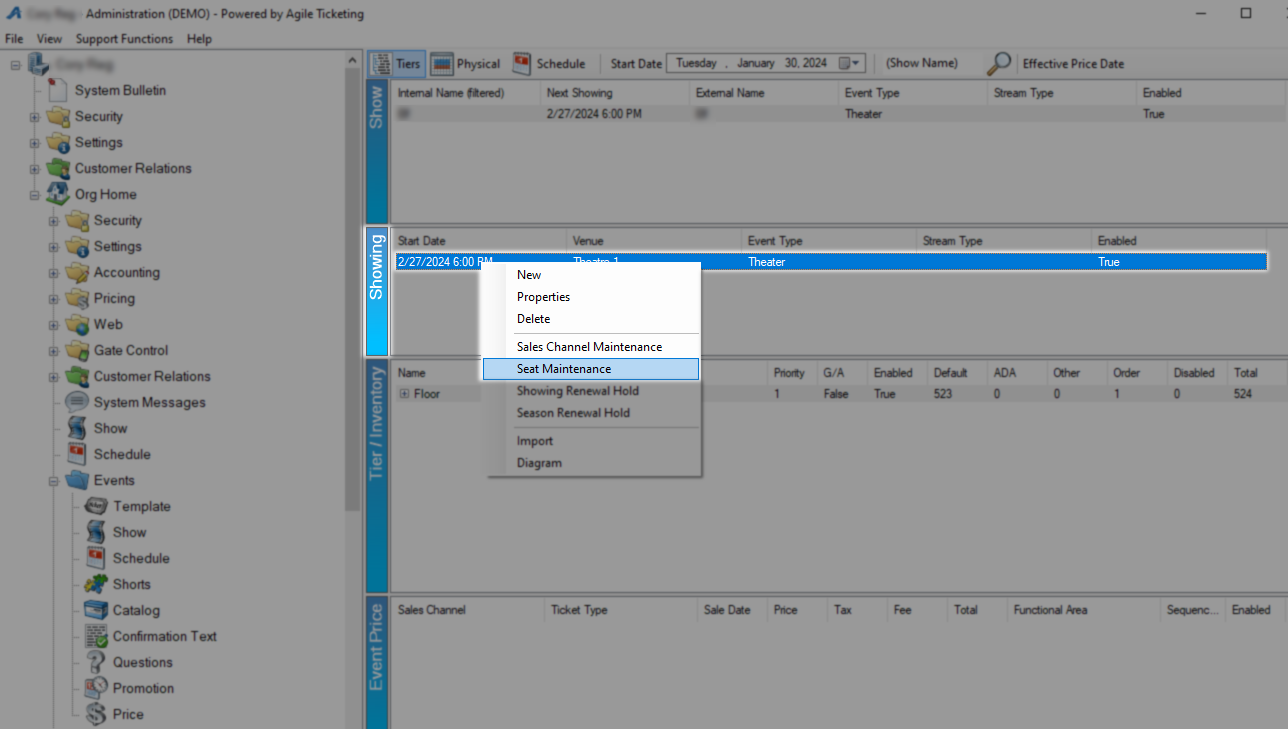
In order to change inventory levels such as removing or adding holds start at the Showing, Event, or Template level then right click and select Seat Maintenance.
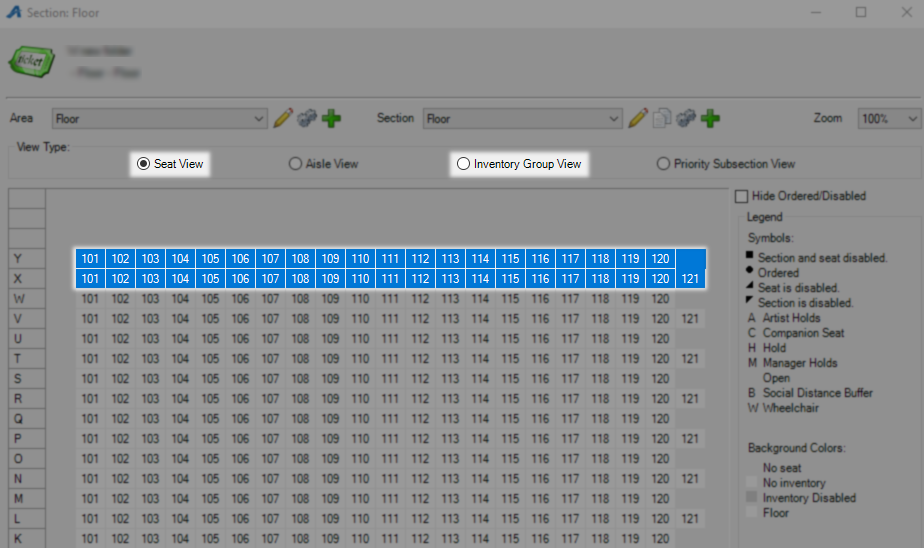
From the Seat View or Inventory View you will now have your seating map with rows and seat numbers visible. Select the seats you wish to modify by drawing a box with your mouse until they are highlighted.
To change the inventory these seats will be counted by right click your selected group and choose Set Inventory Group / Tier from the list.

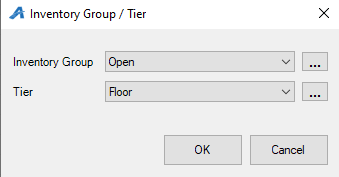
On the Inventory Group / Tier window the Inventory Group and Tier will both be set to whatever these seats are currently assigned to.
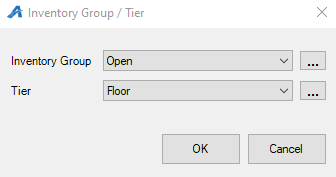
Use the drop down Menus to select the Inventory Group or Tier these seats are moving into then click OK to close this window and OK again to save your changes.
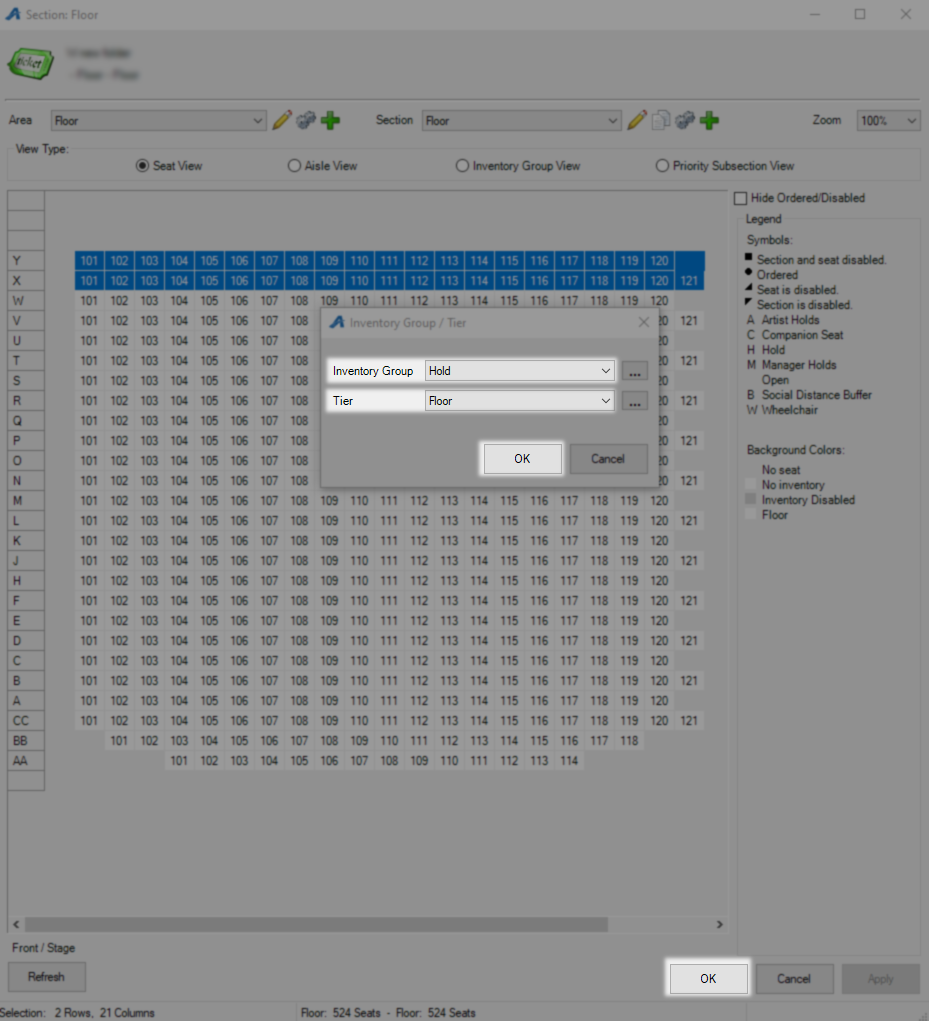
In order to add or removes seats to an existing seating map start at the Showing, Event, or Template level then right click and select Seat Maintenance.

On your seating map in Seat View first identify if you have the free space to add the seating you need, you are looking for empty space on the chart where you need the new seats to go.
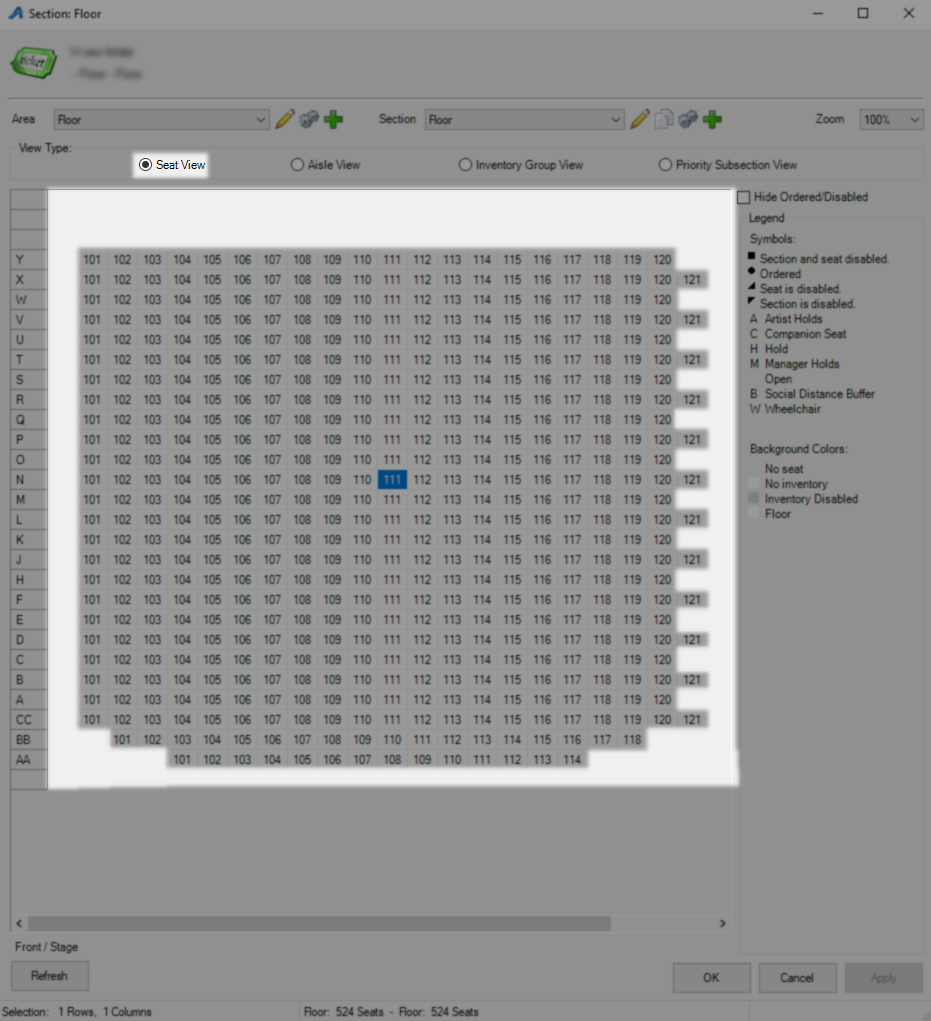
To add a new row locate an empty space in the Row Column and name that row, in the example image row Z has been added at the top of the chart.
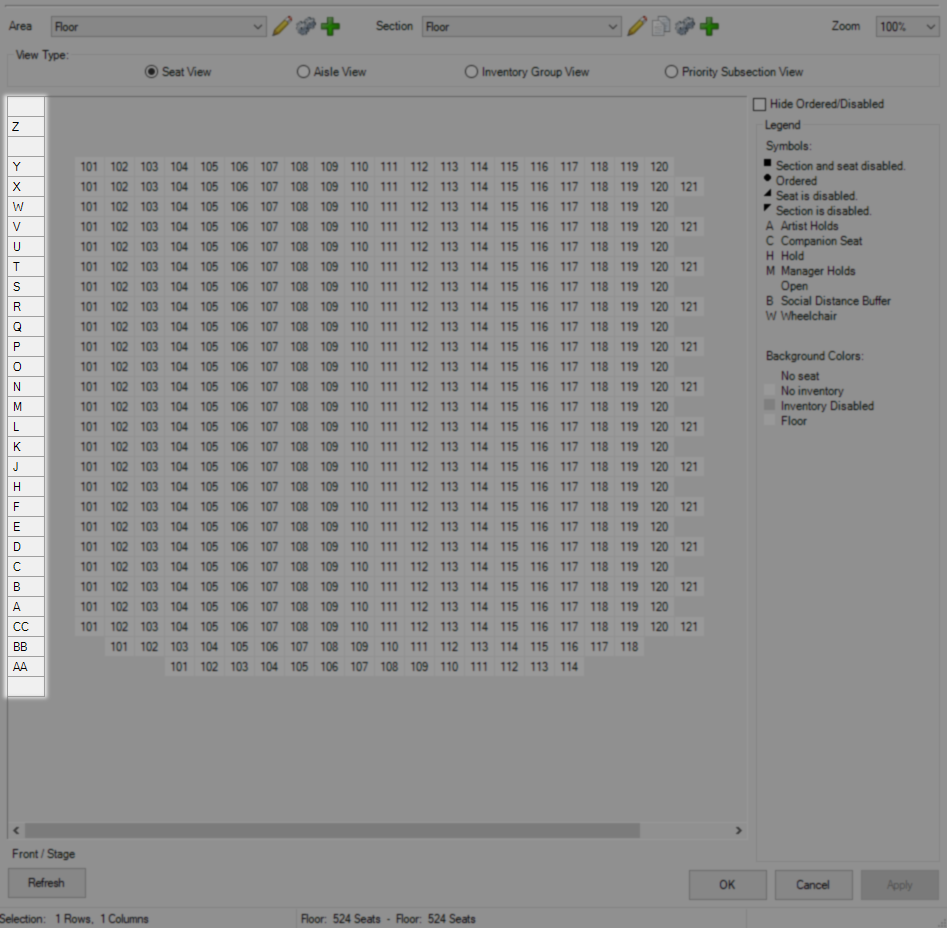
With the new row added select the number of boxes from that row you want to turn into seating by drawing a box or holding shift and clicking the first and last. Right click and select Assign Seat Numbers to begin the next step.
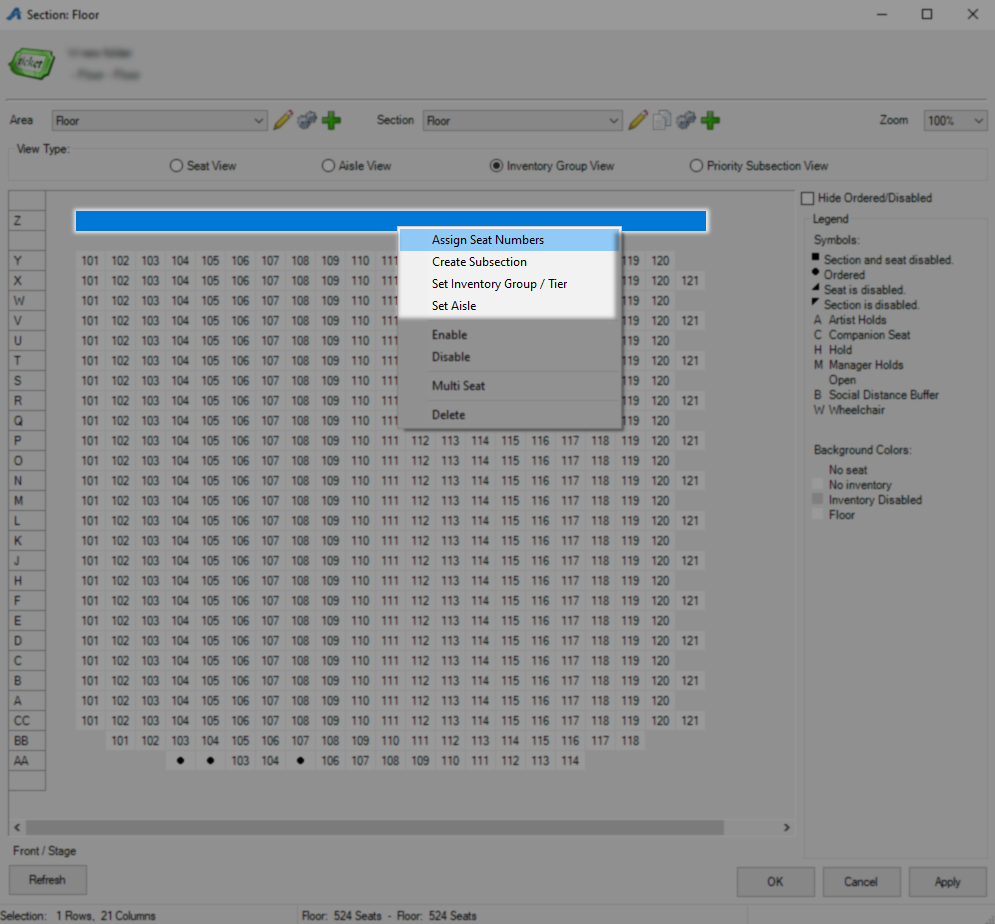
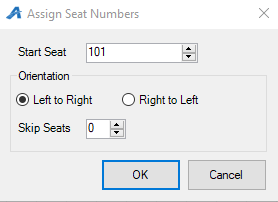
On the Assign Seat Numbers window in Start Seat put the number your seating for this row starts with. In Orientation choose if your numbers goes left to right or right to left. Skip Seats is used when your seats are even or odd and you need to skip the other, put a 1 to use every other number. Hit OK to create these seats.
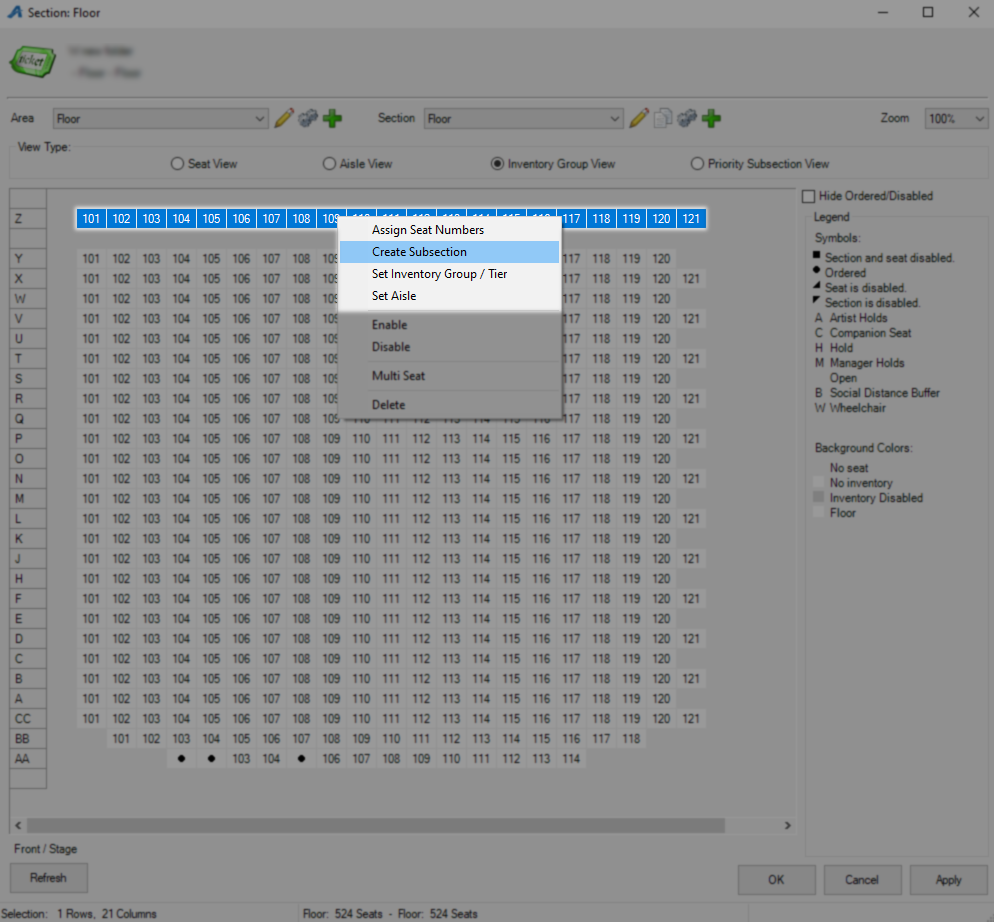
All seats must also belong to a subsection so that the system can auto assign them when needed. Select and right click the seats you just created and choose Create Subsection.
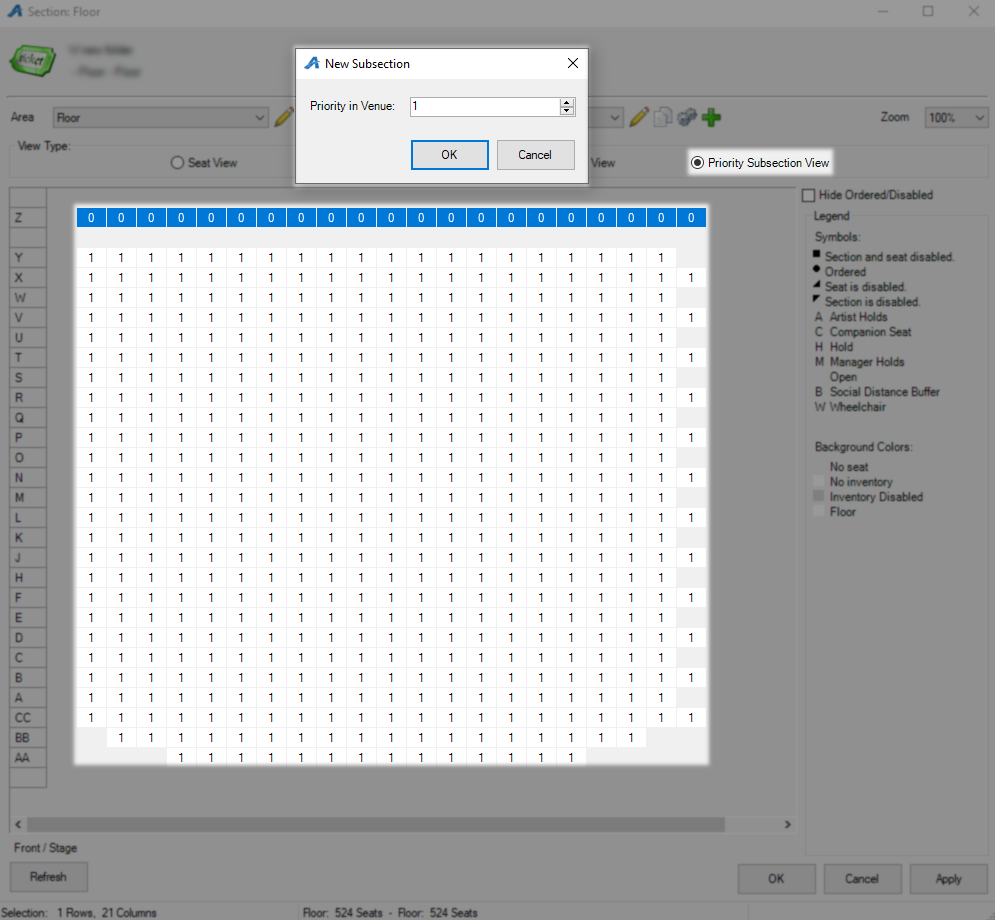
When the New Subsection window opens you will be swapped to Priority Subsection View so you can see what the rest of your venue is using and either use the same number or the next one. The system when left to assign seats will fill up lower numbered sections before moving on to higher numbered ones. Click OK to set this subsection.
Lastly make sure these seats are assigned to one of your inventory levels so the system knows where to count them. Select the new seats and right click then select Set Inventory Group / Tier.
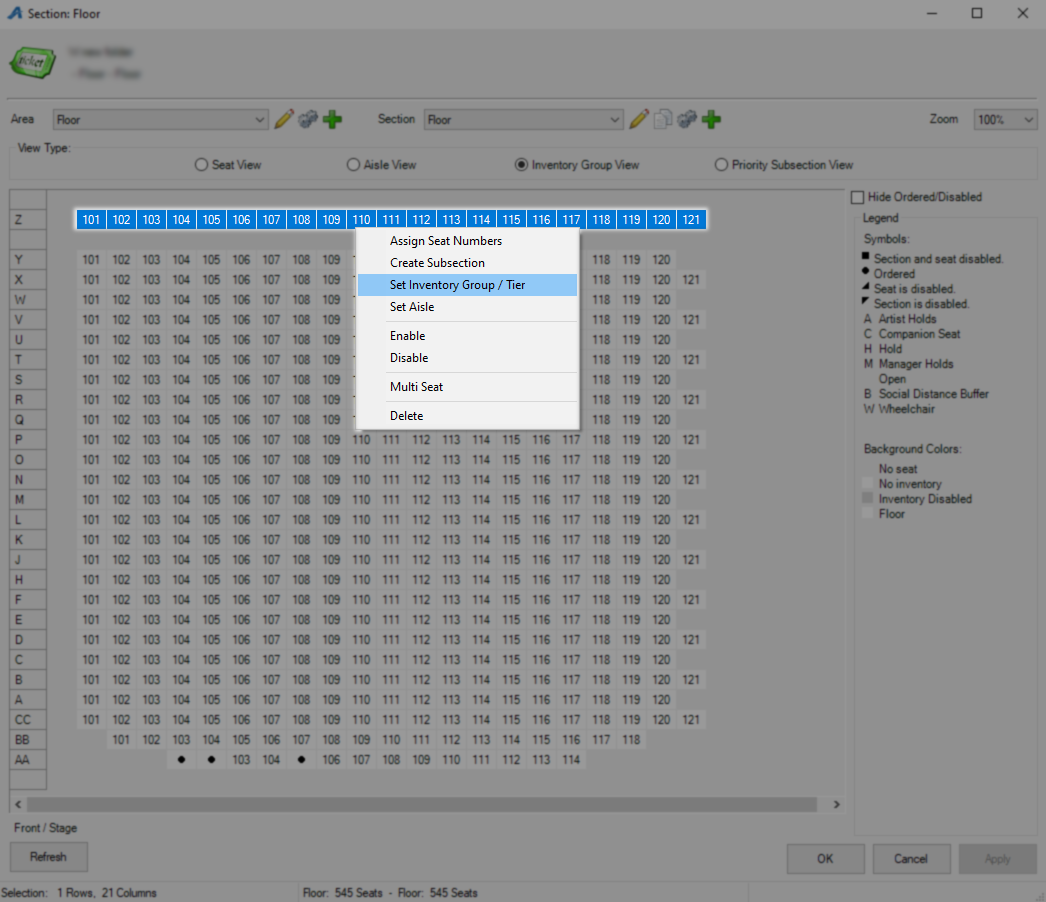
Use the drop down Menus to select the Inventory Group and Tier these seats belong in then click OK to close this window.
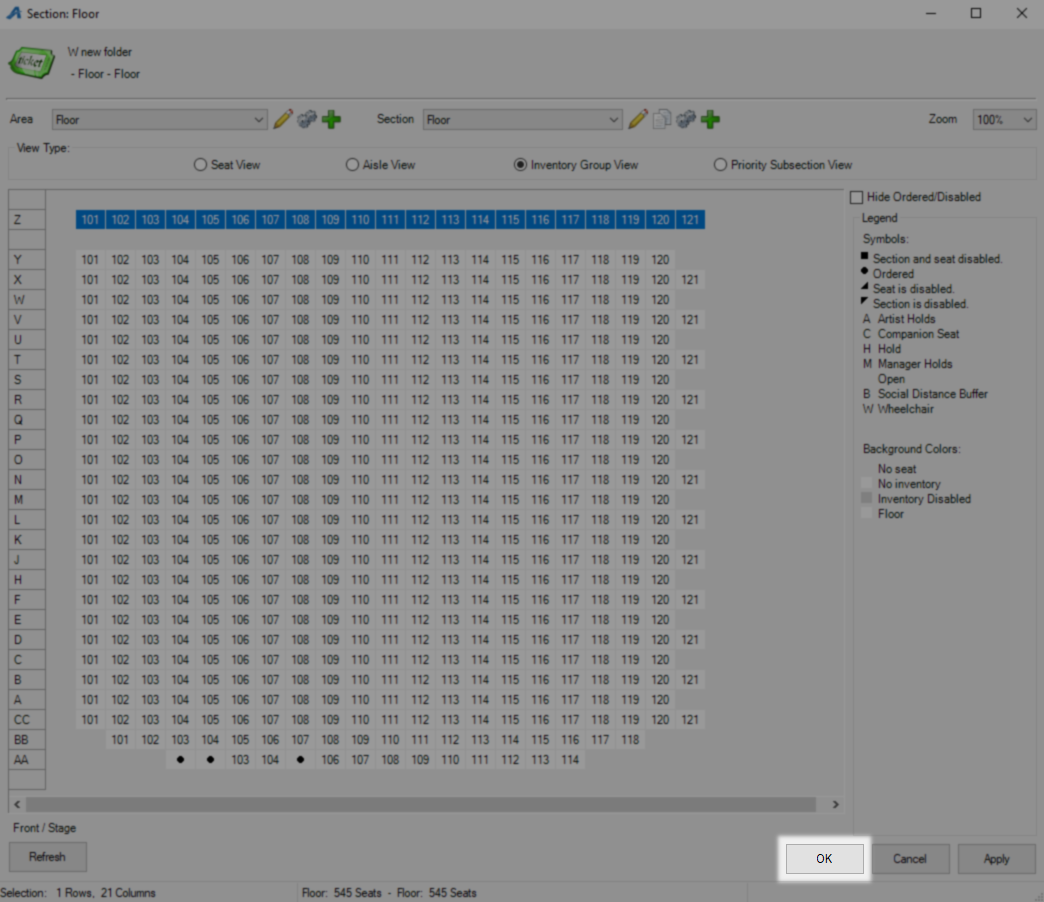
Click OK one last time to save and close the seating map then you can check your inventory where the new seats should have been added to the pool.
Web Portal
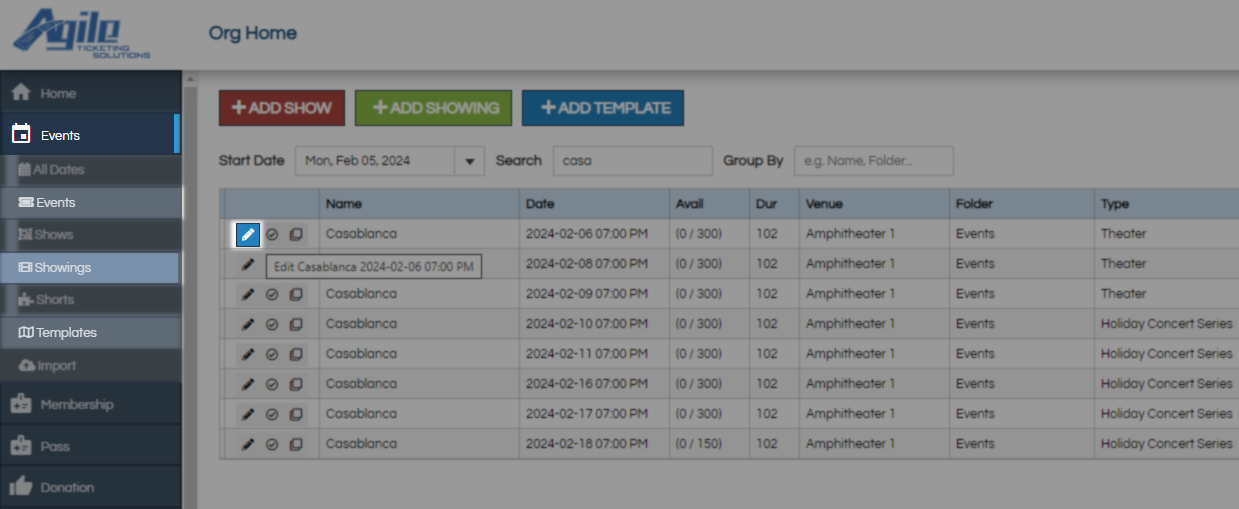
Begin by Logging In to the Web Portal and locate the Events section on the left menu which is where you will find your Shows, Events, or Templates. No matter which one you are working with you will click the edit pencil to make changes to the inventory.
General Admission
Scroll down to the Pricing and Inventory Tiers section.
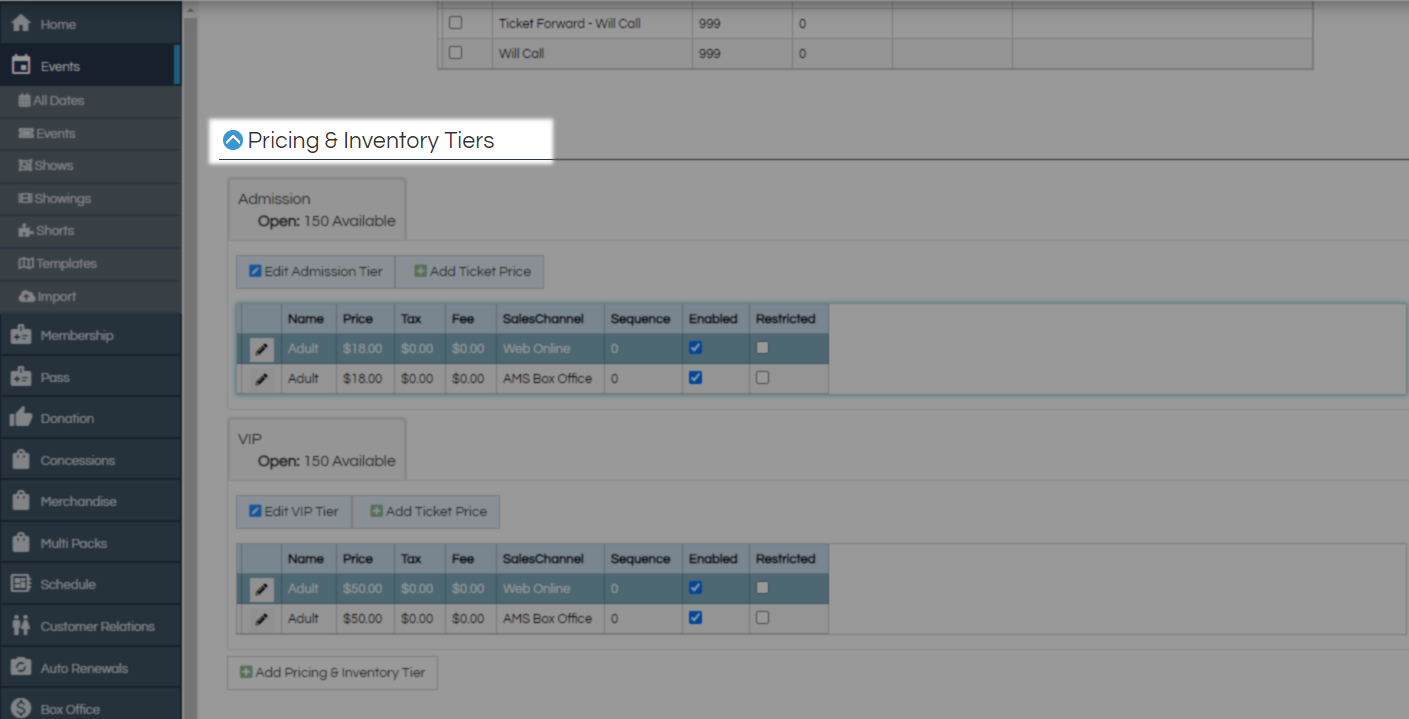
Now at the Pricing and Inventory Tier section pick the action you are trying to perform.
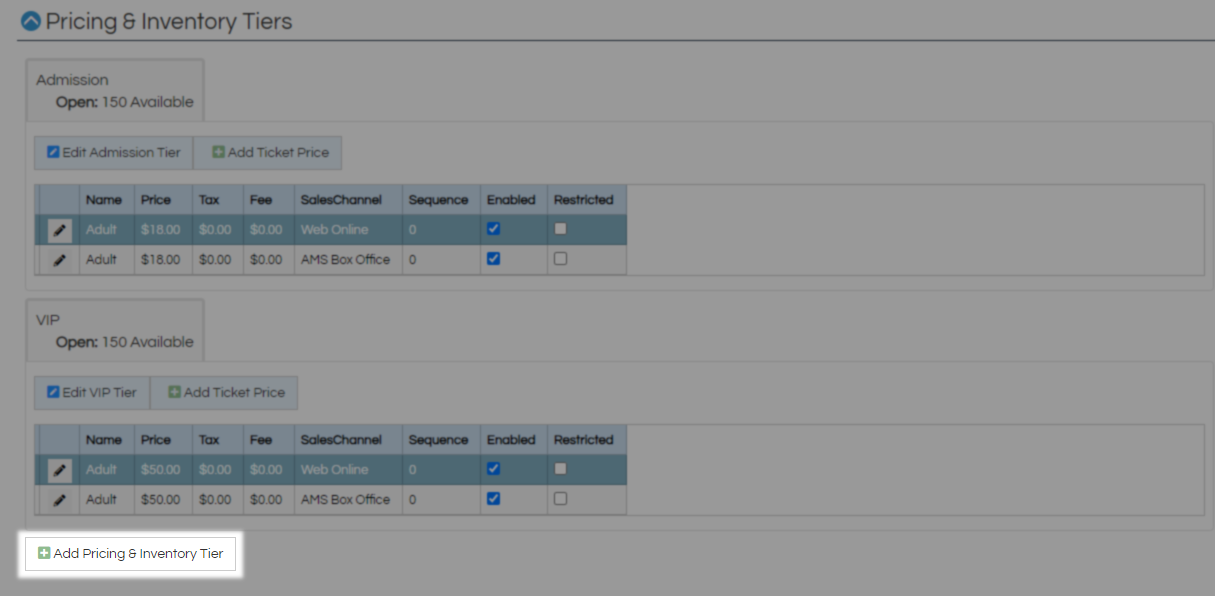
Click the Add Pricing and Inventory Tier button to add a new Tier.
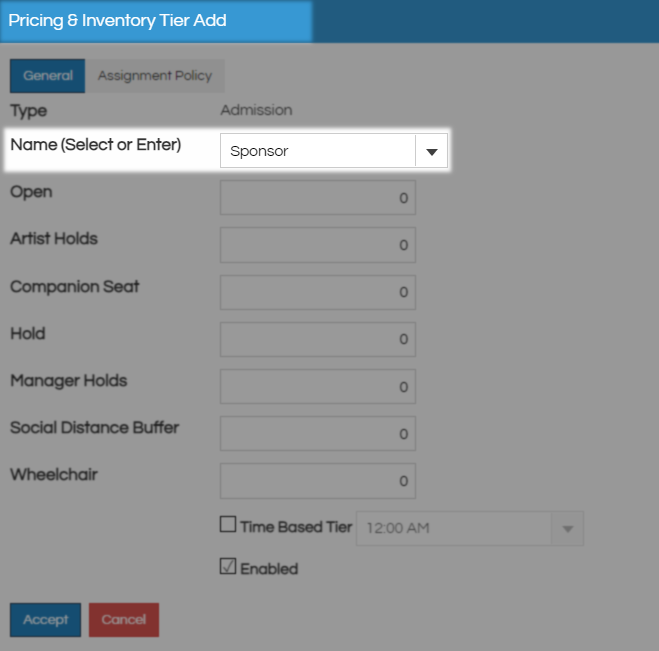
On the Pricing and Inventory Tier Add window you will have to give this Tier a name using the Name(Select or Enter) field. This is a customer facing name and you can either select a previous Tier using the drop down menu or click and type a new one directly into the field.
Below that are your various levels of inventory and you must put something in one or more of these fields. Open is the most commonly used level of inventory and is also what the system will be trying to sell from by default.
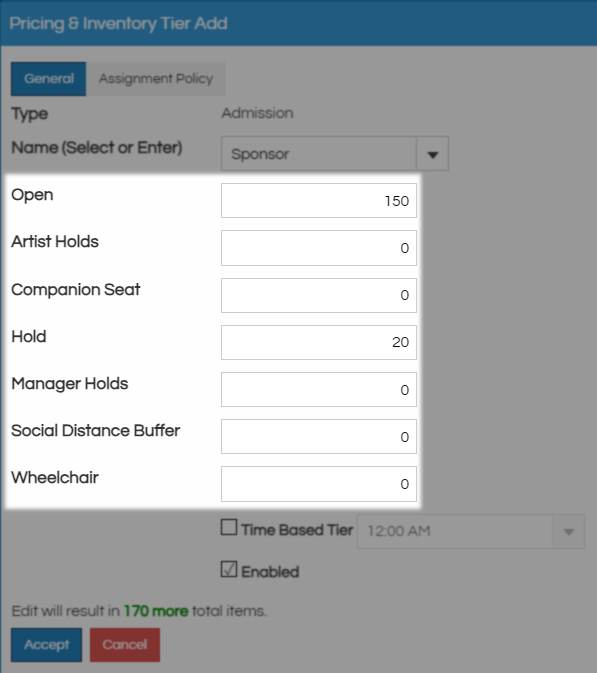
Only check Time Based Tier if this Tier will be one of many used to create windows of time with limited inventory such as for a tour. Leave Enabled checked to make this Tier available for use. Check above the Accept button to make sure you are creating the desired total number of tickets for sale and then click Accept to save this new Tier.
Under the Tier you want to modify click the Edit Tier button.

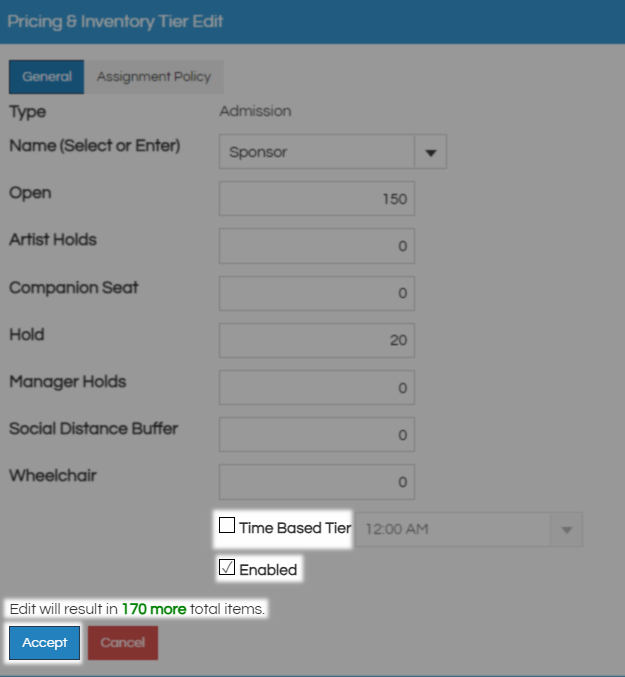
In the Inventory Fields you will see how much of each type you have currently available, modify these numbers up or down as desired and note the total change above the accept button. Click Accept to save changes and close this screen.
